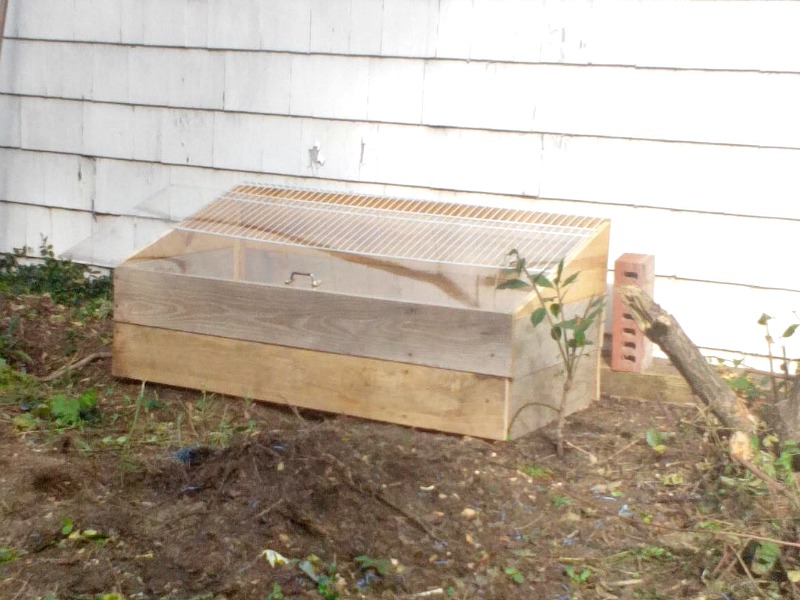
A cold frame is a bottomless box with a sky light that creates a micro-climate by trapping solar energy. If possible you will want the top to slope so you catch the slanting winter sun.
More sun will enter the higher the angle of the slope.
STEP ONE: Select location
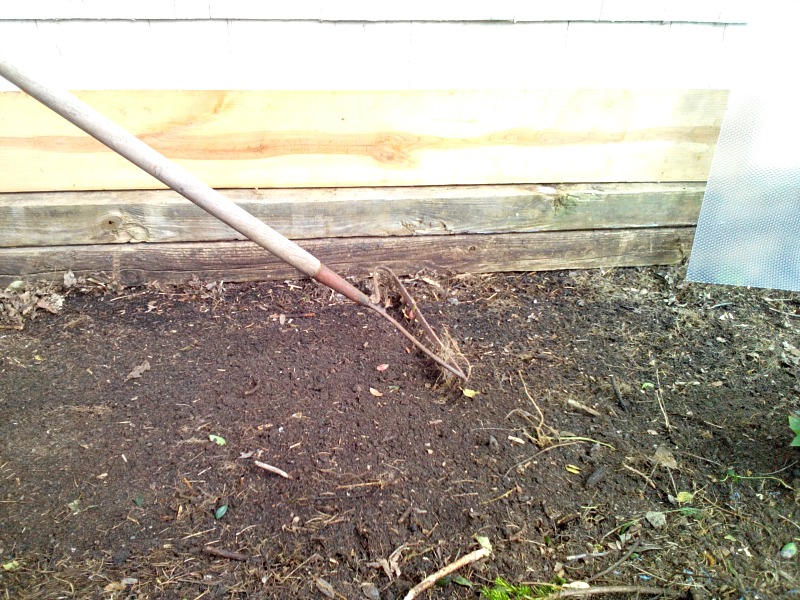 The best location should have good drainage and be facing south. Prepare the soil to a depth of 12-18 inches if you are going to plant directly into the ground. Mix in some compost or manure.
If you don’t want to plant in the ground you can add a layer of gravel for good drainage, and set your potted plants on that.
STEP TWO: DIY Cold Frame Supplies
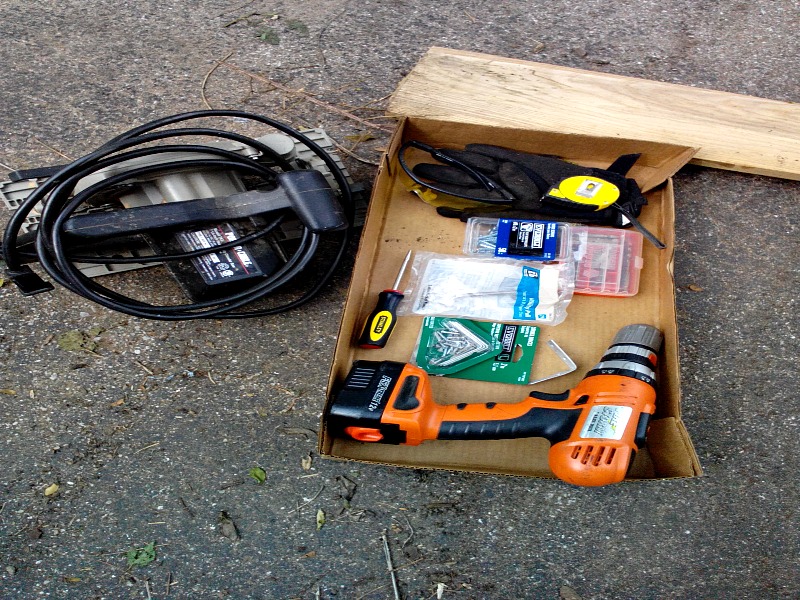 You will need a tape measure, drill, circular saw, screws or nails, a hammer, safety glasses and wood. For this project I used 1 X 6 boards, one 2×4 piece of clear plexiglass.
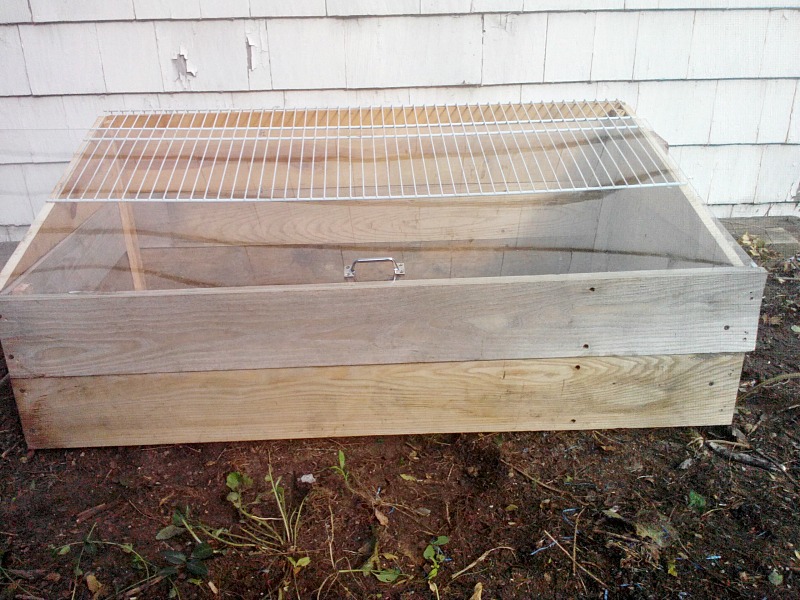
The back of the cold frame should be higher than the front if you want to create a slant. So I made the front of my frame two boards high (12”) and the back three boards high (18”).
I cut the front and back boards, five in all, to a length of four feet, same size as my plexiglass top.
I screwed the long pieces together at the inside corners using a piece of one inch wide scrap wood and two screws per board.
STEP THREE: Cut the sides
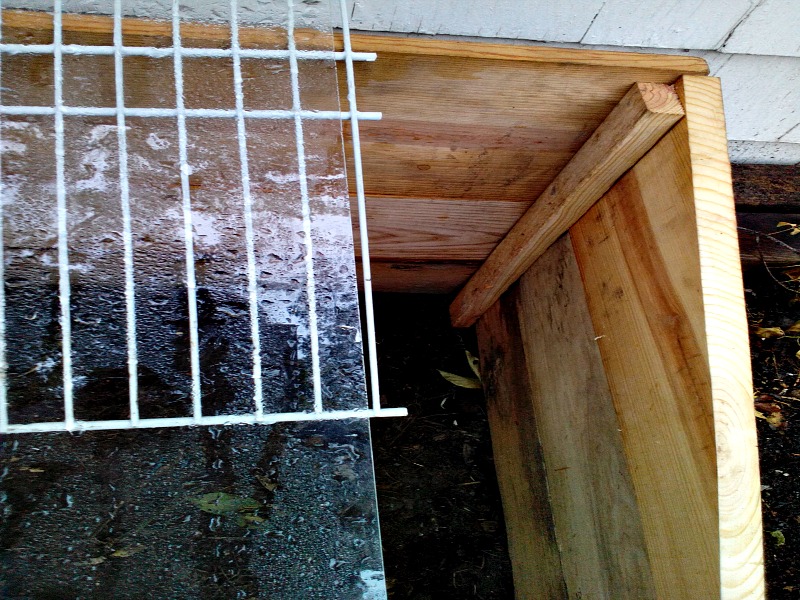
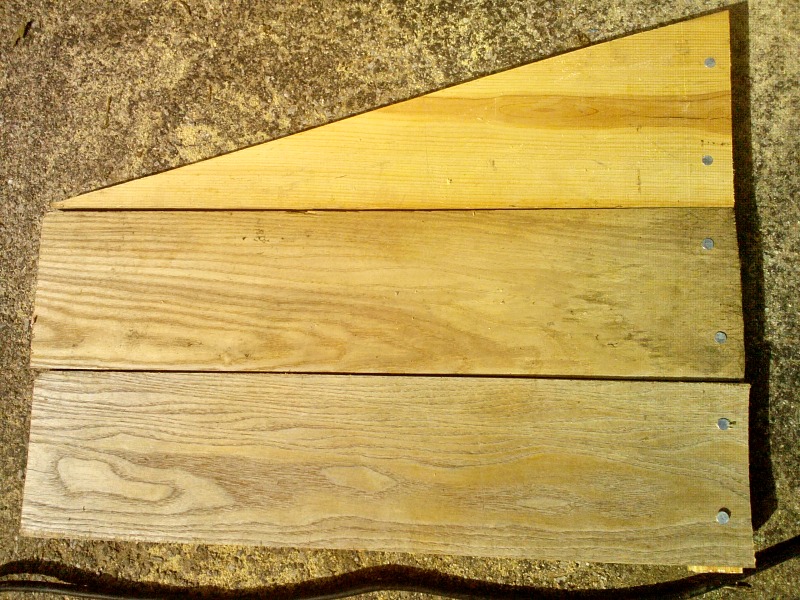 Mine are two feet long, again to match the plexiglass top. To cut the slanted top board, measure the correct length and cut that first, then lay a straight edge from the bottom corner tip (see arrow on photo) to the top corner, draw a line and cut. You will have two identical pieces, one for each side. Nail or screw these together using corner blocks like you did the other sides.
This photo shows the corner blocks I used to hold all the side pieces together. I pre-drilled all the holes to prevent the wood from splitting, a good idea whether you use nails or screws.
The straighter your cuts the tighter and warmer your box will be, very important here in Michigan.
STEP FOUR: Insulation
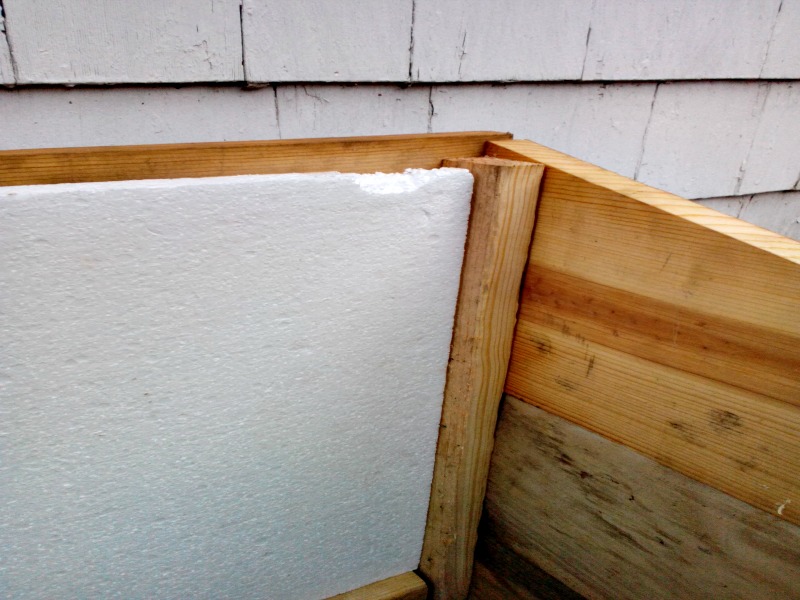
I lined the inside of my box with foam board insulation. I also plan to add a hay bale to each side of the box for added warmth and to help block cold winter winds.
STEP FIVE
 Because my piece of plexiglass was so flimsy, I used an old wire shelf I had laying around to give it support. I drilled holes in the plexiglass and zip tied it to the wire shelf.
Then using construction adhesive, I glued the rest of the plexiglass edge to the same 1 x 1 board I used for the corner blocks. That allowed me to add a handle, which is optional.
STEP SIX: Add plants.
Remember to remove snow from your box with a broom so you don’t break the glass or plexiglass.
On really cold nights you can toss an old quilt over your cold frame, but remember to remove it in the morning.
When the temperatures are above 45 degrees you should vent your cold frame, either by propping open the lid a few inches or opening it all the way.
Don’t forget to water your plants as needed.
If you have no building skills or tools, you could make a fast cold frame with an old storm window laid across the top of straw bales arranged in a square.
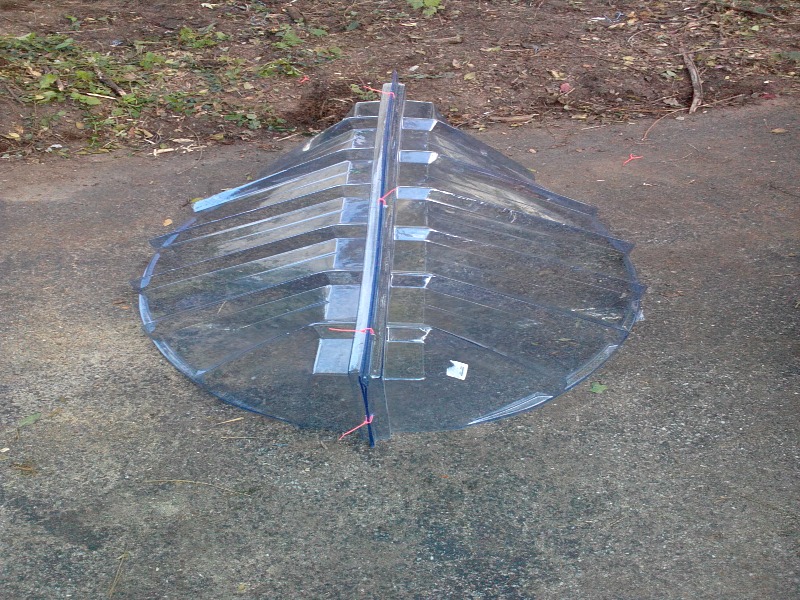
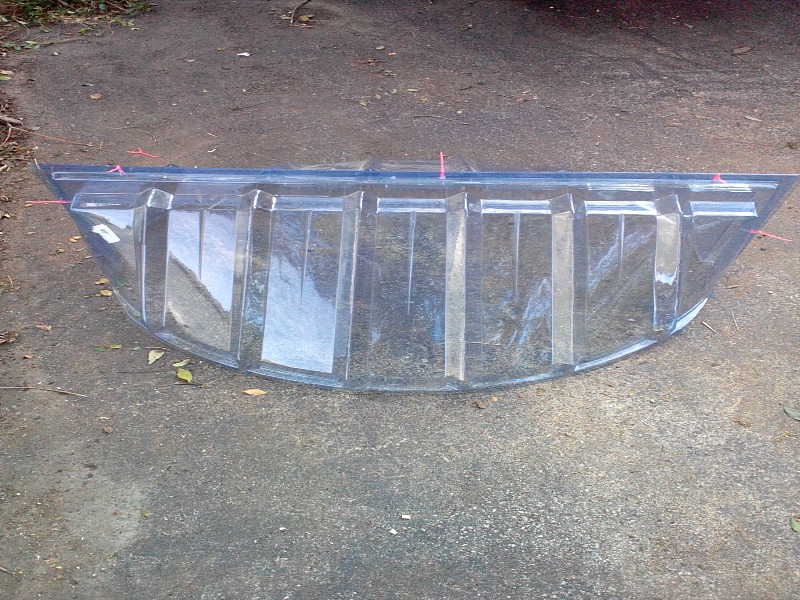 While rummaging around in the garage looking for scrap lumber, I found these two window well covers, and a light bulb went off in my head! I placed the covers back to back and drilled five holes, three across the top and one on each side and then zip-tied them together. This has got to be the quickest and lightest cold frame I’ve ever made.
ABOUT THE AUTHOR: Karyn Flynn is a life long gardener, mother of two & grandmother of three.
Mike, will you do a thing on how to make labels for our plants that we have started root and at potting up for sale??? thank you sooo very much. i’ve learned lots from you and your books and these sites. thank you sooo very much for helping us all out like you do.
Clifton,
The properly labeling of your plants is important, but even more than that is starting out on the right foot and making sure that you truly know what variety of plants you are propagating. This is so, so important if you want to sell them to another grower, a landscaper and it’s the law. I constantly preach this to our members because nobody in the members area, http://backyardgrowers.com/join, wants to buy improperly labeled plants. I rant about this, here’s my rant; http://freeplants.com/rant.htm
Most important thing about labeling. Permanent markers are not permanent. They can and do fade. Believe it or not a #2 pencil works better, or better yet, an indelible pencil. I also use a lot of aluminum tags in my propagation area. http://mikesbackyardnursery.com/2012/06/aluminun-plant-tags-that-dont-fade/ Some people cut up mini blinds, most buy plastic strip tags. I’m sure you can find them on amazon or ebay.
But I do need to do a post about this, thanks for reminding me.
I have also been thinking about doing this, but I’ve been too busy to get it done. Just got my 5 gallon bucket sunk in the ground for HWC storage. Where do you get plexiglass and isn’t that too cold? I guess I don’t get the idea of a coldframe. Is it a mini greenhouse since mostly it’s made with a window which absorbs sun? do you start plants there, or seeds? isn’t it too cold at night to do that?
Cathy,
All of your questions are valid. In my experience most cold frames are used at the end of winter to start plants early and protect them from frost, but not from freezing. There’s a big difference between a frost and a hard freeze. You’re right, a hard freeze will penetrate a cold frame and kill tender plants inside. I don’t use cold frames. I want my plants to stay dormant as long as possible in the spring, that keeps them from being vulnerable.
What would the difference be in rooting cuttings in an unheated garage that receives plenty light through the windows, and using a cold frame outdoors ?
Rhonda,
You can root cuttings in a garage but you lose the benefit of ground heat, the garage is much colder, especially the floor. And the garage will either be too dry or too wet. Neither one are good.
You can also start seeds in one if you don’t have a place to do it indoors.
Why stop watering after a hard freeze? We live here in central California, where it stopped raining, for the most part, a year ago. Will grass survive this winter without watering?
What would cause me to want to build one of these? I live in Richmond, VA, zone 7a. Aren’t the plants I cut, stuck, rooted and potted capable of making it through the winter?
A cold frame is, essentially, a mini-greenhouse. By growing plants in a cold frame, you can harvest cold-tolerant vegetables year-round, even if you live in zone 5 where winter temperatures can dip as low as –20 degrees F. Cold frames are also great for hardening off seedlings, growing cold-tolerant flowering annuals like pansies, and rooting cuttings from your garden.
You are correct it was short! Karyn
If your plexiglass is 2ft wide and you cut sides of wood 2ft long it will be too short as the slanted side is longer.
Asquared + Bsquared = Csquared
Damon, I wanted to use a window but didn’t have one and nobody on Craigslist was giving one away so used what I had.
Ruthann, you probably won’t need to water unless we have a very dry fall, it rains here a couple of days every week, so the plants are fine. Leaves are great, that’s what I used last year.
Mary Ellen, you can put any plants in you want, I put in all my smallest plants but I have left the top open as the weather here is still pretty mild and the plants would cook, also they need the rain until we have a hard freeze. Probably will not close it unless the we have a really heavy snow
How to protect dwarf trees from the northern side of the property?
Dear Mike,
I had some potted plants that didn’t get put in. I put them on the north side, where there is less thaw, freeze, thaw. The snow piles there and takes longer to melt in spring. I covered the pots very high with leaves, and patted the leaves down.
No space for a cold frame. Do you think this will be a good “blanket” for them. Perennials;
large variety of Burning Bush – not the dwarf. Leaves are off.
We have turned off our watering system. Would they need water if the leaves are off?
Thanks! LOVE your channel and next year we are air propagating some trees with your pods.
I am in the process of moving from Florida to northwest Ohio. So I don’t feel too bad (or stupid) asking this question. Which plants from one’s yard or garden does one put in this box? And when do you put those plants there? Thanks !
great coldframes. I used 2nd hand sliding shower doors from habitate for humanity surplus stores.
They run about $5.00 each.