How to Clean, Maintain, and Store Your Garden Tools
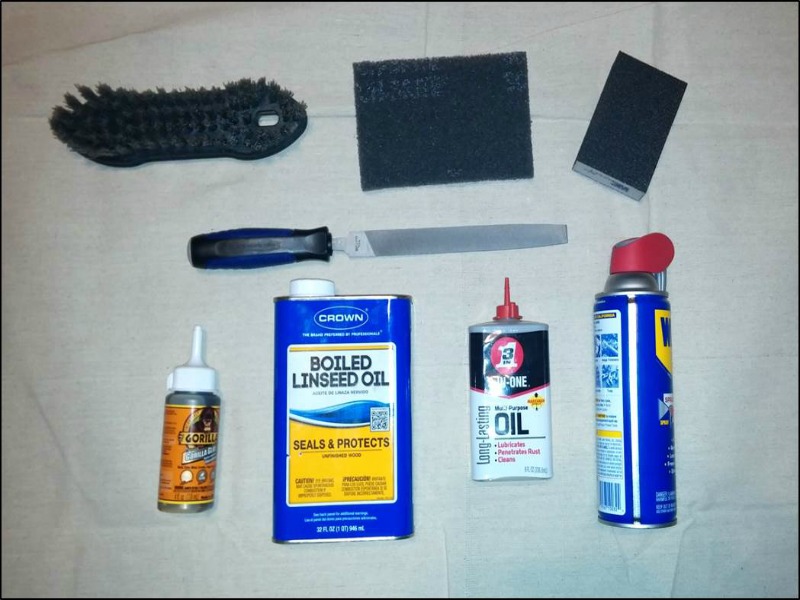 Gather the required materials and tools.
Materials:
– Boiled linseed oil
– Spray lubricant
– Multi-purpose tool oil
– Abrasive pad or steel wool
– Sanding block or sand paper
– Waterproof glue
– Dish soap (not pictured)
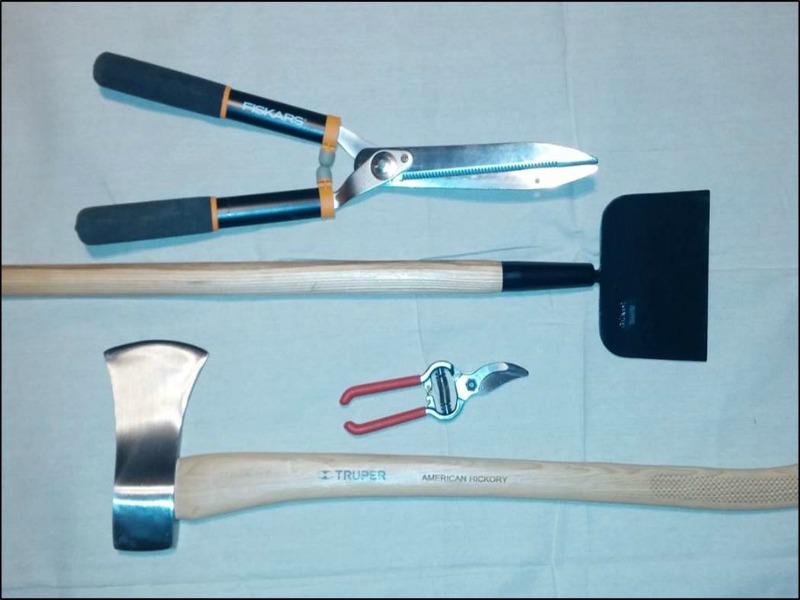 Tools:
– File
– Bucket (not pictured)
– Scrub brush or wire brush
– Cleaning rags (not pictured)
– Rubber gloves (not pictured)
– Shovel, spade, axe, pruning shears, or whatever garden tools you have
First, gather your garden tools together. You will probably find that it’s easier to take care of several tools at one time.
 Next, take an honest look at your garden tools to determine their condition. If you use your tools often, it’s likely that you don’t pay too much attention to little problems with your tools.
For example, if you dig a lot of holes, you probably tend to focus more on the size, shape, and depth of the holes instead of on any rust spots on your shovel.
Look for dull blades, surface rust, moving parts that don’t move smoothly, cracks or splinters in wooden handles, etc.
Inspect your garden tools for anything that might be bent, broken, loose, etc. Fix any problems you can. Good quality water proof glue can often help to secure a loose rake head, handle grip, or similar problems.
Keep in mind that if a garden tool is badly damaged or worn, it may be time to replace it.
The most important part of this process is to thoroughly clean your garden tools.
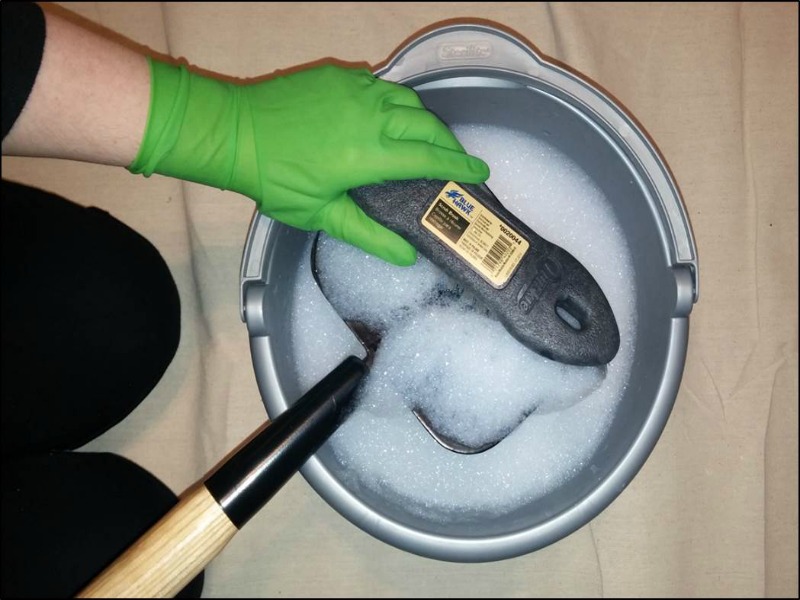 This can usually be done with a bucket of warm soapy water and a scrub brush or rag. (If your tools are really dirty, you may need to spray them down with your garden hose first.) With a scrub brush or wire brush, remove any visible dirt or grime.
Your tools should be visibly clean and feel clean to the touch. Use a clean, dry rag to dry your tools after cleaning them.
Using an abrasive pad or steel wool, lightly scrub away any surface rust on the metal parts of your tools. Minor surface rust is usually fairly easy to remove. With a clean, dry rag, wipe off any rust flakes or metal shavings. Keep in mind that you may need to replace any badly rusted or seriously corroded tools.
Take care of your wooden handles.
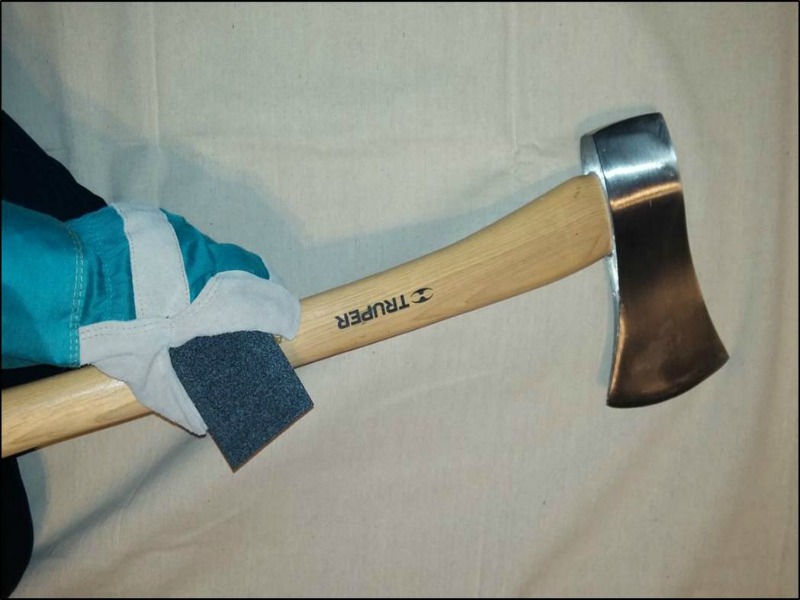 With sand paper or a sanding block, lightly sand the wooden handles on your tools. Remove any splinters and sand down any rough spots on the wood. With a slightly damp cloth, wipe away any small wood bits or sawdust.
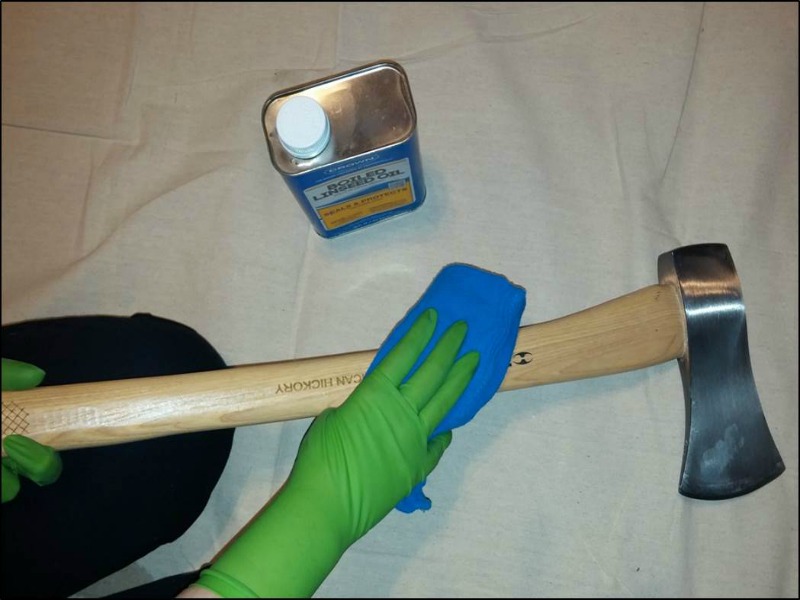 Boiled linseed oil is used to treat and prolong the life of wood. While wearing rubber gloves, use a clean, dry rag to apply a small amount of linseed oil to the wood.
Thoroughly coat the wood and slowly rub the linseed oil into the handle. Allow the linseed oil to soak in for approximately 10-15 minutes. Using a clean, dry rag, wipe off any excess linseed oil from the wood. Avoid allowing excess linseed oil to dry on the surface of the wood as it can become gummy. If your wooden handles are particularly dry, you may want to wait about an hour and repeat the above, applying another coat of linseed oil to the handles.
Two important safety notes about linseed oil:
#1: Wear rubber gloves when using linseed oil and use it outside or in an area with good ventilation. Always read and follow the safety instructions on the can.
#2: Be careful when disposing of rags covered with linseed oil. As with most wood finishing oils, linseed oil does not dry by evaporation but by oxidation (a process that produces heat).
A pile of carelessly discarded linseed oil soaked rags can potentially burst into flame and cause a garage or house fire. Again, always read and follow the safety precautions on the can.
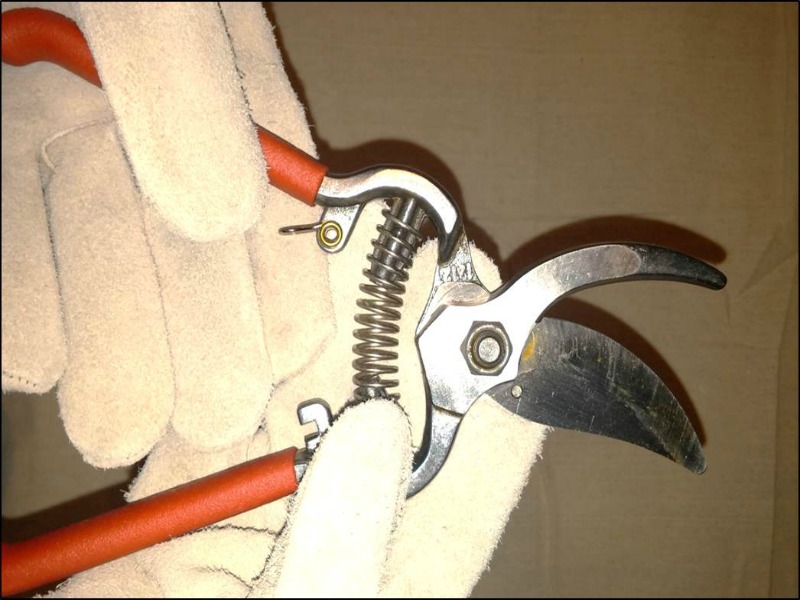
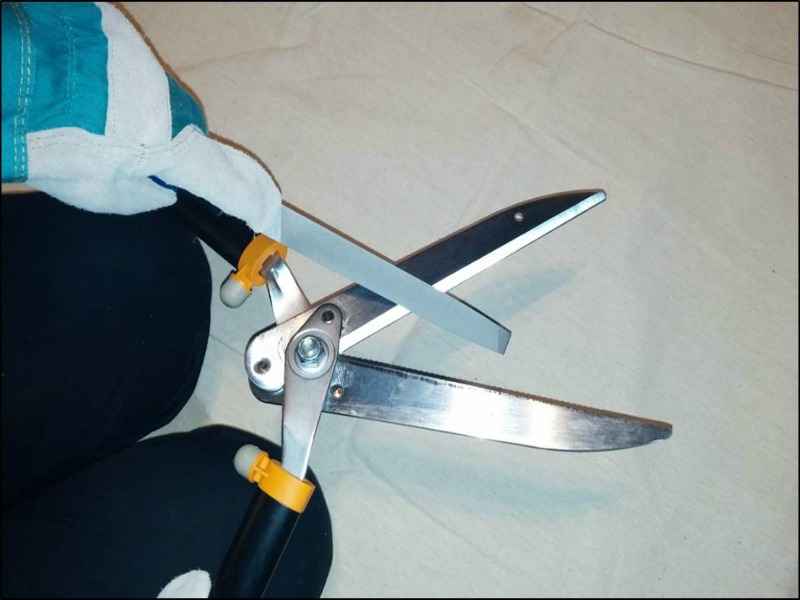
Sharpen the cutting edges.
Sharpening your garden tools is an important step as sharp tools work better and require less effort than dull tools. However, many people try to skip this step as they are not comfortable with sharpening their tools.
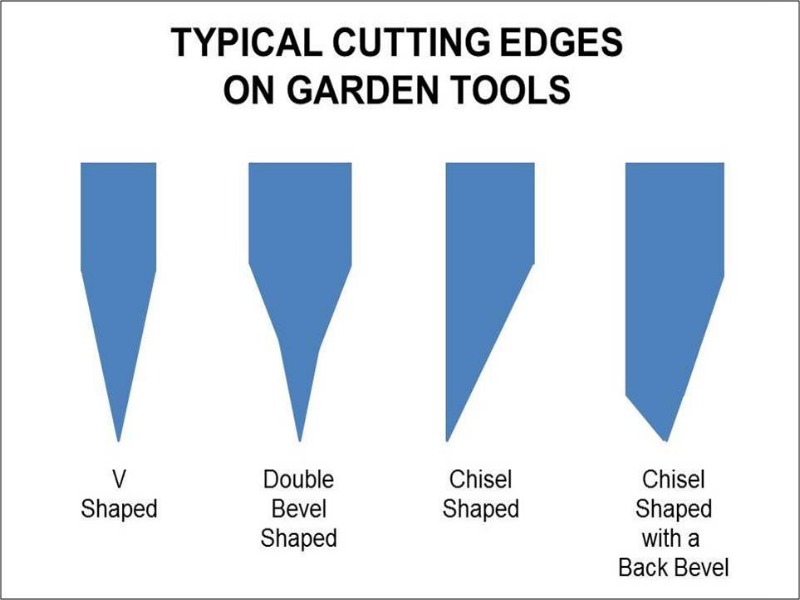 Sharpening most garden tools is fairly easy. First, look at the edge of the tool to determine the type of cutting edge it has.
Some of the more common types of cutting edges are the V-shaped edge (similar to many axe heads), a double bevel shaped edge (similar to many kitchen knives), a chisel shaped edge (found on many shovels and edging tools), and a chisel shaped edge with a back bevel (found on many wood chisels).
Most of your garden tools will probably have a chisel shaped edge. Most pruning shears are somewhat similar to scissors. They will normally have either two moving chisel shaped blades that cross against each other in order to make a clean cut, or they might have one chisel shaped blade that crosses against a flat edged blade to make a cut.
Once you know the shape of the cutting edge involved, then you can efficiently sharpen it.
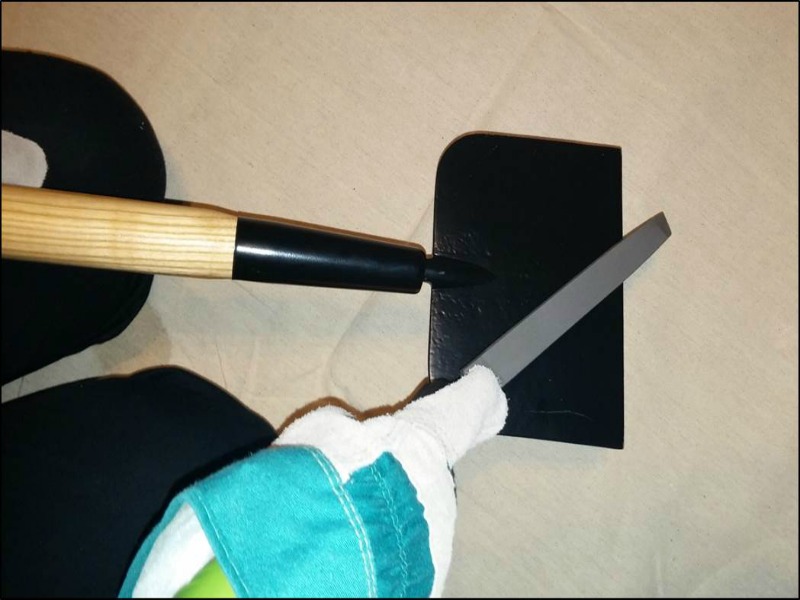 With a hand file or similar tool, carefully sharpen the cutting edges of your garden tools by pushing the file away from you and in the direction of the cutting edge of the tool. For example, when sharpening a shovel blade, you will push the file in steady strokes moving away from the handle and toward the cutting edge or point of the shovel.
 Move the file across the metal in smooth, light strokes. You should only remove a small amount of metal with each pass of the file. Your goal is to produce a smooth, clean cutting edge
Lubricate any moving parts.
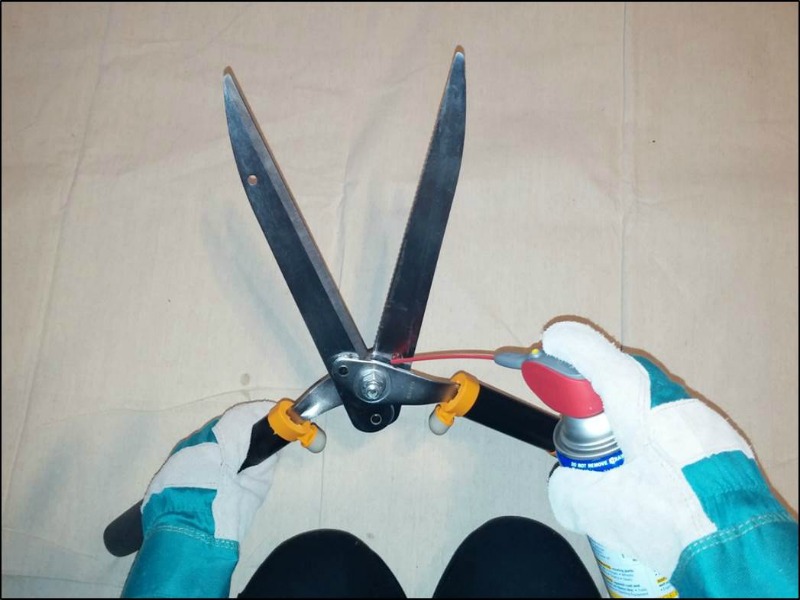 Apply a small amount of the spray lubricant to each of the moving parts on your tools. Move the parts several times to allow the lubricant to work its way into the mechanism. With a clean, dry rag, wipe away any excess lubricant.
Oil the metal parts to prevent future rust.
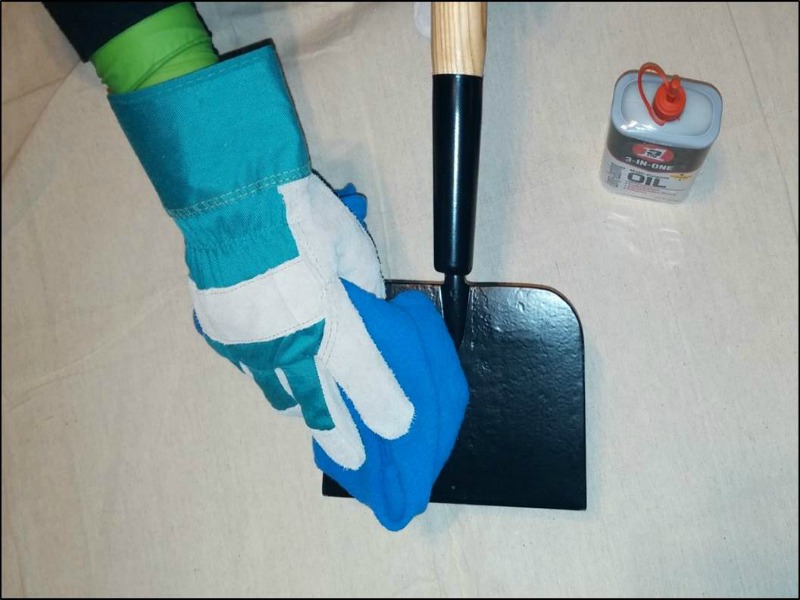 With a clean, dry rag, apply a small amount of multi-purpose tool oil and rub down the metal parts of the tools. Coat the metal parts with a thin coat of oil in order to protect the surfaces and prevent rusting. The protective coat of oil should be very thin.
There should not be enough oil on the tools for them to look oily or for the oil to drip off the tools.
Note: Some people prefer to use vegetable oil or a similar non-petroleum based product to oil the metal parts of their garden tools. This is usually done to prevent possibly introducing any petroleum products to the soil. This is a personal preference and up to each user. I always try to wipe off any surface oil from my tools before using them anyway and only use an oil coating on the metal surfaces when storing tools.
Properly store your garden tools until needed again.
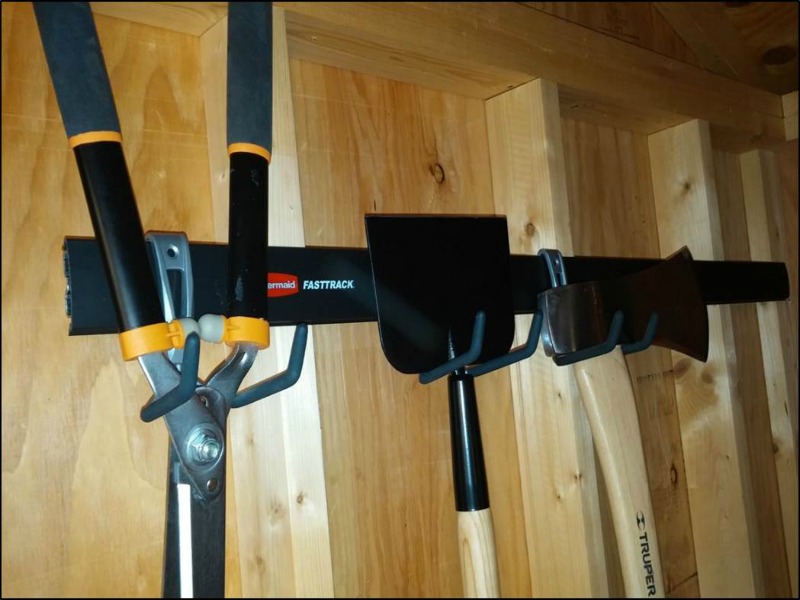 Your garden tools will last longer and serve you better if you store them properly. Keep the tools out of the weather in a shed, garage, or similar place. Don’t leave tools out and exposed to rain or snow.
If possible, hang your tools on a wall from tool hooks or from carefully placed long screws or nails. If you leave tools such as shovels and rakes leaning against a wall or propped in a corner, it is more likely that the tool handles will warp or bend over time. The specific hanging hardware isn’t particularly important as long as it can keep the tools neatly stored.
If you buy good quality garden tools and take the time to properly maintain them, they should last for many years. Taking care of your tools will take time and effort. However, you will probably find that it will be time well spent.
About the author:
James Hammond is a disabled veteran and has done landscaping and home renovation projects for over 25 years.
Great tool maintaining tips. thank you! Merry Christmas
YES!! They all work! . Hmmm…I like that post 🙂