DIY Self-Watering Planters
There are probably about as many different shapes, sizes, and variations of self-watering planters as there are plants to put in those planters. Most have some form of a water reservoir, fill pipe, and overflow tube or hole.
I chose to use 5 gallon buckets because they are easy to find and are a good size for many plants. You may wish to vary the design and materials to suit your own personal needs. Materials for the self-watering planter shown here cost about $30.
Step 1: Gather the required materials and tools.
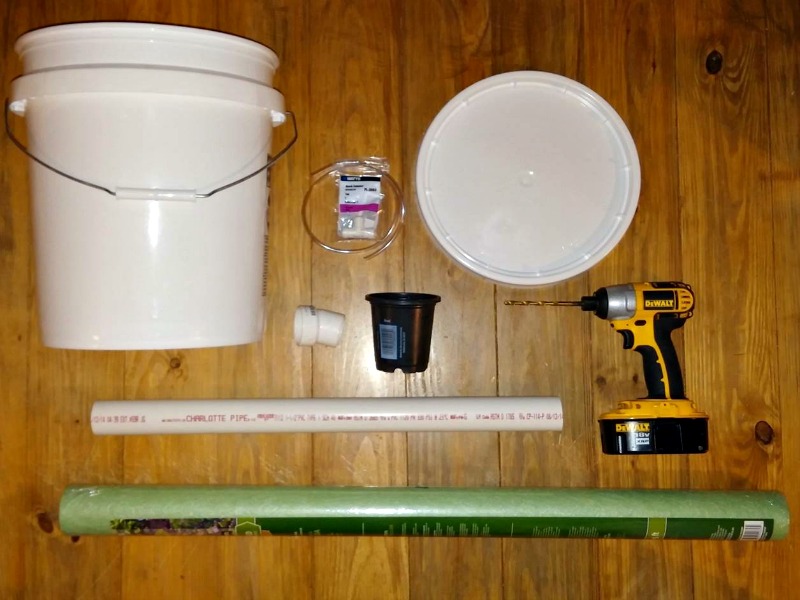
Materials:
– Two 5 gallon plastic buckets (recommend food grade)
– One lid to fit plastic buckets
– One PVC pipe, 1 1/2 inch diameter
– One PVC 22 1/2 degree elbow fitting, 1 1/2 inch diameter
– One plastic nursery pot, 1 pint, 4 inch diameter (throw away pot in which plants are sold)
– One vinyl tube, 1/4 inch O.D. (outer diameter), about 10 inches long (ice maker type tubing)
– One plastic tee fitting for 1/4 inch tubing
– One sheet of weed barrier fabric about 3 feet x 3 feet (do not use biodegradable fabric)
– Potting mix and other potting medium of your choice
Tools:
– Power drill with 1/4 inch bit
– Sharp knife
– Scissors
Step 2: Mark bucket depth.
Place one bucket inside the other and hold the stacked buckets in front of a light. You will see the outline of the inner bucket through the side of the outer bucket.
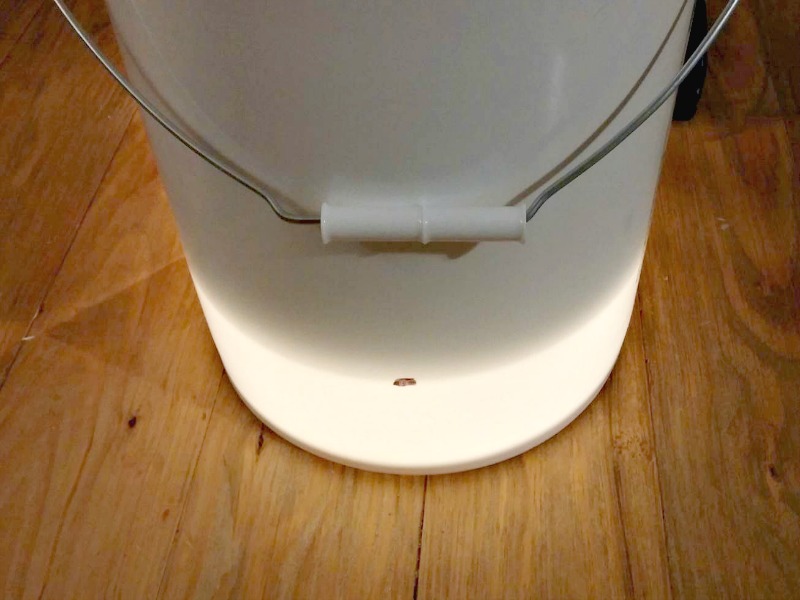 Make a mark on the side of the outer bucket to show this depth. The space between the two stacked buckets forms the water reservoir for the self-watering planter.
Step 3: Mark the bottom of the inner bucket.
Remove the inner bucket and place it with the bottom facing up.
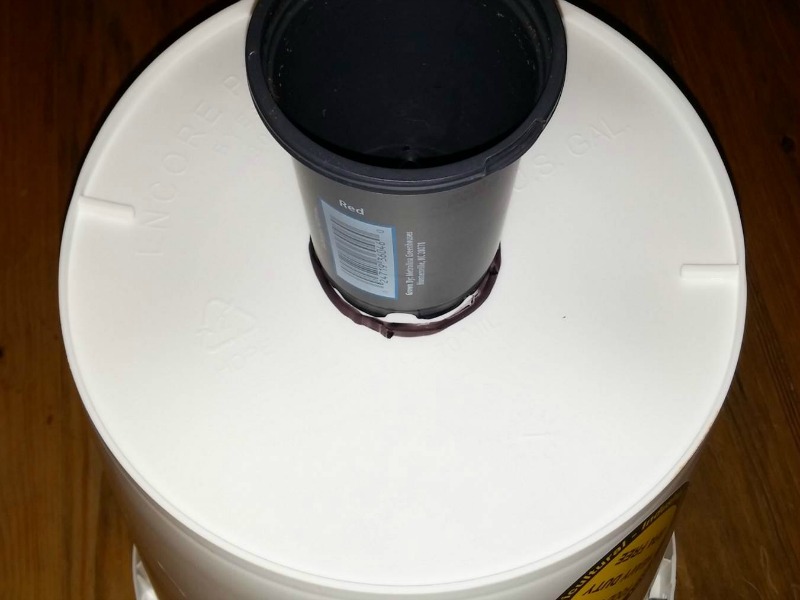 Place the bottom of the plastic nursery pot in the center of the bucket bottom and trace its outline on the bottom of the bucket.
Next, place the open end of the PVC pipe against the outer edge of the bucket bottom and trace its outline on the bottom of the bucket.
Note: I chose to remove the handles from both buckets at this point as they tend to just get in the way.
Step 4: Cut openings and drill drain holes in bottom of the inner bucket.
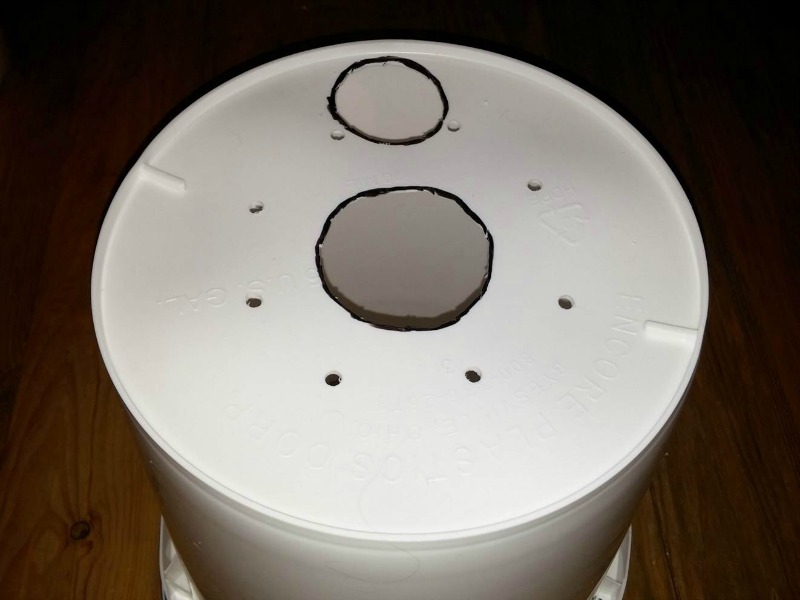 Using a sharp knife, carefully cut out the two circles drawn in step 3 on the bottom of the inside bucket. Cut the center circle large enough to allow about 3/4 of the bottom of the nursery pot to easily slide into the hole. (Do not cut the center hole large enough for the nursery pot to slide completely through the hole.)
Cut the hole at the edge of the bucket large enough to allow the PVC pipe to easily slide through the hole.
Next, drill about six or eight 1/4 inch holes around the remaining part of the bucket’s bottom. These extra holes will allow for proper soil drainage when planting in the inner bucket.
Step 5: Cut slots in side of nursery pot.
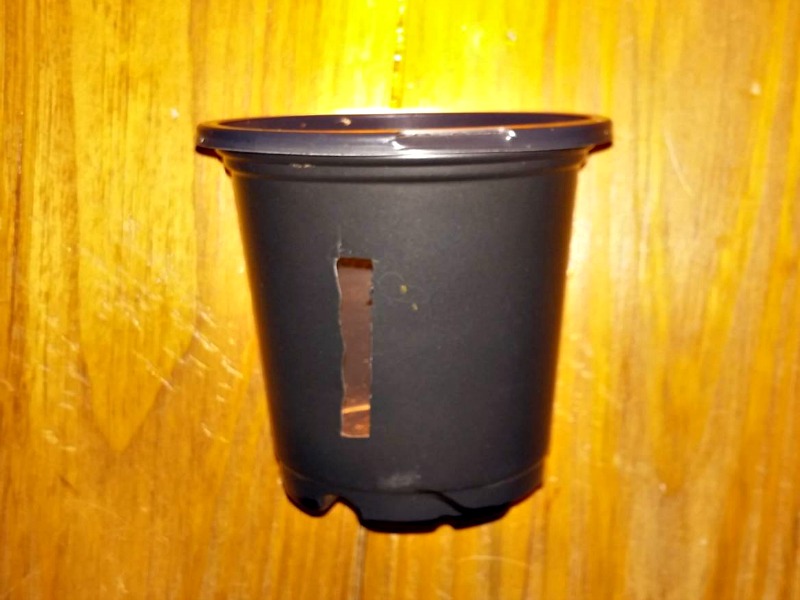 Using a sharp knife, carefully cut two rectangular openings, one opposite the other, on the sides of the nursery pot. Each of the openings should be about an inch long and about 1/4 inch wide.
Step 6: Drill an overflow hole in the side of the outer bucket.
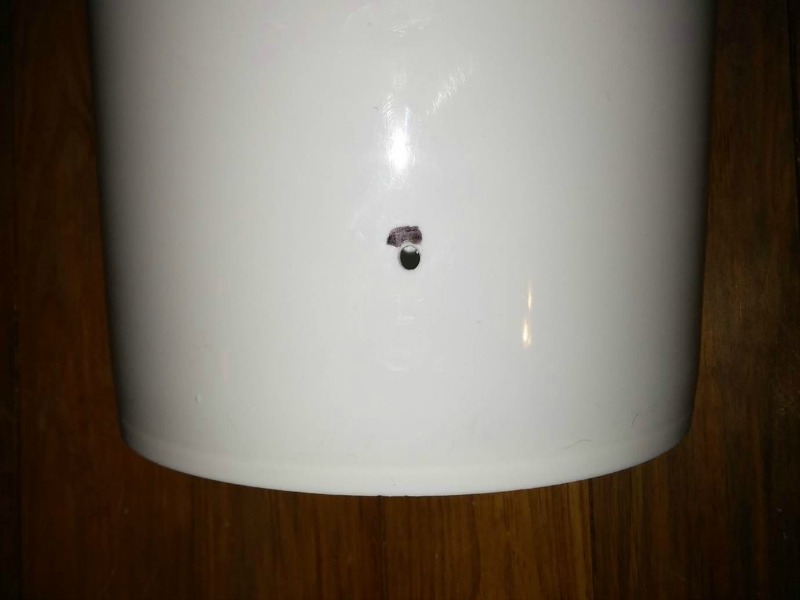
Step 7: Install overflow drain tube (optional).
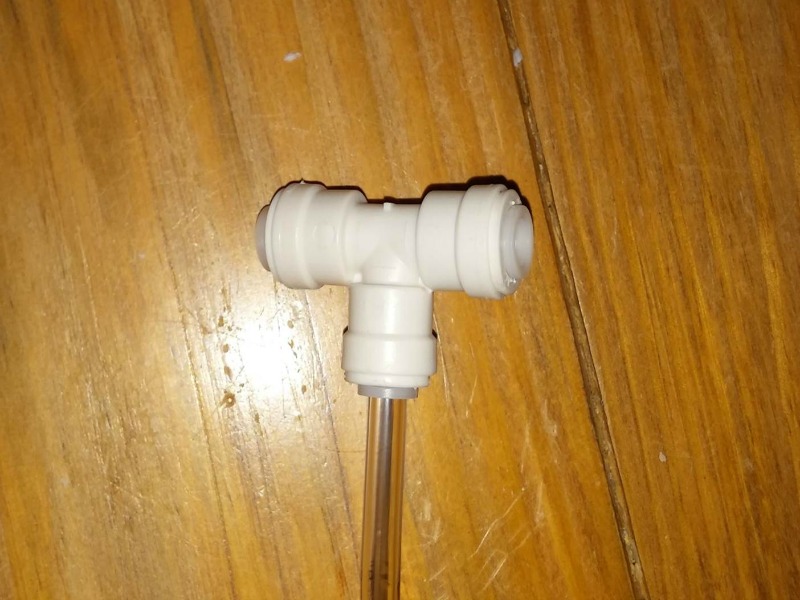 Attach the plastic tee to one end of 1/4 inch OD vinyl tubing.
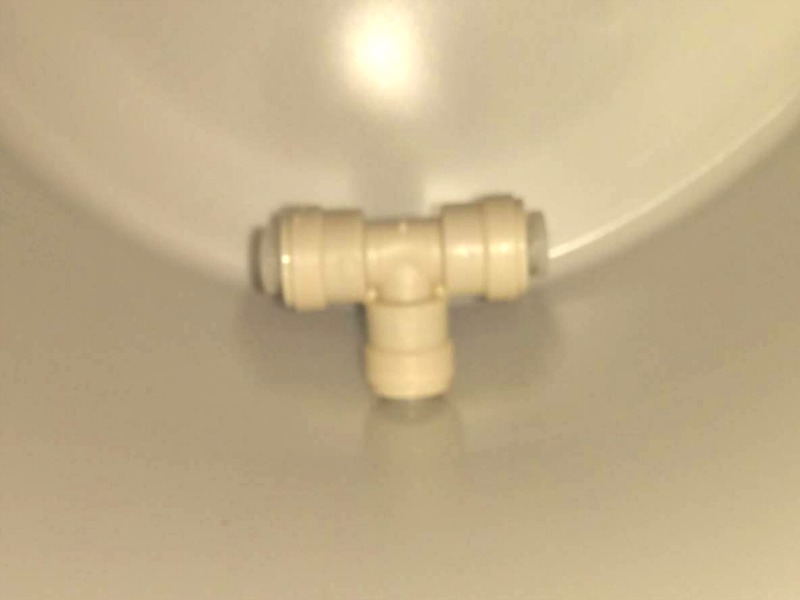 From the inside of the bucket, push the other end of the vinyl tubing through the overflow hole in the side of the outer bucket.
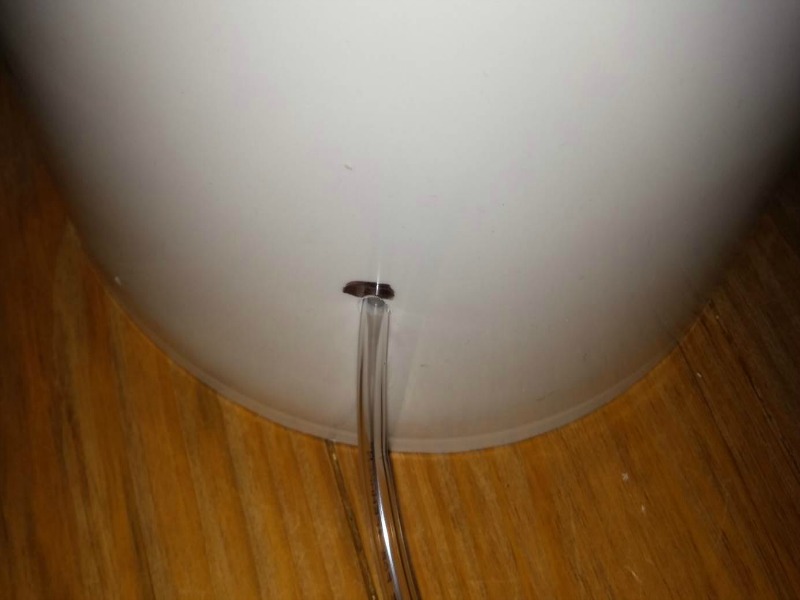 The vinyl tubing should fit tightly in the hole in order to prevent water from leaking around the tubing. (You may wish to place a small bead of silicon caulking around the vinyl tubing for added leak prevention.)
The overflow tubing will allow you to capture the extra water and use it to water other plants, thus not wasting any water.
Note: The overflow tube is optional. You may prefer to have the overflow water drain directly from the outer bucket through the overflow hole.
Step 8: Cut openings in bucket lid (optional).
Using the PVC pipe as a guide, trace two circles on the top of the bucket lid. One circle should be in the middle of the lid and the other circle at the outer edge of the lid.
 Using a sharp knife, cut out the two circles. Next, cut two narrow slits in the lid. One slit will connect the two circles and the other will extend from the outer circle completely through the edge of the bucket lid. This will create a keyhole type opening with two circles in the lid.
The middle circle is for the stem of the plant and the outer circle is for the PVC pipe. The slit will allow you to attach and detach the lid as needed by flexing the lid in order to get it around the plant and PVC pipe.
Depending on the type and size of your plant, you may want to make another slit from the middle circle through the edge of the lid on the opposite side, which will result in a two piece lid instead of a one piece lid. This may make the lid less effective, but the lid will be much easier to install.
Note: The lid is optional. If used, the lid will help to keep out weeds and minimize moisture loss due to evaporation from the soil. You may choose not to use the lid, depending on your particular situation, weather, type/size of plant, etc. Personally, I don’t use a lid and just place mulch or pebbles in the top of the planter. However, I wanted to show the lid for those who wish to use one.
Step 9: Test fit the parts of the planter.
Assemble the empty self-watering planter in order to test fit all of the parts.
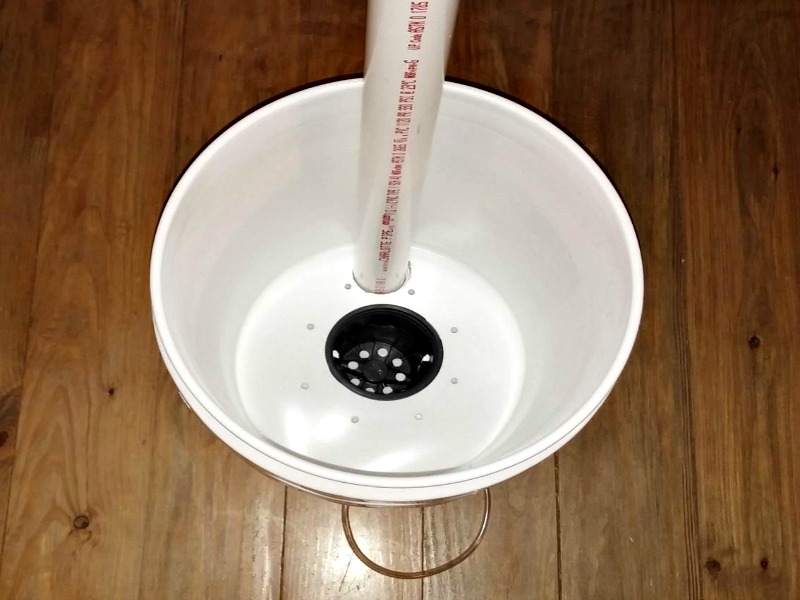 Place the nursery pot inside the inner bucket. The bottom of the nursery pot should extend through the center hole in the bottom of the bucket with the open end of the nursery pot pointing in the same direction as the opening of the bucket.
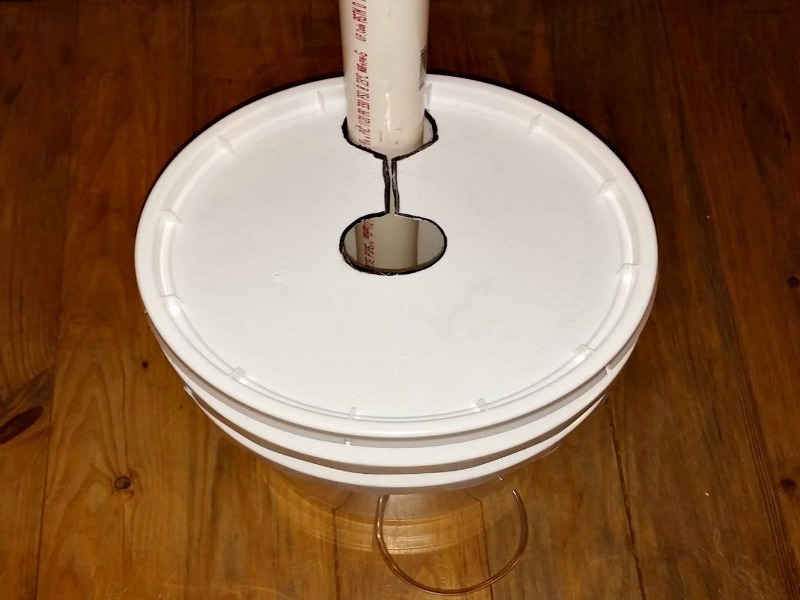 Attach the PVC elbow to one end of the PVC pipe. Insert the PVC pipe through the other hole in the bottom of the inner bucket. The pipe should extend through the hole with the PVC elbow on the outside of the bottom of the bucket.
– Slide the inner bucket into the outer bucket and place the lid on the bucket. The PVC pipe should extend through the hole on the edge of the lid.
– Make adjustments as needed in order for the parts to easily fit together.
Step 10: Mark and cut weed barrier fabric
Cut out two rectangles of the weed barrier fabric with each rectangle about 18 inches by 24 inches. Remove the lid from the assembled planter.
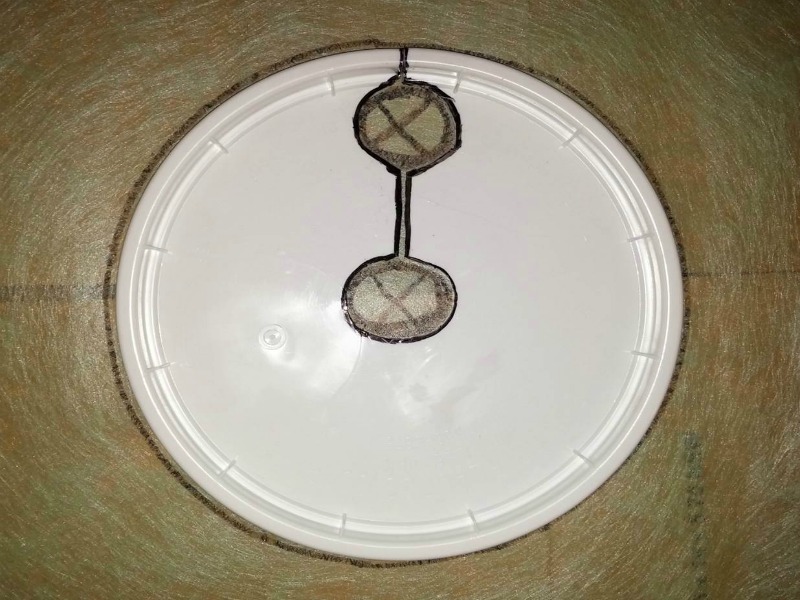 Using the bucket lid as a template, trace the outline of the bucket lid and the two holes in the bucket lid on one of the pieces of weed barrier fabric. With a sharp knife or scissors, cut along the line you traced around the outer edge of the bucket lid. Do not cut out the smaller circles.
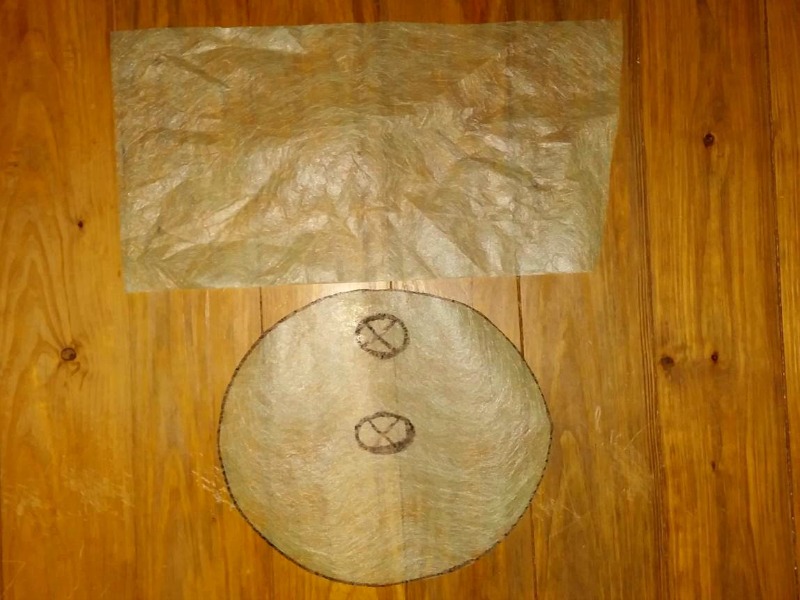 The end result will be one rectangle of weed barrier fabric and one circle of weed barrier fabric, on which two circles are drawn.
Step 11: Wrap the nursery pot with weed barrier fabric.
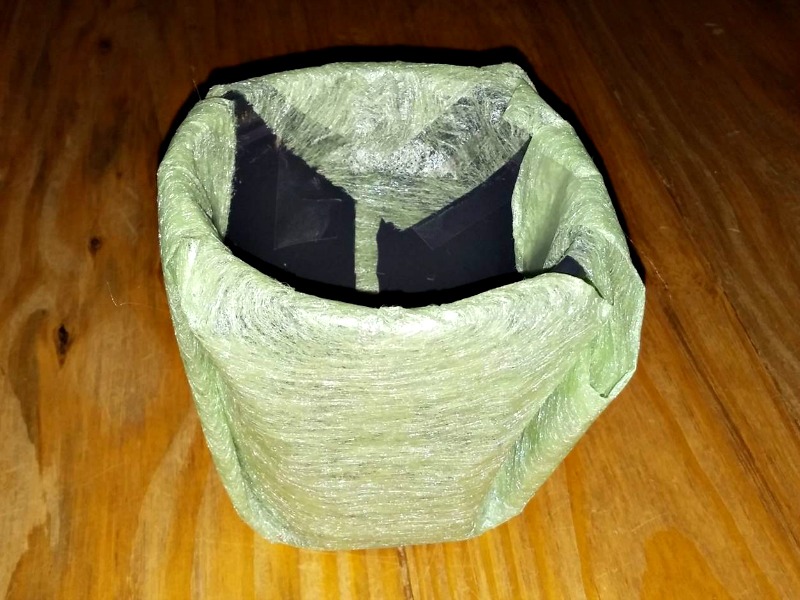 Remove the nursery pot from the inside of the inner bucket. Fold the rectangular weed barrier fabric in half to make a square.
Place the bottom of the nursery pot in the center of the square piece of weed barrier fabric.
Wrap each corner of the weed barrier fabric over the lip of the nursery pot and tuck the fabric inside the nursery pot. The result will look somewhat like a gift wrapped present. You may wish to use a couple of small pieces of tape in order to keep the weed barrier fabric from unwrapping.
Step 12: Line bottom of inner bucket with weed barrier fabric.
With a sharp knife or scissors, cut an X inside each of the small circles on the circular piece of weed barrier fabric.
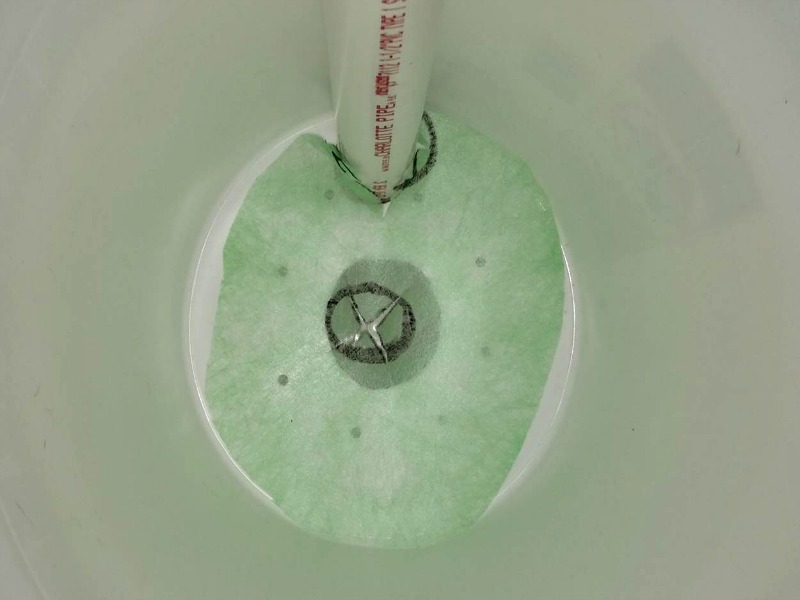 Next, trim the edge of the circular piece of weed barrier fabric until it will fit smoothly in the bottom of the inner bucket. Trim and adjust the weed barrier fabric as needed for a good fit.
The weed barrier fabric doesn’t have to be a perfect fit in order to help keep dirt out of the water reservoir.
Step 13: Fill the nursery pot with potting mix.
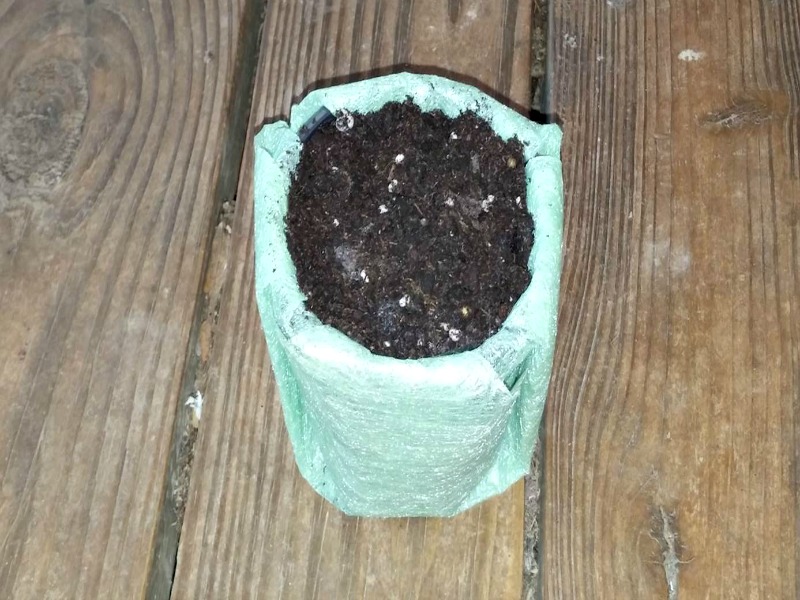 Fill the wrapped nursery pot with a good quality potting mix. Gently press the potting mix into the nursery pot in order to eliminate air pockets. Try not to get any potting mix on the outside of the wrapping.
Step 14: Place the wrapped nursery pot in bucket and add additional potting mix.
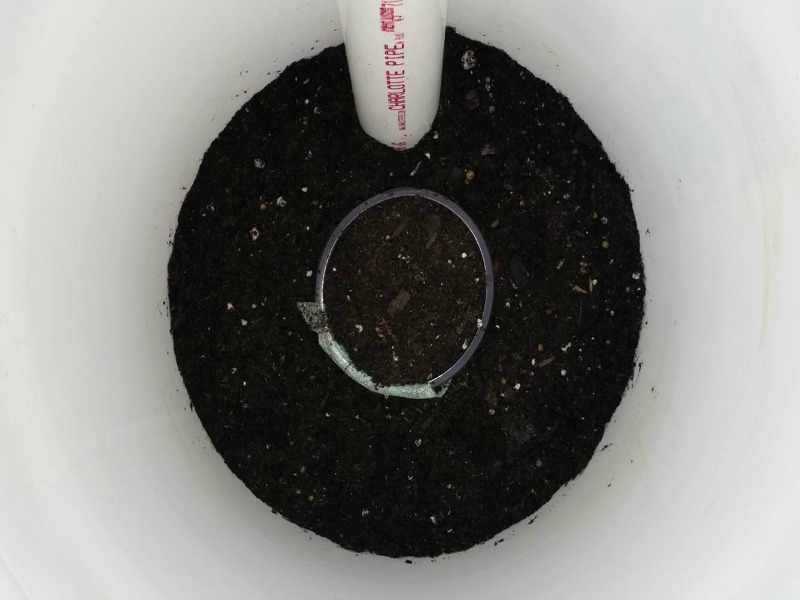 Insert the wrapped, filled nursery pot through the center hole in the bottom of the inner bucket. The wrapped nursery pot should extend into the water reservoir space between the two buckets by about two inches.
Next, fill around the top part of the wrapped nursery pot with additional potting mix. Press the potting mix into the bottom of the inner bucket in order to eliminate air pockets.
The end result should be a layer of potting mix covering the entire bottom of the inner bucket up to a height about equal with the wrapped nursery pot.
The nursery pot and the layer of potting mix will act as a wick and draw the water up from the reservoir and into the inner bucket.
Step 15: Add additional soil to the inner bucket.
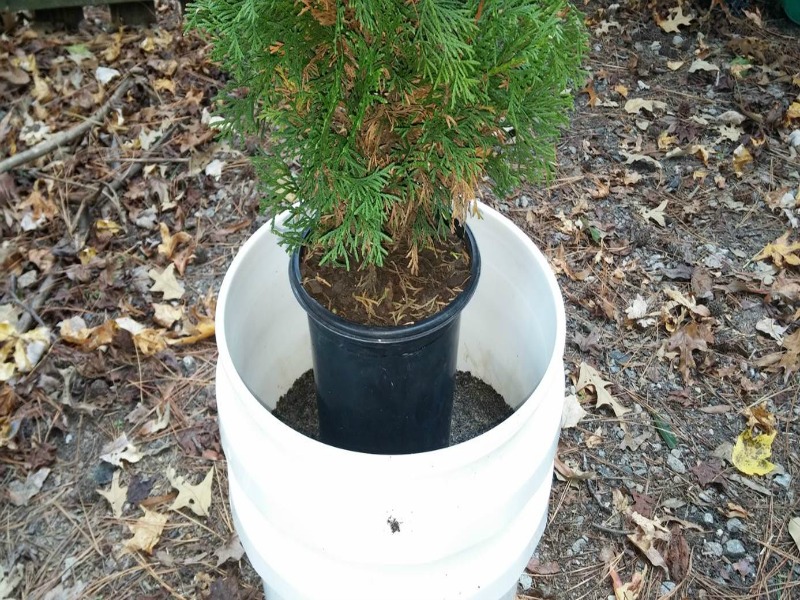 Continue to fill the inner bucket with your preference of potting medium. Personally, I prefer to use a two stage approach.
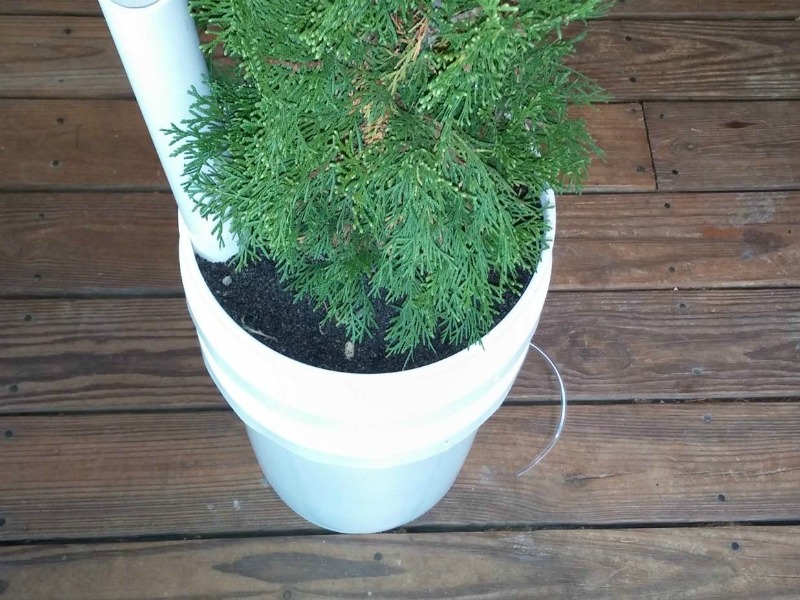 First, I use a 50/50 mix of potting mix and compost up to the bottom of the plant being potted. While adding the potting medium, I periodically set the plant in the top of the planter in order to gauge how much more potting medium I need to get the crown of the plant at or slightly above the rim of the inner bucket. (You have to keep in mind that the potting medium will compress some when watered.)
For the remainder of the pot, I don’t normally use any potting mix. In order to keep the soil from wicking up too much water and the roots being too damp, I normally fill the remainder of the planter (the space around the plant’s root ball) with a mix of roughly three parts compost to one part sand or perlite.
Step 16: Water in the plant and fill the reservoir with water.
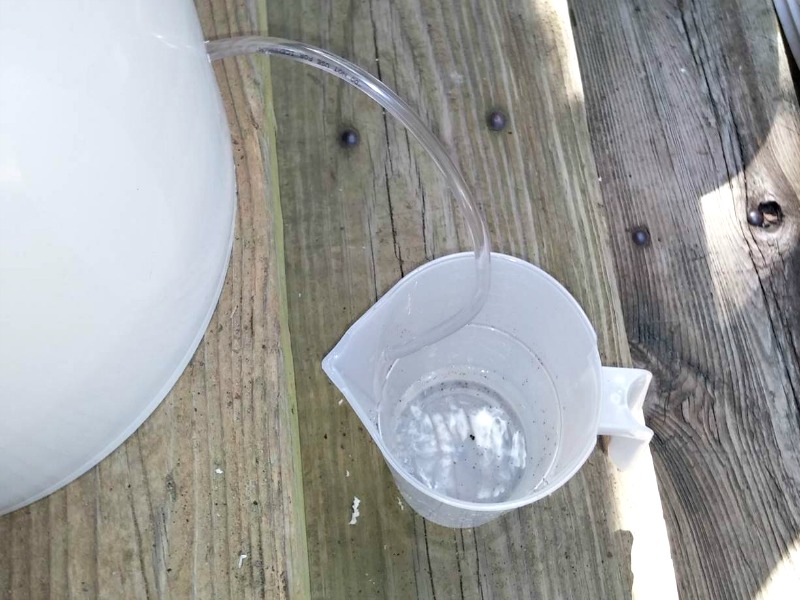 Thoroughly water the plant from the top in order to settle the soil in place around the root ball. Then, fill the water reservoir by adding more water through the PVC pipe until there is a steady flow of water through the overflow tube. As I mentioned in step 7, using an overflow tube will allow you to capture any excess water in order to minimize water usage.
Note: You may wish to place a PVC pipe cap over the open end of the PVC pipe when not in use, if you live in an area with mosquito problems.
About the author:
James Hammond is a disabled veteran and has done landscaping and home renovation projects for over 25 years.
I love the way you explained this in detail. Have another with a tote but didn’t understand all the directions they left some out. Wish I could get to some of your people without having to pay through the nose to get their addresses. Sorry , that is why I want to make money, not have to spend a lot to get to them. Think this could be handled differently, but just my thoughts. Still love the way you explain things and ideas.
In business, when money changes hands it’s all about value verses the cost of the product. Our products are packed with value, that’s why they are priced as they are. If you are a customer then we let you test drive the private members area for $7.00. It can’t get more fair than that.
James – compliments on how clearly you’ve provided instructions, including options for drain/no drain tube, lid/no lid. Thanks.
Although I can see it might be a bit of work for one plant, this would readily adapt to large planters with several plants for a patio, etc., by using a cheap disposable bucket inside, the planter of choice, with the center hole closed off and a new drain hole drilled at the appropriate level. For display purposes, the fill-tube could be cut off at an inch or two above soil level so it could be hidden by the foliage.
I really like this idea..
This looks like a GREAT Science project for your kids or grandkids that you can help them with!
Especially when it is the dead of winter and you have nothing better to do!
IT MOST COST CLOSE TO $20 & HOW MANY HRS OF MY TIME……….. FOR JUST ONE PLANT ???????
MOST PEOPLE HAVE MORE THAN JUST ONE PLANT.
I THINK I’D RATHER CALL A GOOD NEIGHBOR.& TO WATER THE POTS AS NEEDED
SORRY NOT FOR ME
I have had good success with a similar planter made from 18 gallon storage tote. False bottom made of wire mesh suspended over 3 inch slices of 4 inch PVC drain pipe with 1/4 inch holes drilled. Cover with filter fabric leaving the center support open to act as a wick and one corner to accept the filler tube, cut the bottom of the filler at 45 degrees to allow water to enter the reservoir. Drill overflow holes at the top of the mesh. Fill with good potting mix. Great for carrots – no obstructions for 12 inches. Sufficient soil mass for tomatoes.
How do u take cuttings from Japanese arelias
Japanese Aralias can be propagated with stem cuttings taken
from late spring up until mid-summer. http://www.freeplants.com/soft%20of%20decid.htm
Sucker growths can easily be dug up and transplanted elsewhere.
I’m going to plant some tomatoes this way this spring. You did a great job of explaining. I can’t wait to get started!
I love the simplicity… great idea
I like this idea a lot and will try it out.
This year we moved to a new house – at a school charity event I bought a new quality plastic rain barrel (55 gallon) spliced the rainwater down pipe ( from the roof guttering) with a cheap fitting to run into it. Attached a garden hose to the spigot and a soaker hose to the other end. Easy and worked for me – but I really like making use of free rainwater ( 55 gallons at a time) and not paying the water company to take my water away.