Why would anyone want to build a bat house? Because bats are the primary predator of those annoying, flying nighttime insects like mosquitoes, moths and beetles. One bat can eat thousands of insects in one evening! And if you build a bat house for them, they will stay out of your chimneys, rafters and attics. Build your very own bat house for spring with these simple bat house plans!
Step 1: Gather the required materials and tools.
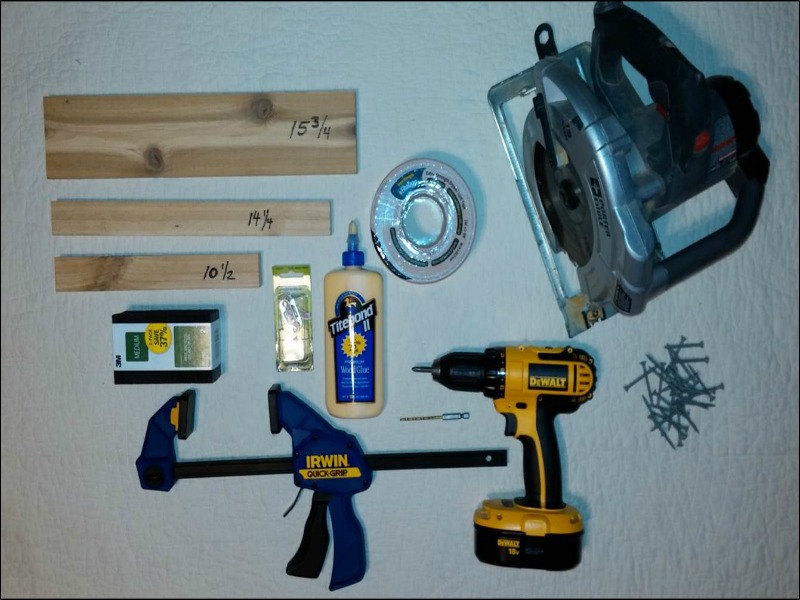
– Six 1” x 4” cedar boards 15 3/4 inches long
– Four 1” x 2” cedar boards 14 1/4 inches long
– Two 1” x 2” cedar boards 10 1/2 inches long
– Two count package of keyhole hangers with screws (1/2” wide x 1 1/2” long)
– Medium grit sanding blocks
– One roll 2 3/8” self-adhesive drywall tape
– Wood glue
– 2” deck screws
Tools:
– Power drill with 1/8” drill bit and Phillips-head bit
– Circular saw
– 12” clamps
A few quick notes about lumber terminology:
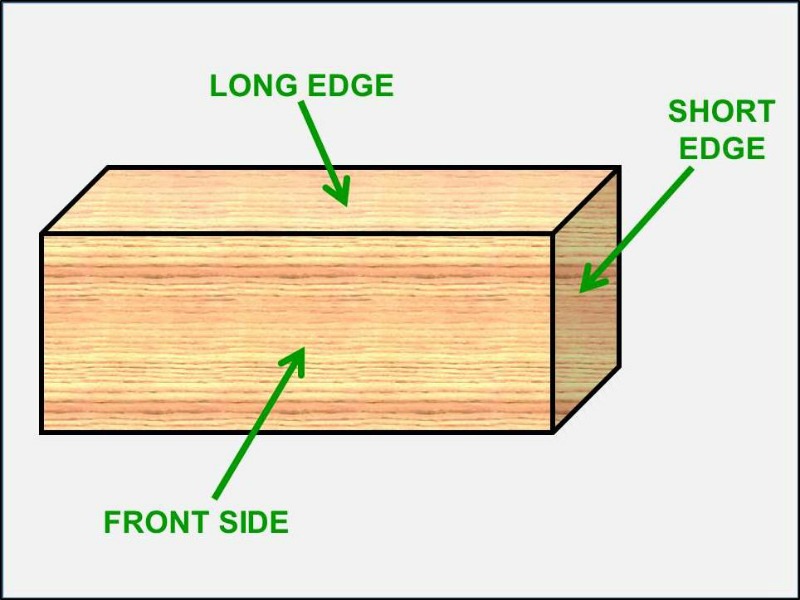 Home centers and lumber yards typically sell lumber identified by “nominal” dimensions. These are the dimensions before the mill surfaced and planed the boards. As a result, the actual dimensions are smaller than the nominal dimensions.
The two sizes of lumber used for this project were 1” x 4” boards (actual dimensions 3/4” x 3 1/2”) and 1” x 2” boards (actual dimensions 3/4” x 1 1/2”).
Each board has 2 long edges, 2 short edges, a front side, and a back side. Lumber is sold either unsurfaced or with 1 or more sides and/or edges surfaced (smooth sanded).
The lumber used for this project had 1 side (the front side) and the two long edges surfaced. The back side and the short edges were unsurfaced.
Step 2: Prepare the front and back panels.
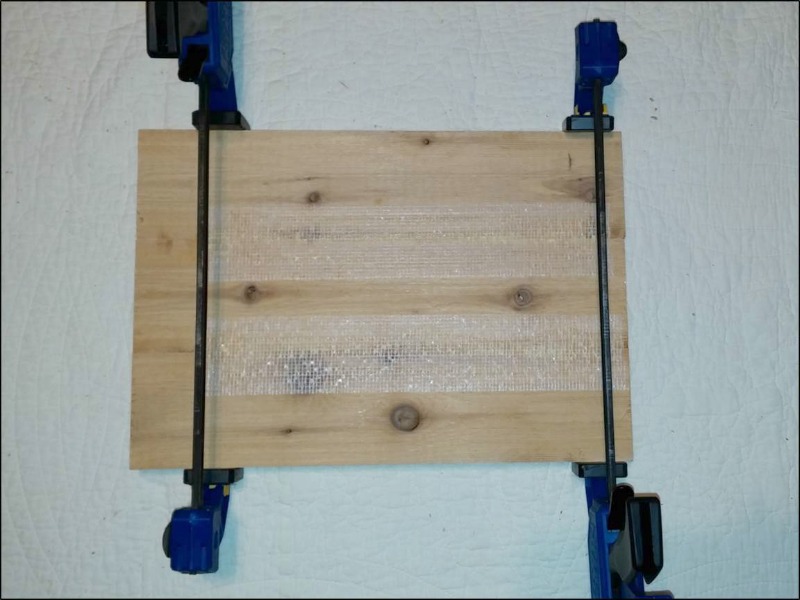 Place 3 of the 15 3/4 inch 1” x 4” cedar boards side-by-side with the front sides down and the long edges touching. Place a bead of wood glue on each of the long edges of the center board and join the outside boards to the center board. This will result in a board measuring 15 3/4” x 10 1/2”.
On the back (unsurfaced) side of the boards, place a bead of glue along each of the seams you just glued.
Place a strip of the mesh drywall tape along the length of each of the seams (self-adhesive side toward the board) excluding the last 2 inches. Secure the clamps to the two exposed, outer long edges of the boards and allow the glue to set for about an hour.
Repeat this same process with the remaining three 15 3/4 inch 1” x 4” cedar boards.
When the glue sets, these two 15 3/4” x 10 1/2” boards will be the front and back of the bat house.
The unsurfaced sides of the panels and the drywall tape provide an easy surface for the bats to grasp with their feet.
Step 3: Attach the top to the front panel.
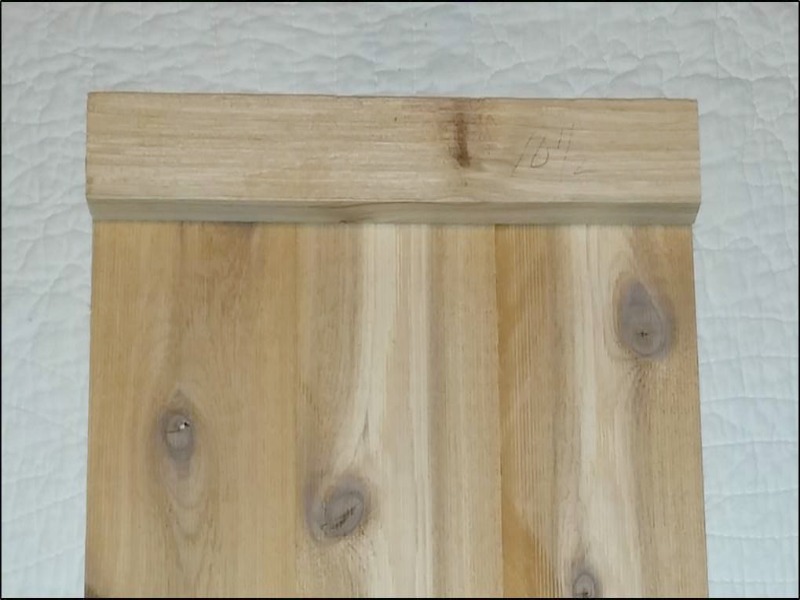 Select one of the 15 3/4” x 10 1/2” boards you made in step two to use as the front panel of the bat house. With the clamps removed, place the front panel on your work bench with the unsurfaced side up. Place a bead of glue on the front side of one of the 10 1/2 inch long 1” x 2” boards.
Place the 10 1/2” board on the unsurfaced side of the front panel (glue side down and aligned with one of the 10 1/2” edges of the front panel).
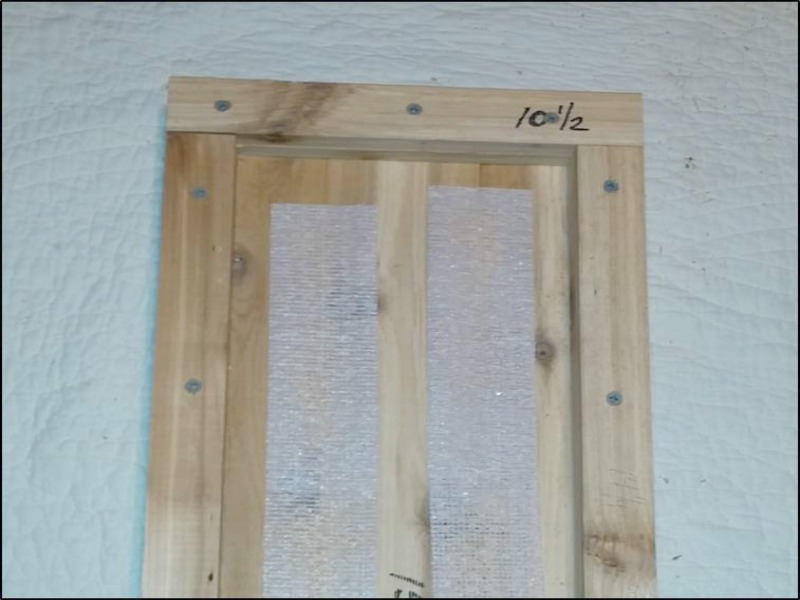 Repeat this process with the second 10 1/2 inch long 1” x 2” board, gluing it to the exposed side (back side) of the first 10 1/2 inch board (stacking the two 10 1/2 inch boards on top of each other). This will be the top of the bat house.
Step 4: Attach the walls to the front panel.
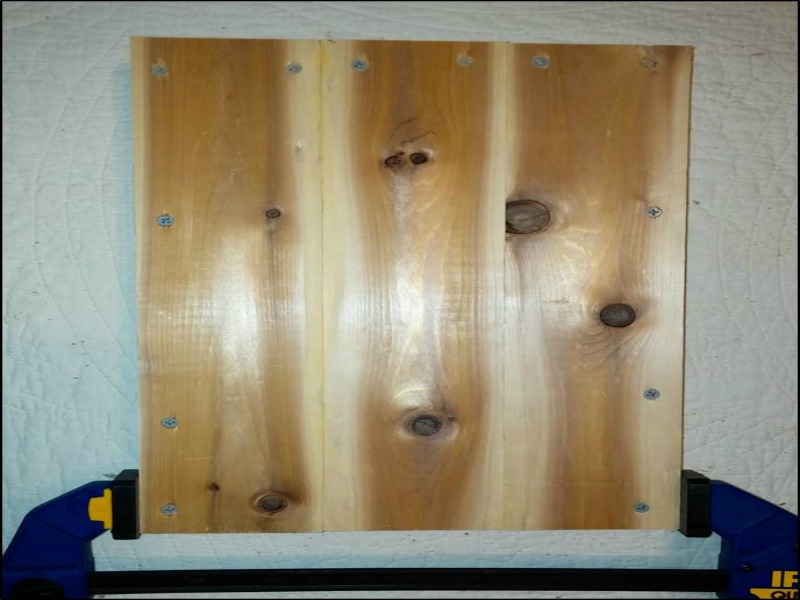 Place a bead of glue on the front side of one of the 14 1/4 inch long 1” x 2” boards. Place the 14 1/4 inch board on the unsurfaced side of the front panel (glue side down and aligned with one of the long edges of the front panel).
Repeat this process with another 14 1/4 inch long 1” x 2” board, gluing it to the exposed side (back side) of the first 14 1/4 inch board (stacking the two 14 1/4 inch boards on top of each other). This will be one side wall of the bat house.
Repeat this process with the remaining two 14 1/4 inch long 1” x 2” boards, aligning them with the other long edge of the front panel. This will be the other side wall of the bat house.
With the 1/8” drill bit, drill 3 or 4 evenly spaced pilot holes in the exposed back side of the 10 1/2 inch board and the 14 1/4 inch boards forming the top and side walls of the bat house. Be careful to keep these pilot holes shallow (do not drill all the way through the surfaced side of the front panel).
Insert a 2” deck screw into each pilot hole to help reinforce the attachment of the top and side walls to the front panel (do not drive the deck screws all the way through the surfaced side of the front panel).
At this point, you should have a “U” shaped border securely mounted around 3 of the 4 edges of the front panel. Inside the U shaped border are the two strips of drywall tape.
Step 5: Attach the back panel to the bat house.
Place a bead of glue on the exposed back side of the 10 1/2 inch board (top) and each of the 14 1/4 inch boards (side walls) in which you inserted the 2” deck screws in step 4. With the unsurfaced side down, carefully place the remaining 15 3/4” x 10 1/2” board you made in step 2 (the back panel) in place on the top and side walls.
(You can use one of the clamps to help keep the back panel aligned with rest of the bat house, if you wish.)
Being careful not to hit the deck screws you inserted in step 4, drill 3 or 4 pilot holes in the exposed side of the back panel. Align the pilot holes with the top and side walls.
Insert a 2” deck screw into each pilot hole to help reinforce the attachment of the back panel to the top and side walls of the bat house.
Step 6: Attach the hanging hardware.
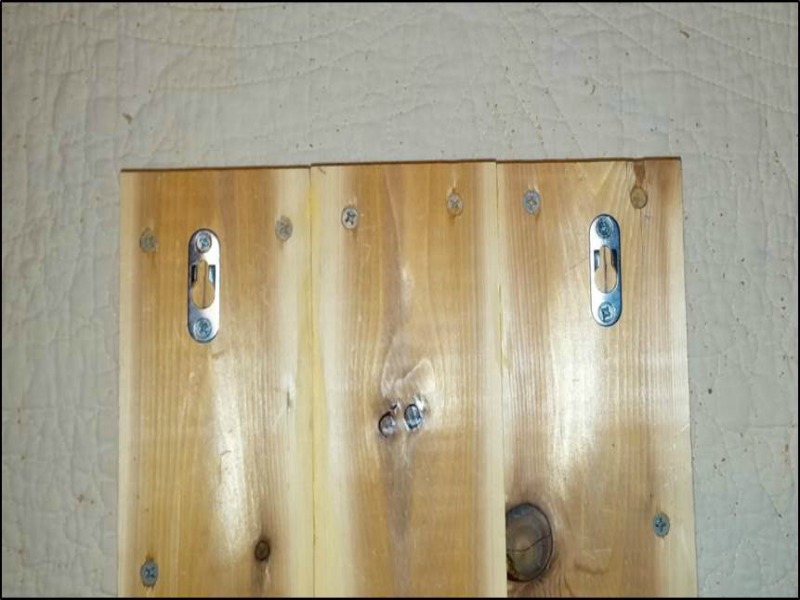 Using the screws included with the set of keyhole hangers, install each keyhole hanger to the back panel about 1 inch from the top edge. Be sure to install both keyhole hangers the same distance from the top of the bat house.
Note: The keyhole hangers pictured here are one of many possible ways to hang the bat house. Depending on where you decide to place your bat house, you may want to go with different hanging hardware.
Step 7: Sand the top of the bat house.
Using the sanding blocks, sand the top of the bat house. Lightly sand the back part of the top. Slowly increase the amount of sanding as you gradually work your way from the back of the top toward the front of the top.
This will result in a smooth top with a slight downhill pitch from the back to the front, which will allow rain water to easily run off the bat house.
(Note: It is not necessary for the pitch of the top to be very steep. A slight pitch is enough to prevent rain water from collecting.)
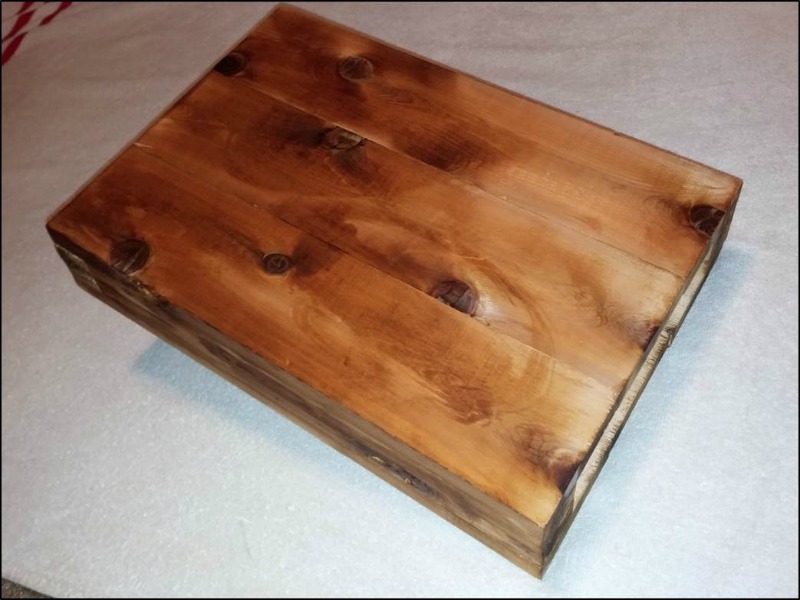 At this point, the bat house is essentially finished. If you wish, you can add a stain or some other wood treatment to the exterior of the bat house. However, it isn’t necessary as the cedar is naturally rot resistant.
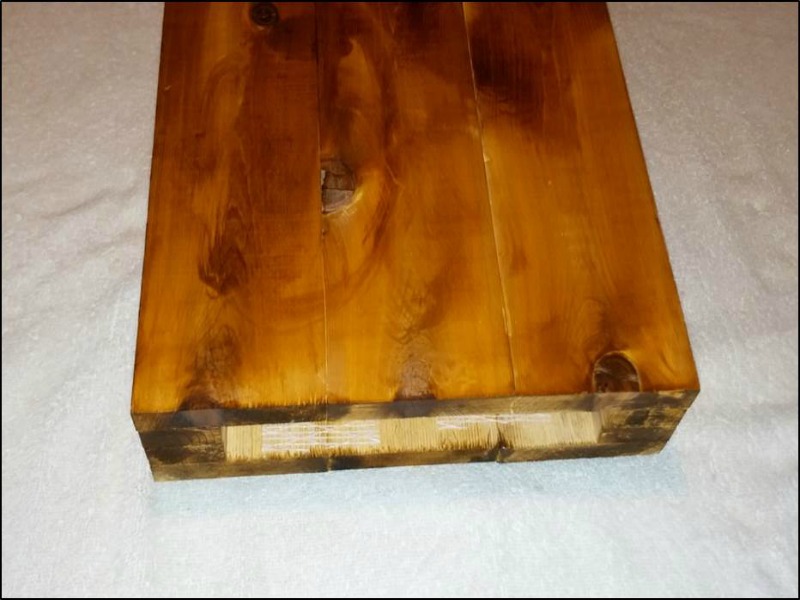 The finished product is a cozy wooden box with a narrow interior space in which the bats will live. Unlike bird houses, bats prefer a dark, cozy space with the entrance to the bat house on the bottom. This gives the bats a nice dry, cave-like atmosphere.
Step 8: Mount the bat house.
Depending on who you ask or what web pages you consult, there are different thoughts out there as to the best locations and methods for mounting a bat house. In general, most experts recommend mounting bat houses with the bottom opening at least 12 to 15 feet off the ground and placing them in an area away from street or house lights. (Bats prefer to sleep during the day and go out in search of mosquitoes and other food at night. If you place your bat house too close to a street or house light, the bat house will be less appealing to its intended occupants.)
Some people prefer to mount bat houses to the sides of their homes, usually under one of the eaves near the roof line. Personally, I prefer to attach bat houses to a tall T-shaped pole and mount the pole in a darker part of the back yard about 25 feet from my home. I prefer this approach for two reasons. First, my kids are easily frightened by bats moving around at night and placing the bat house in the back yard tends to keep the bats somewhat out of sight. Second, having the bat house in the back yard (as opposed to hanging on the side of my home) tends to make it less likely that the bats will eventually try to find their way into my attic.
NOTE: You may wish to change the dimensions and make your bat house bigger or smaller than the one described here. The materials required to build the bat house shown above cost about $25.
About the author:
James Hammond is a disabled veteran and has done landscaping and home renovation projects for over 25 years.
I want to build this this weekend. How many bats do you think it will hold? Also I have a couple ponds about a block away (8 houses) do I still a water feature in my yard?
Elena, this one camber bat house can potentially house up to 50 bats.
I hesitate to use cedar…yes, it resists rotting, however, the volatile oils it contains are harmful to any animals respiratory system. This is why it is recommended to use aspen in the bedding of small animals…(hamsters, gerbils, chinchillas, mice, rats and snakes, etc.) I’d hate to afford a nice cozy home for our beloved bats with building materials that will be detrimental to their health. Pine is not good either. I don’t mean for this to be a negative post, nor am being critical…just concerned with the welfare of the little animals that we love so! Thanks for loving bats enough to want to provide a home for them. RjW
Try using western red cedar. It is naturally rot resistant and has no odor to bother bats.
If you use what is called western red cedar, you will find it is naturally decay resistant and has no aroma to bother bats. Another thing too, is to make sure the inside of the front and back panels are rough, not planed smooth. This is what the bats use for grippers to clamp on to when they sleep.
About 15 years ago we got into the bat frenzy and I did all the research. We finally built them from some old pallet material, painted them black, made them narrow and put 4 on a 20 foot 6×4 treated pole close to a pasture but near several ponds and many trees. We made cross bars at the top out of some old oak we had and had a house in every direction which is what one of the sites said do. We enjoyed watching them in the evening chasing bugs. This last summer we took it down because the bat houses were falling a part and the Cherokee Rose growing around it became a nuisance. Got to make some more. I’ll try Mikes plans, they look simple. Love my bats.
How dp you tell if bats have taken up residense?
Well in the evening right at dusk you’ll see them. That’s when we see them. They are nocturnal and sort of glide when out chasing their prey. They are attracted to the sound of water so if you have a waterfall on your property, manmade or natural put them close to that.
If you take a couple of pieces of kite string and with a little water based glue stick them at the opening of the bat house, as they fly in and out they will probably brush the strings and the strings will fall off. You may also have the fun of listening to them screaching at each other when they move in for a little hang time space.
I really want a bay house but I think I’ve researched this topic too much. Some sutes say do not use cedar because of the aroma,some say it’s the best. Some say do not put near trees because of a bat’s natural enemy lurks there waiting for them to emerge, yum yum.
All agree though on the distance from the ground because bats need to “fall” in order to begin to fly.
Signed….confused in Pa.
Jim,
I think you’re right, you’ve researched it too much. Find a source you trust and go with that. If you’re concerned about cedar use something else. I am constantly telling our members about growing plants, you learn more doing than you do researching. Action trumps all!
Probably need guana?
one sunny summer afternoon I heard a raucous out side and rushed to see what it was. to my sheer amazement it was a pair of crows/ravens who had snatched a bat out of its hiding place and were tag teaming the poor bat as it was struggling in mid air to escape them. At one point the bat managed to escape and fell into the street. I approached it hoping to save it from the birds but the bat was so freaked and hissing and snapping (of course) I didn’t dare pick it up, so, not having anything in hand to cover the bat or scoop it up, I turned around and headed back to my garage to find something to assist me in containing and saving the bat. The crows had been circling and watching at my original attempt to collect the bat but as soon as I went the other way, they swooped down, snatched the bat and flew up and away with the doomed creature….I screamed as they flew off “I tried to save you!!……
Be sure to use a waterproof glue, some wood glue is for interior use only and may not hold up well outside after a few rains.
Hopefully bat houses will give bats a better home than damp caves. Bats are fighting back from white nose syndrome and clean, dry houses will help.
Joint tape mesh may provide a good surface for the bats to cling to, but I am not sure of how long it might last. We use a radial arm saw to just barely score what will be the inner surfaces of the bat house. Horizontal cuts a half inch apart or so should give enough grip for the bats to “hang” out. While slower, a table saw will make the scores just as well.
Another suggestion. Make it a little shorter. You can add to the length of the rear center board. Maybe an inch longer top and bottom. drill four 1/8 “” holes for anchor screws. You don’t need the rear metal hangers, I do this on bird houses I build..
for future growth, don’t glue the front panel. Use screws so it can be removed. Go to a house construction site and and ask for a scrap piece of plywood. Cut it to size add the tape to both sides. it will replace the original front. Add top and 2 sides.like before. predrill top and sides for faster attaching of this room divider. Start screws in these holes. If you make a cardboard or paper template of the original construction, life is easy. Everything is prefabbed, Screws are started in the new panel . Just unscrew front. Screw on the new panel and screw the front back on.. If you used a full width piece of vinyl siding to cover the top boards you are still covered.. You can also add a strip of siding down the sides for weather, a drip edge and protection. O PLEASE have some one hold the bottom of the ladder. OOOOO PLEASE wear a DUST MASK. & EYE PROTECTION. .You now have a duplex.
awesome pro for bats, however……no cedar,,,pine,,,,,needs a piece of wood extended from bottom with a plastic type mesh so they cnd land and crawl up…they will not fly up in…,,,and a plastic mesh on inside……should have a ventilation strip also. 15 ft, higher better…..s/se side of dead tree, pole, house etc…at least 6 hrs of sun….and if you live in a colder state, paint it dark brown/black with non-toxic latex paint. nothing extra you can do to attract them, they know a good environment…^V^ with Organization for Bat Conservation…
Mike,
How do you entice the bats to the house (neat plan, by the way)
Keny,
More than likely the bats are there, they’ll find it.
How many bats will this size box house?
Just a couple of additions to the house building. If you have a pond or wetlands area as do we, put your bat house up high (around 16 feet) near the wet area. Also try to put it near a treed area so the bats will feel safer. Bats actually will make their homes under bark on trees. That’s why you should make their new house very narrow inside. One last thing. Paint your bat house black for two reasons. It is more attractive to the bats and black does hold in heat in which bats like. They will be more liable to live in a warmer darker house than a natural wood colored house.
You are correct about the heat. They lived in our farm house attic. The old tin roof made it like an oven and we had 100’s up there. They came out of the smallest wood siding cracks every evening.
First, you are my new go-to-guy on all my nursery and yard needs and projects! Second, why cedar? Will any wood work?
Stephanie,
I’m sure any wood will work. In a natural settings bats can’t be that picky.
DO NOT use treated lumber. A scrap piece of vinyl siding from any job site works for the top.
12-15’high keeps snakes away. They can smell bats and birds. They raid nests
Cedar resists rotting and will last longer.