SIMPLEST WAY TO GROW TOMATOES OF ALL TYPES
Materials needed:
· An over ripe tomato of any type that was bought from the store or
seeds from your local nursery
· Organic potting soil to mix with your yard soil (optional)
· Water
· 3-4 inch pot for the first transplant (optional)
· six gallon pot (optional) for one plant that has good drainage or
an inexpensive five gallon bucket (with drilled holes for good drainage)
STEP 1
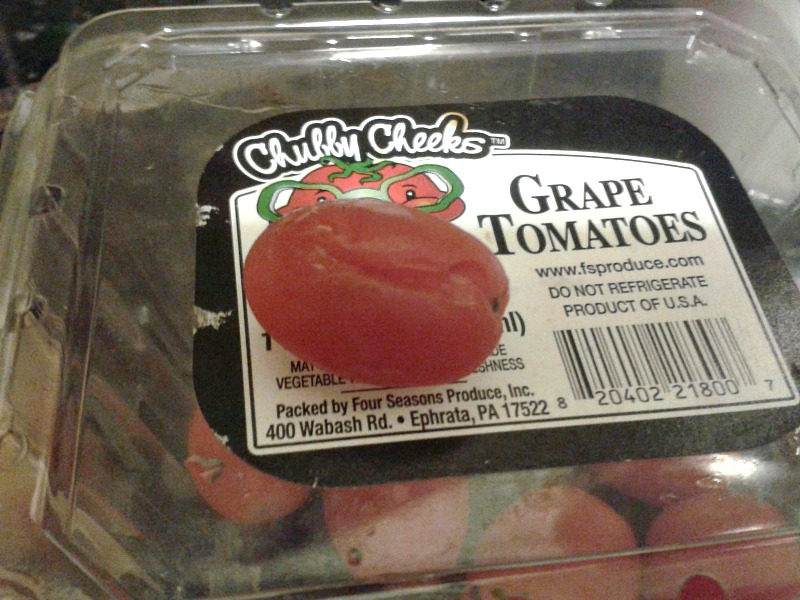 Select a few over ripened grape or cherry tomatoes (or any variety tomatoes of your choice) that you bought from the store. The grape or cherry tomato (the smaller varieties) are less prone to many of the problems or diseases that plague larger-fruited varieties and they often produce fruit early and have a habit of producing fruit in long trusses.
STEP 2
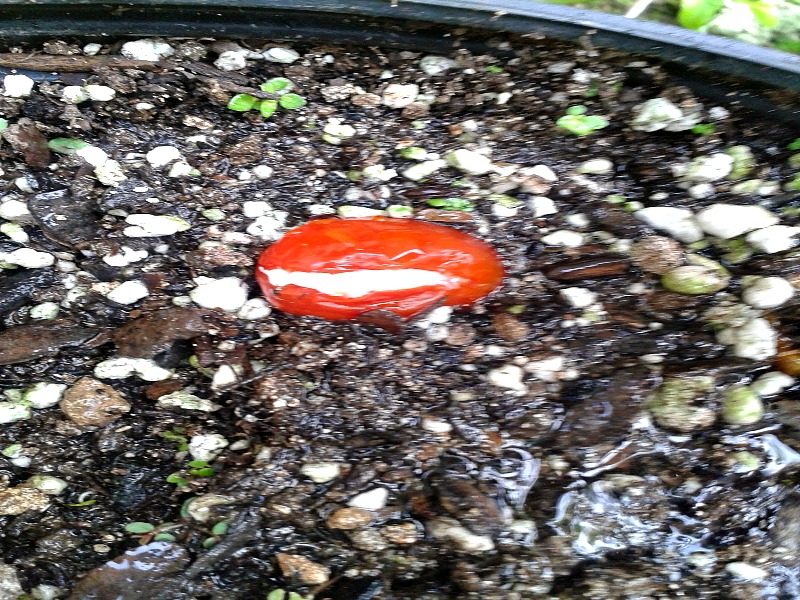 Pick an area in your yard or porch that is sunny at least ten hours a day. Simply throw it into your yard where the soil is loose and rich or in a pot with good, organic potting soil. ‘Partially’ cover it with the soil if you feel you must in order to give the tomato seeds a chance to dry and germinate.
STEP 3
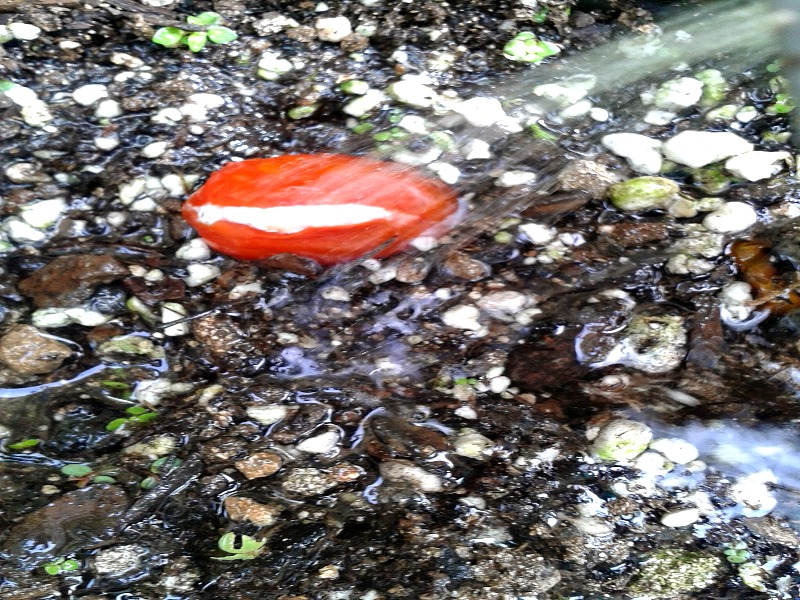 Water it once planted. Soak your tomato bed once a week, or every five days at the height of summer. Water directly on the soil rather than the leaves in order to prevent rot. Potted plants usually need to be watered more frequently. Plastic or fiberglass pots (rather than clay) are best so the plant will not dry out as quickly. While tomatoes love heat, they definitely do not like being dry, and dry soil is a huge detriment to fruit production.
Growth progress of the young grape tomato plant:
 about day 7 days
(This grape tomato was thrown directly into yard soil and did not make as good a progress of those thrown in organic potting soil)
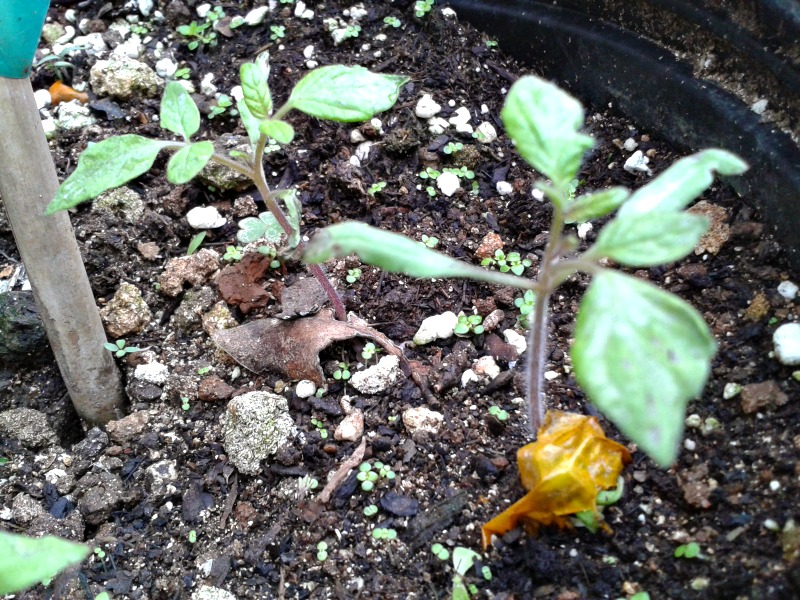 about day 15 days
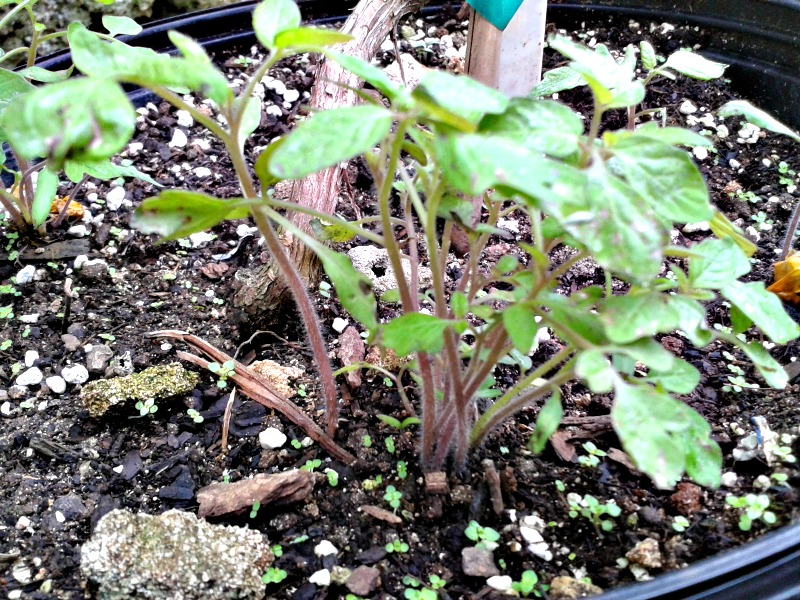 about day 30 days
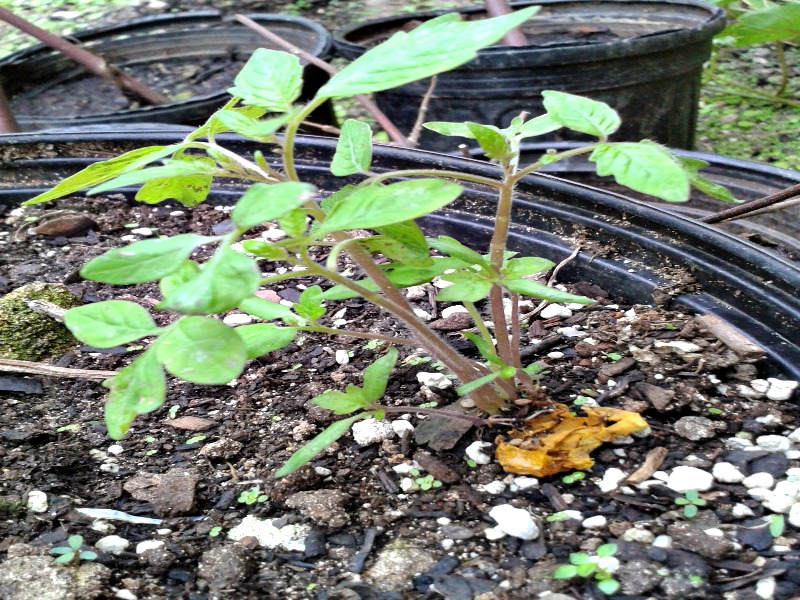 about day 40 days
Step 4
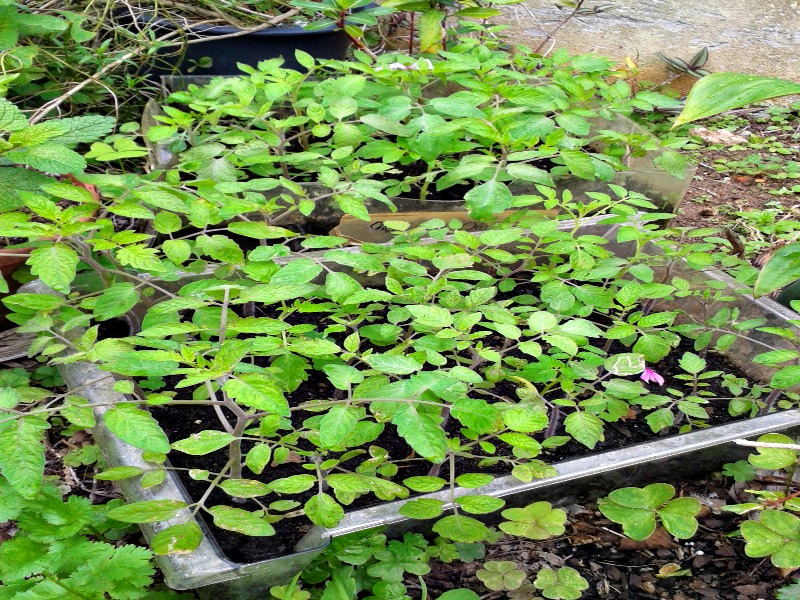 When the stem is about 1-2 inches long, it is time to separate and transplant each plant either into your garden or into an individual 3”-4” diameter pot that is filled with good quality, well moistened organic potting mix. Make a hole in it to receive the seedling. Crowded conditions inhibit their growth.
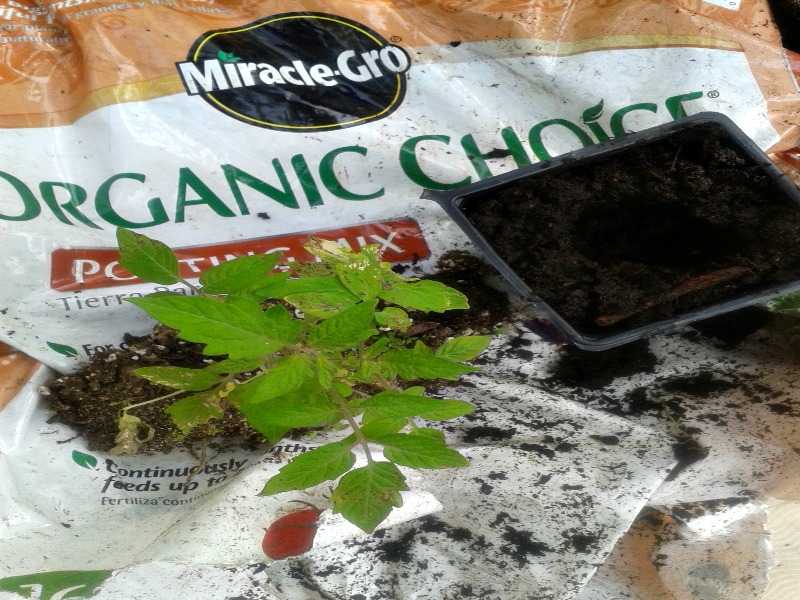 A single tomato plant can grow as tall as 5 feet though I’ve heard some growing to 10 feet (depending on the variety) so it needs the space. When transferring the tomato plant to the 6 gallon pot or to the garden, bury the stem to just below the lowest set of leaves as well as the roots themselves.
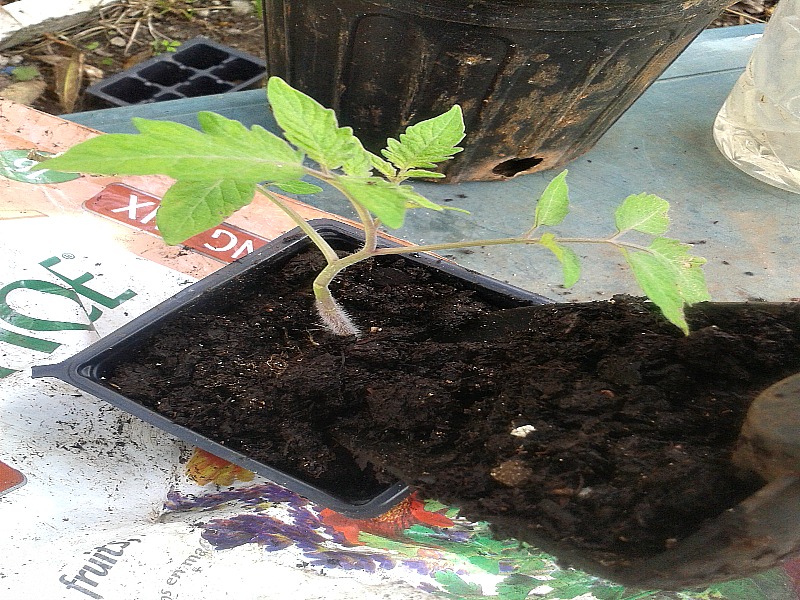 New roots will grow along the buried section of stem, making it a healthier plant.
If the tomato plant is in a pot, put soil within an inch below the rim of the pot to allow room for watering and then place it on a sunny windowsill or sunny part of your porch or yard.
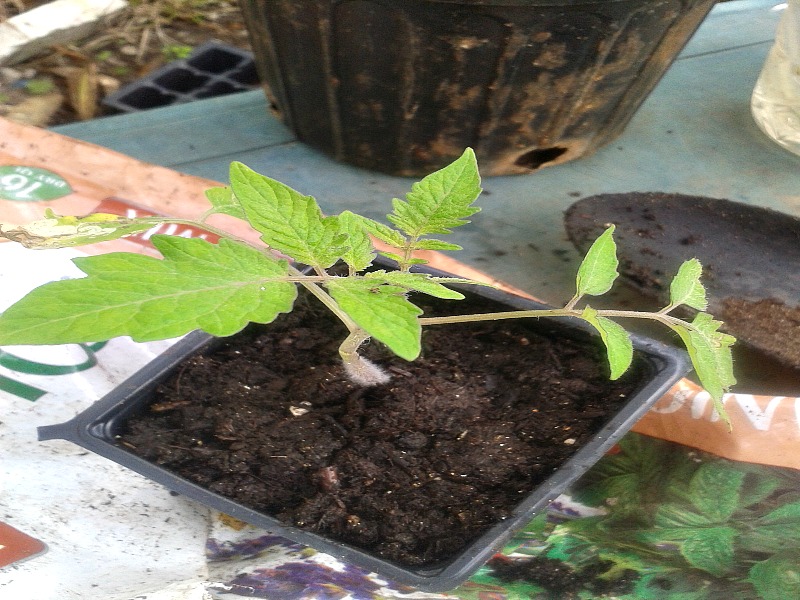 Tomatoes love sun – the more sun the better. Direct sunlight helps maintain stocky, robust plants and avoids spindly plants. Once in place, water thoroughly.
Step 5
Once your tomato plants reach about 3 ft. tall, remove the leaves from the bottom 1 ft. of stem. These are the oldest leaves and they are usually the first leaves to develop fungus problems. As the plants fill out, the bottom leaves get the least amount of sun and air circulation. And being close to the ground, soil borne pathogens can easily splash up onto them. Spraying weekly with compost tea also seems to be effective at warding off fungus diseases.
Step 6
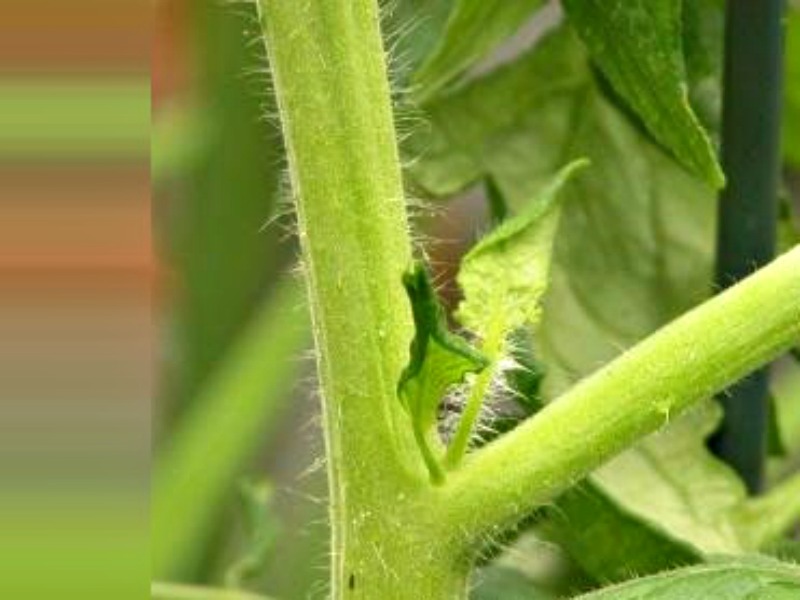 Pruning tomato suckers is sometimes recommended because the resulting new stem is competing for nutrients with the original plant. You may be setting more fruits if you leave the suckers to grow, but the fruits will be smaller and the plant will be more cumbersome. Pruning tomato suckers is really just thinning the plants.
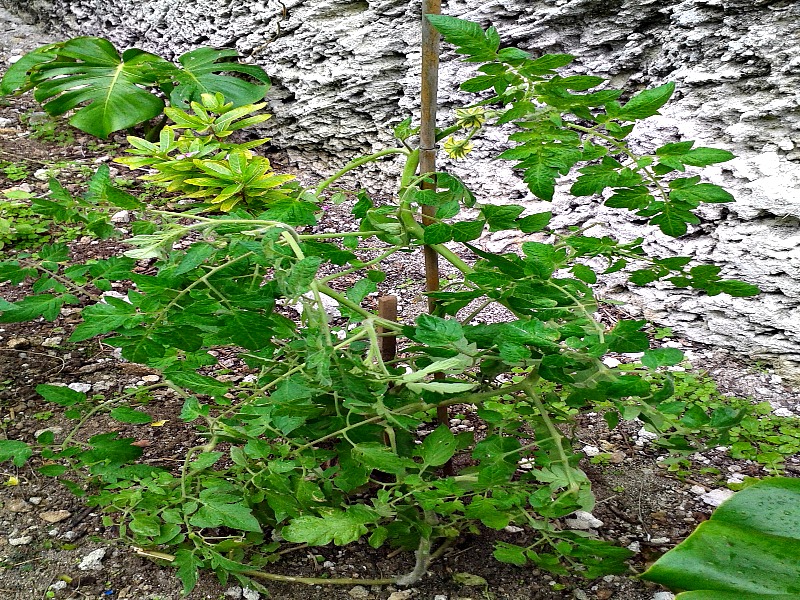
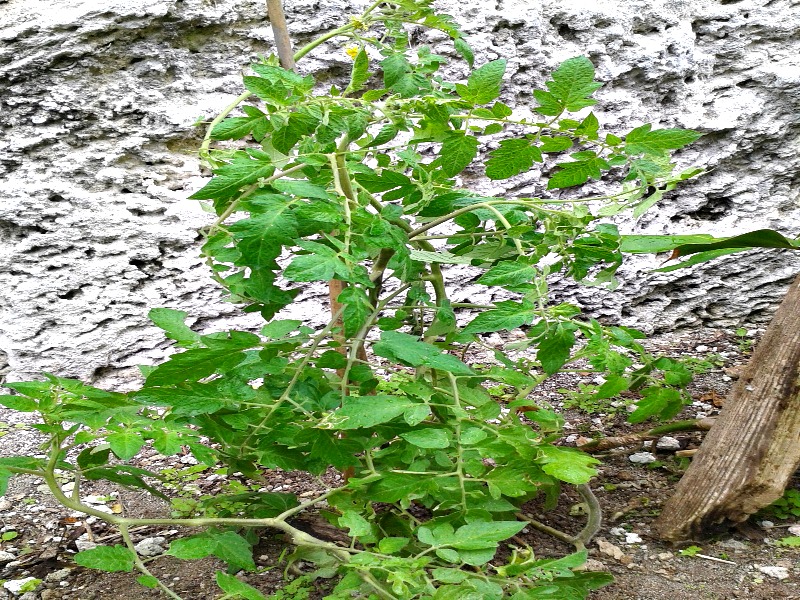 Here is a picture of a large variety tomato plant approximately three months old planted from seed in early November 2014 supported with wooded stakes.
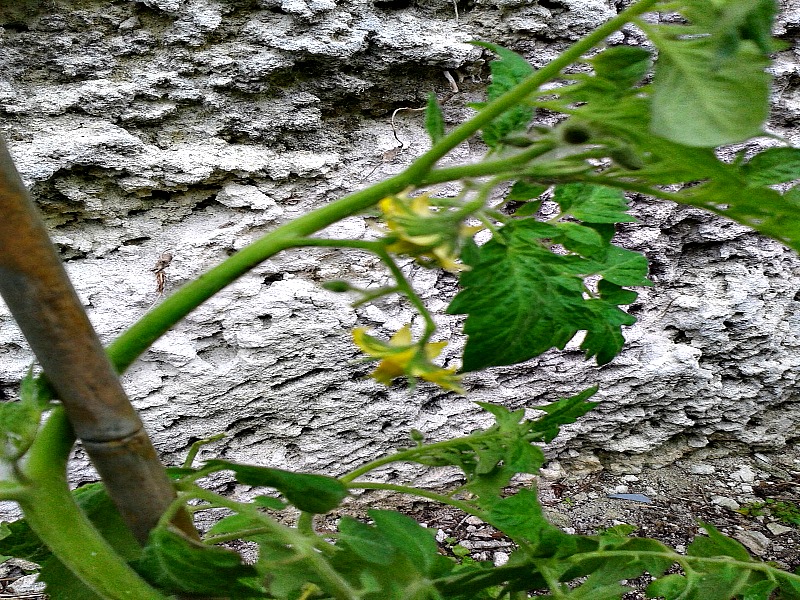 Depending on the variety of tomato, it can take from 70-81 days from seed to fruit or even 100 days for the hybrid. The bigger the variety, the longer it takes to fruit. The smaller varieties take approximately 45 -70 days.
Tips:
In colder climates you can sow your tomato seeds 6-8 weeks before planting outdoors. Planting your seedlings outdoors should be scheduled around 2 weeks following the average last frost date for your growing zone.
Plant herbs like cilantro and dill near tomato plants and let them go to flower. They attract beneficial insects that keep pests such as hornworms under control.
Give your plant frequent, light watering and keep it in a sunny place to encourage growth.
When watering, it is best to soak the root system well, and then allow the surface to dry out somewhat before watering again. Depending on the weather this may mean watering once a day or once every two weeks. Test it by sticking your finger into the soil. If the first two inches are dry, it’s time to water.
Watering the soil rather than the leaves and mulching the ground with a material such as straw will keep the water from splashing onto the lower leaves and stems. This can help prevent diseases from spreading.
Some gardeners even remove the lower leaves of tomato plants once they are well established to prevent them from picking up diseases from the ground. Red plastic mulch is said to keep nematode populations down. There are, however, diseases for which there are no resistant varieties.
Please note that every time you water a potted tomato plant, you are washing nutrients out of the soil and since tomatoes are heavy feeders, you need to fertilize regularly preferably with either fish emulsion or seaweed extract. Once a month is good, but every other week is better and apply the fertilizer at half-strength. This will provide a constant source of nutrients for the tomato tree’s needs.
Irregular watering, (missing a week and trying to make up for it), leads to blossom end rot and cracking. The rule of thumb is to ensure your plants get at least 1 inch of water per week, but during hot, dry spells, they may need more. If your plants start to look wilted for most of the day, give them a drink.
Pinch and remove suckers that develop in the crotch joint of two branches. They will take energy away from the rest of the plant. But go easy on pruning the rest of the plant. You can thin out a few leaves to allow the sun to reach the ripening fruit, but it’s the leaves that are photosynthesizing and creating the sugars that give flavor to your tomatoes.
Once the fruit begins to ripen, you can ease up on watering. Lessening the water will coax the plant into concentrating its sugars, for better flavor. Use your judgement. Don’t withhold water so much that the plants continually wilt and become stressed or they will drop their blossoms and possibly their fruit.
Support for the tomato plants are important in aftercare because:
1. It helps to avoid diseases
2. It makes it easier to harvest
3. It keeps the fruit clean
4. It makes it easier to spray and monitor problems
All varieties of tomatoes benefit from some support. There are many ways to support your tomato plants. Wood stakes are a simple and inexpensive solution. You will need to tie off the plant to the stakes. Be sure to use several to support your plant well. Another way is creating a real focal point in the garden by making a tall tepee trellis using extra-long pieces of bamboo.
Mulching, while less important in a container than in a garden bed, is still a good idea. It will keep weeds from growing in your tomato pot and retain moisture, so you won’t have to water quite as often. The best mulches are pebbles, bark mulch and straw. Another choice is using the black or red plastic. Simply lay it over the soil before you plant your tomato, cut a slit large enough to put the plant in, and hold it down with metal stakes.
Growing fresh tomatoes is one of the true joys of the vegetable gardener. But tomatoes can suffer from all kinds of diseases and pests. Problems growing tomatoes are often the result of weather conditions. This is something that is out of the gardeners’ control. However if you know your area is prone to a certain disease, you should look for tomato varieties that are listed as resistant.
ABOUT THE AUTHOR
 I am from beautiful Bermuda born and raised. I’m an avid gardener and I intend to sell my organic fruit trees (grown from seed) and tropical plants right from my small yard. I have traveled the world as an opera singer and now I teach here in Bermuda as a voice teacher and coach. I’ve been married for almost 45 years and I have three children and four grandchildren.
I grew tomatoes in the early 90’s, once in Long Beach, CA . Got busy with other things and am just getting back to tomatoes,
Now live most of the time in Baja, Mexico. Bought 6 seedlings 10 days ago.
Really like the posts from folks that have done it.
Wind is a BIG problem here. Any advice ??
RDO,
Maybe a wind break. Check out silt fence.
I have been growing vegetables, especially tomatoes & cucumbers for years but I am having trouble I believe because I see hardly any bees for pollination. I hear this is a problem for others. Someone I know has bumble bees & has had tomatoes but it seems they have chosen not to show up after several years of having them as well as cucumbers. A couple of years ago I planted cucumbers & although they were loaded with blooms I found that they fell off or just disappeared without a single cucumber.. Hives are not permitted where I live if that might be a solution but I wondered if there is any way to attract bees in order to benefit from pollination & have the plants to produce. I use plants I have used in the past so I know I have some that should produce. I built a raised garden about 3 or 4 years ago & put rich soil in it in hopes that it would help. If there are any ideas, I would appreciate hearing about them.
David,
Lots of colorful flowers in your yard will for sure attract bees.
HI, Tomatoes can be wind pollinated , or even hand pollinated (once the blossom opens use a small artist brush to drag pollen to center of flower.
Also note that tomatoes require a temperature range of usually 55 to 85 degrees for the pollen to be active ( outside of these temps you can trick the plant into producing a tomato by placing a small drop of dilute Endol acetic acid at the center of the open flower ( a tomato will form and ripen normally but won’t have any seeds ) Cucumbers which require it can also be hand pollinated by using your brush and touching the center of a male flower and then touch the female flower.
The female flowers have a small bulb at the base like a baby cucumber. There are also some types of cucumbers that are self fertile and will set fruit on their own , but these types have expensive seeds 1
Using store-bought tomatoes as a source for seed is a BAD idea. Most commercial tomatoes are hybrids that are bred for qualities such as simultaneous ripening, resistance to diseases and tough skins to survive shipping damage and NOT good flavor. Being hybrids, they will not breed true so you cannot guarantee what the fruit from their plants will be like. Also, the gel-like coating around the seeds actually restricts their growth. If you had removed it by a simple washing or fermenting process, the yield from your “throw the tomato on the ground” method would have been much greater.
For the price of two store tomatoes, you can buy a pack of open-pollinated tomato seeds from a reputable supplier which will have much better taste and will produce seedlings exactly like their parent.
Hi, You are correct about most store bought tomatoes, but what you have said doesn’t apply to using seed from organic tomatoes, which are usually not hybrids, but true open pollinated seeds. By law all organic produce must come from organic seeds which are usually not hybrids.
Alex, very few commercial tomatoes are open pollinated, although you can find many at farmer’s markets. And by the way, “organic seeds” is a meaningless term. Seeds from the same OP variety identical whether grown with “organic fertilizer” or not.
As opposed to watering from above in potted 5 gallon plants, why not have the bucket sit in a shallow pan where you can just keep the lower pan full of water and the plant can take what it needs when it needs? Pros and cons of this idea?
my tomatoe plant leaves look awful. dried looking / brown and yellow in color. please help me..
Very good advice. Tomatoes are easy to start, but a little difficult to raise up to harvest point here in Florida with the heat, rain, bugs etc. but well worth the effort. I notice that the author is from Bermuda. When I was a child in the 50s & 60s my mom used to buy Bermuda onions. They are a mild yellow onion. They have stopped selling them locally and I would be interested in obtaining some seeds if that is possible.
I read Mike all the time, so I will watch for future posts.
My neighbor worked for the city in the sewer department. several years ago he let the city spread the sludge from the sewer plant all over his bean field. Then the tomato seeds sprouted. Every time the combine got to that area, they had to shut it down and cut out all the tomato vines before they could go around again. This continued for several years.
We never had a time we didn’t have LOADS of tomatoes.
Be careful, some if not all wastewater sewage sludge contains heavy metals and pathogens if not treated correctly before spreading it.
I have worked in the wastewater treatment field for several years. The sludge from the municipal or industrial wastewater treatment facilities is NOT really suitable for edible crop fields – it is not “organic” because so many other undesirable wastes, chemicals, and metals are in the sewer wastewater (not just toilet contents!). Also, pharmaceuticals (flushed drugs) have not yet been proven to be eliminated during treatment. Yeah – great to reduce costs and disposal transportation for the wastewater treatment facility, but I wouldn’t want it in my body 🙂 Yuck
I finally got my plants started & already some have Bloom’s on them and they are looking great & beautiful.thanks for the good advice Mr.Mike. I also live in South Tampa Florida
You’re welcome Stephen, good luck and have fun!
Mike, my memory ain’t worth a crap. I think you used to have your information in the emails you sent. In the last year or 2 you have to click on a link to see the information you mention. 95% of the time I never see what you are saying. Simply put, I rather see information in original email. I have cat scans proving my thinking isn’t like most folks.Cat scans also proves my memory isn’t what it used to be. I appreciate the information you give out to folks.
Ronnell
I agree with Ronnell 100%.
I mean, I’d rather see information in the original email. If I have to click on a link, often I just delete.
Since I don’t charge for this information, even though I’ve invested tens of thousands of hours of my own time creating this content, I think having you click a link is a pretty fair trade for the information that we give away.
II believe the canned tomatoes story….when sludge from water filtration poos was first offered for home use,,,,,the yards turned into tomato gardens. I think tomatoes are indestructible.
Very informative
While in the Navy I was stationed on Andros Island in the Bahamas. Someone must have thrown a tomato into a pile of dredged coral. The tomatoes although tasty left our hands stained yellow. Just goes to show tomatoes are easy to grow.
They like warm soil. I dig a funnel shaped hole to start the plant in. As the soil warms each week I back fill up the stem removing the bottom leaves. The stem then sends out more roots to feed the plant. Because tomatoes love magnesium sprinkle a little Epsom salt for the roots to grow into..
Another trick to warm the soil is green/fresh cow manure.. Dig a hole 12″ deep put some in maybe an inch and cover with an inch or three of soil then set your plant as if that was the bottom of the hole. As the manure works it generates heat. This is also a trick to get Cannas to grow earlier. Use more fresh stuff 3″ plus 3″ to cove it. Set the tuber on that and back fill.
The issue with this method is that you will find that very few market tomatoes won’t come true to variety. Most will readily revert to cherry sized fruit. The fruit flavor is seldom near the quality of a known hybrid or heirloom. The only tomatoes that can be successfully propagated true from seed are heirlooms or more correctly, open pollinated. My tomatoes are far, far superior to store bought.
@Charline You can avoid the possibilities of introducing unwanted pests by simply obtaining some calcium sulfate. The common name for this is gypsum. It’s available at most nurseries or simply peel the outside paper from from some scrap gypsum wallboard.
How do you use calcium sulfate? Do you mix it in the soil, spread it on top, or sprinkle it on the plant? I’ve not heard of this before. Thanks Phil.
In February or March, I start tomatoes from seeds I saved from the previous year or from sandwiches and salads.
I place about 5 seeds spread out in small containers such as paper mouthwash cups or other 2 or 3 ounce containers. I place some seed starter in the container then add some of the dry seeds. As the seeds sprout, I constantly add more seed starter until the container is nearly full. The idea is to keep the stem buried and only the topmost leaves exposed. New roots will grow from the stem.
Once the tomato has grown to a size about double the starter container, I select the strongest looking sprouts and move them to a next size larger container which are usually 6 ounce paper or plastic cups that I use in pairs. The top cup has holes in the bottom. I add diluted fish emulsion fertilizer to the bottom cup. This way the new plants are bottom fed. I place the transplant at the bottom of the cup then add more of the seed starter – again most of the stem is buried and only the top leaves are exposed to light. As the plant grows, I add more seed starter allowing only the leaves to see light.
When the plant is about twice the height of the pair of containers, I move it to a larger container – usually a pair of `16 ounce soft drink cups that I save from restaurants. Again, the top cup has holes in the bottom so I can bottom feed. But now since the plant is stronger I stop using seed starter and start using potting mix. As before, while the plant grows I keep the stem buried and only the top leaves exposed to air and light.
When the plants grow to about double the height of the soft drink cups, I move them to clean 32 ounce milk or other beverage cartons. I no longer bottom feed. As the stems grow, I bury them with potting soil.
Are you starting to see a pattern here?
My final carton is usually a clean 64 ounce orange juice carton.
When the plant has outgrown the juice carton it is usually well past any danger of frost and the ground is warm. The plant is tall and healthy. I cut off all of the limbs allowing only a few stems and leaves at the top.
I dig a hole about 3 feet deep in the ground. Then I place crushed egg shells at the bottom and after cutting away the carton, I place the rootball deep down into the hole. I allow about 2 inches of stem and leaves to show after I fill in the hole with potting soil mixed with some of the dirt.
What this technique does is give the plant a VERY deep root structure so it will survive the scorching summer heat. This process has given me tomato plants that grew taller than the side of my garage and up onto the roof!
Terry,
Thank you for the very detailed reply.
I’ve found that mulching my garden with folded newspapers – just as they come off the bundle – and laying them overlapped like shingles with the folded edge exposed to the wind, works beautifully to keep the soil moist and cool, reduces insects, prevents mud from splashing up onto the plants, and allows me to walk in the garden after rain or watering without sinking in mud!
Extra-thick papers can be broken down into sections, but it is crucial to leave them folded – I found out the hard way that spreading them out just lets the wind catch and blow them away. Leaving at least a half-dozen to a dozen pages folded together, overlapping by an inch or two so that the thickest folds are all that’s exposed to the wind and weather, works the very best. I snug them to within an inch of the plant stalks, under beans, potatoes, peppers and tomatoes, around chard and lettuce, etc.
My mother has gardened in the same place for over 20 years and the clay soil would always bake hard as cement if she didn’t keep it cultivated, but she pulled every weed she could and hauled them all away, leaving the soil exposed. By the height of summer, it was so hot that I could rarely find an earthworm in the garden. However, after I began mulching with newspapers, the worms loved to hang out beneath them in the cool, moist earth. We noticed there were hardly any potato or bean beetles, fewer cabbage loopers, Japanese beetles and other pests. We weren’t sure whether it was the effect of the newspaper mulch or of any pesticide spray drift from nearby farm fields since there were also very few honeybees last summer, but we were happy to not have the pests!
Perhaps the biggest blessing of all was not having to pull weeds! Overlapping the papers prevented sunlight from reaching the millions of weed seeds in the soil, and even where they DID manage to sprout before I could cover them, the papers soon suffocated them and they became food for the earthworms. The few that sprouted up between the papers and the vegetable plants were spindly and easy to pull..
This year I intend to try smothering the grass with newspapers in some of my yard so I can garden here at my house without having to dig it all up. Then I will try container gardening in buckets with holes cut in the sides for air-pruning the roots, set on the newspapers so I won’t have to mow between them or worry about pests crawling up into them from the soil. I will build wooden frames around sets or rows of the buckets to hold them in place so the ubiquitous wind doesn’t blow them over when the plants grow tall.
This has been a long, cold winter in Finger Lakes country in upstate New York, and I can hardly wait to get started!
Becky,
Thanks for the great information. I too am desperately awaiting spring!
If you want to clear grass for a garden, lay down a piece of old carpet on the area in the fall. By spring, the grass is all gone, and you can go on with the paper program. I I find that my shredded paper works as well for ground cover, it is softer and lalys down quickly, a shot with the hose lays it flat. I put 2-3 inches down, cover it with old hay and a\the worms and II garden all summer.By the way, I use hay because it still has nutritive value….Straw is just cellulose, with no value to the soil.
Your paper project is right on. I find that I can use my shredded paper as well, 2-3 inches deep. I cover that with old hay and then the worms are fed, the weeds are covered. by the way, I use hay as there is still nutrition in hay, while straw is only cellulose, and the worms aren’t that fond of it. My layering in the spring is gone by August, so i do it again. My garden was a sand hill when I started, and now is deep, dark dirt. Also, i make jeep ditches to plant my tomatoes, leaving only 3-4 inches of plant above ground. All that buried stem —10-12 inches, grows roots..
Good column. Have had similar results after throwing rotten tomatoes in compost pile. Compost put into earth later on often surprised me with tomato seedlings all over the place.
I spread the fresh tomato seeds on kitchen paper towel like butter; leave on a windowsill to dry then place kitchen paper towel on top of compost cover with fresh compost and water and voila little tomato plants. Easy peasy
I used to do them that way. But I got occasional fungus that grew on the paper and spread to my seedlings.
Now I write my Plant Description on BLEACHED PAPER coffee filters, and smear the seeds onto the paper. No more fungus on the paper. . I cut/tear it into strips and plant it. Works better. Plus you can write on it.
Good Growing!
DON
I find that my tomatoes do better with crushed egg shells in the potting mix. It seems to prevent blossom end rot, and makes for a more vigorous plant. Maybe it’s just that California soil is calcium deficient, but it works for me.
Great idea! On another note:
my late uncle told me that he planted his favorite tomatoes by purchasing his favorite can whole tomatoes and used the entire can in a row! Doesn’t seem logical because of the canning process but he swore by it.
i’ll have to try it sometime along with the above ideas!