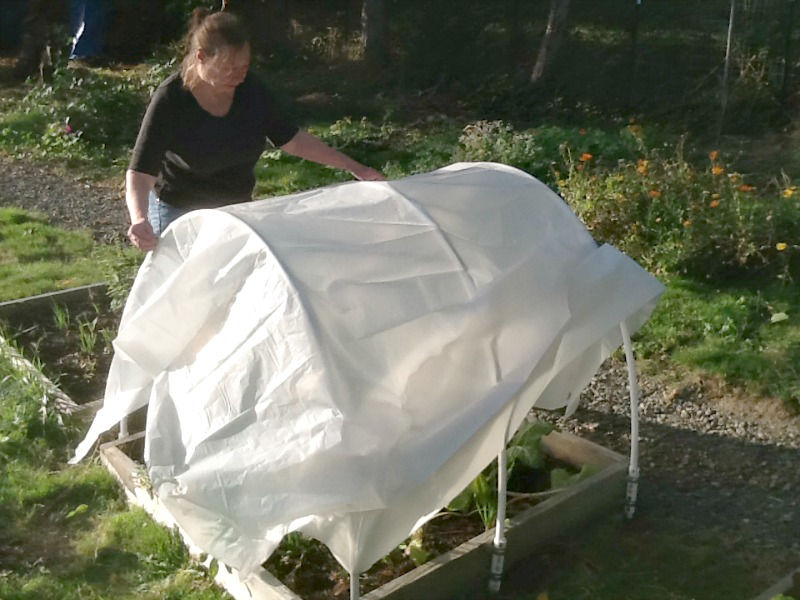
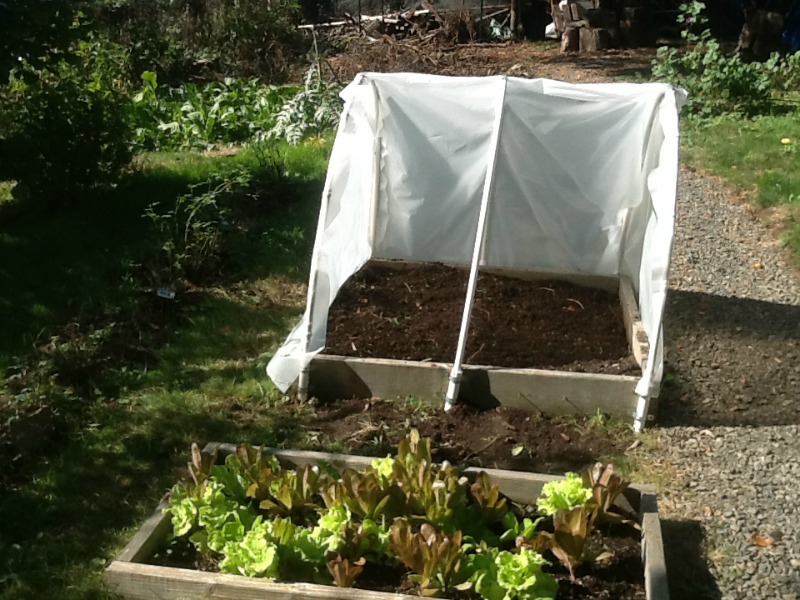
A hoop house or cloche is a tunnel made of plastic, usually semi-circular, square or elongated in shape. The interior heats up from the sun and warms the plants and soil inside, keeping your plants nice and cozy over the colder months.
Instructions for your DIY hoop house for a wooden garden bed frame
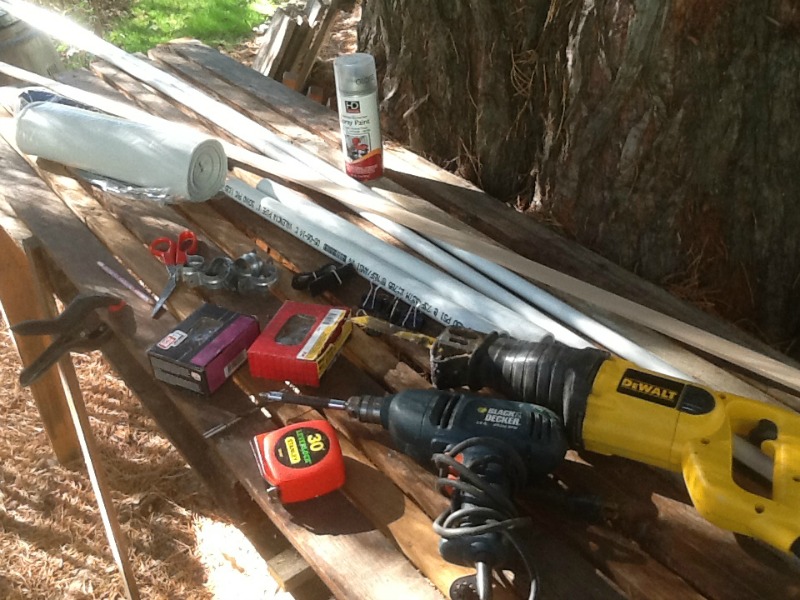
Materials needed
- 3 ten foot 1/2 inch diameter PVC pipe for the hoops
- 1 one inch diameter PVC pipe for the hoop holders
- 12 one inch pipe straps
- screws to secure straps to wood
- 10 foot by 25-foot heavy-duty opaque builder’s plastic
- 12 inches of self-adhering velcro.
- 8-foot lath strip (thin wood strip) cut into eight 1 foot lengths
- finishing nails
Tools needed include a vise grip, reciprocating saw, drill, scissors, hammer
STEP ONE: Cutting the materials. Cut the 10 foot 1/2 inch pipes to 9 foot.
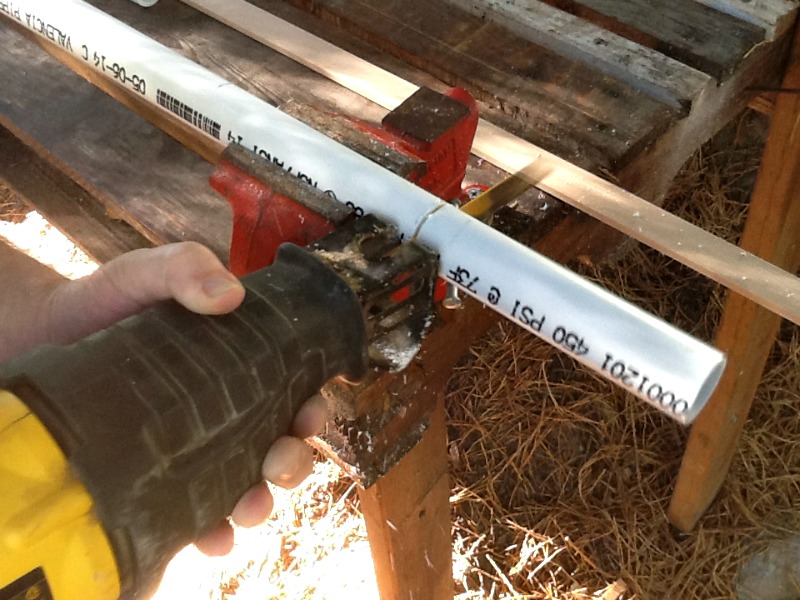
Cut the 1-inch diameter pipe into 8 six-inch long sections.
Cut lath strip into 8 twelve-inch lengths,
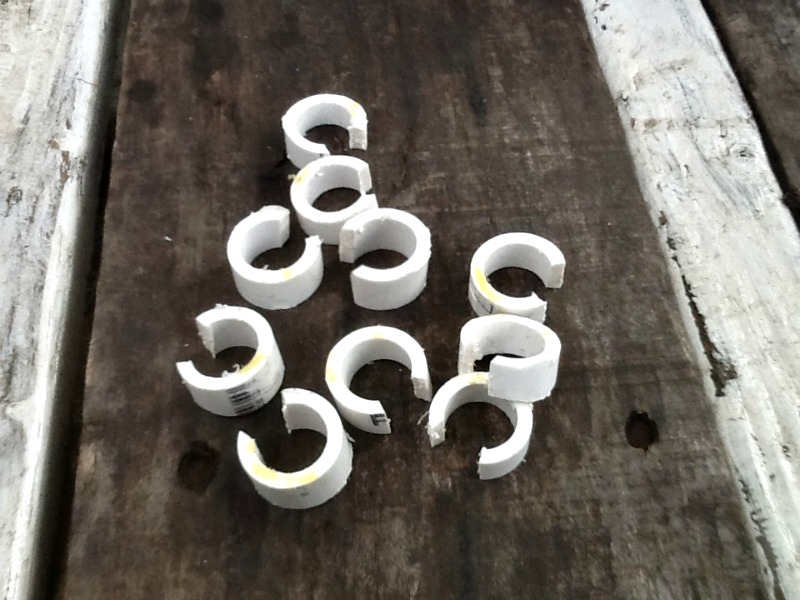
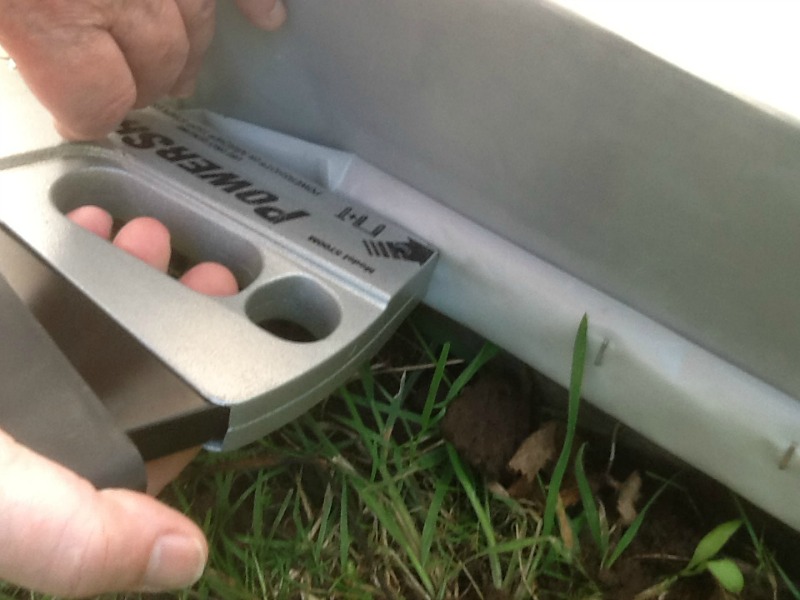
Cut rings about 1/2 inch wide from the remaining 1/2 pipe.
Cut 1/4 section from each ring leaving clips to hold the plastic on the hoops at each end.
STEP TWO: Secure the hoop holders.
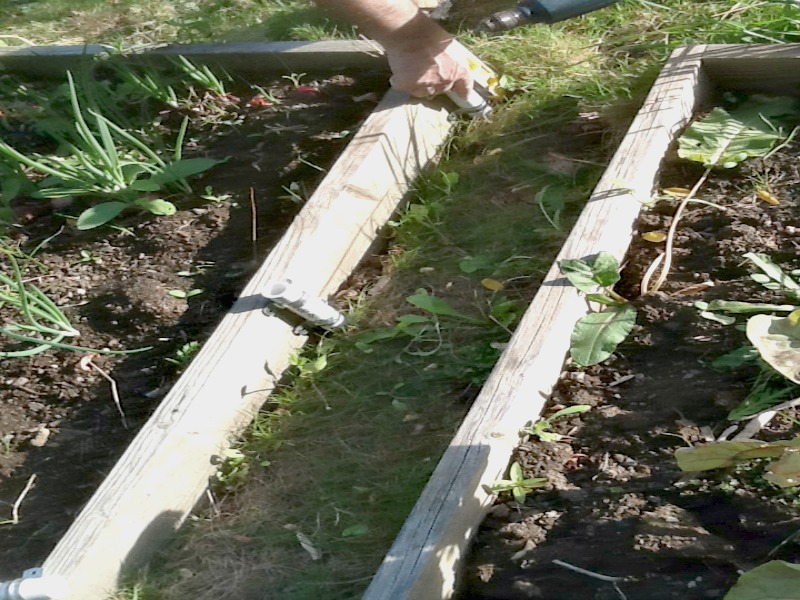
Attach the 1-inch pipe lengths to the side of the wood frame with the pipe straps.
Use two straps on each pipe. Measure and attach the straps to the wood with 1 1/2 inch wood screws so that the hoop holders line up on each side of the wood frame.
STEP THREE: Assemble the structure.
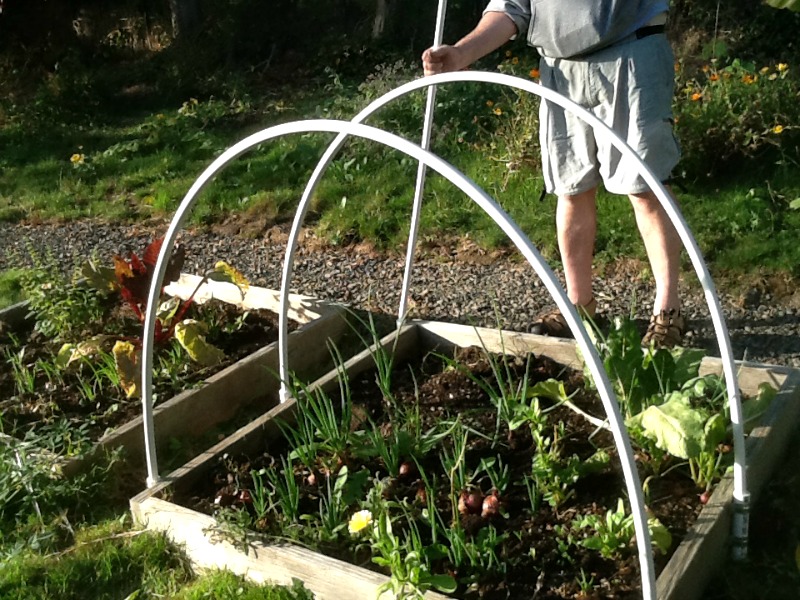
Insert one end of the 1/2 inch plastic pipe in the 1-inch pipe holder, bend it across to the other side and insert the other end in the holder on the other side.
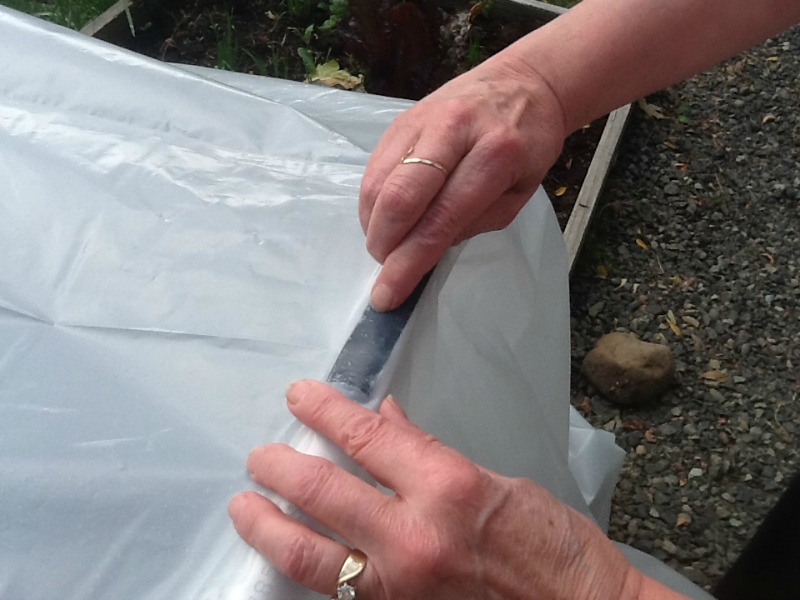
STEP FOUR: Cut and attach the plastic covering at each end.
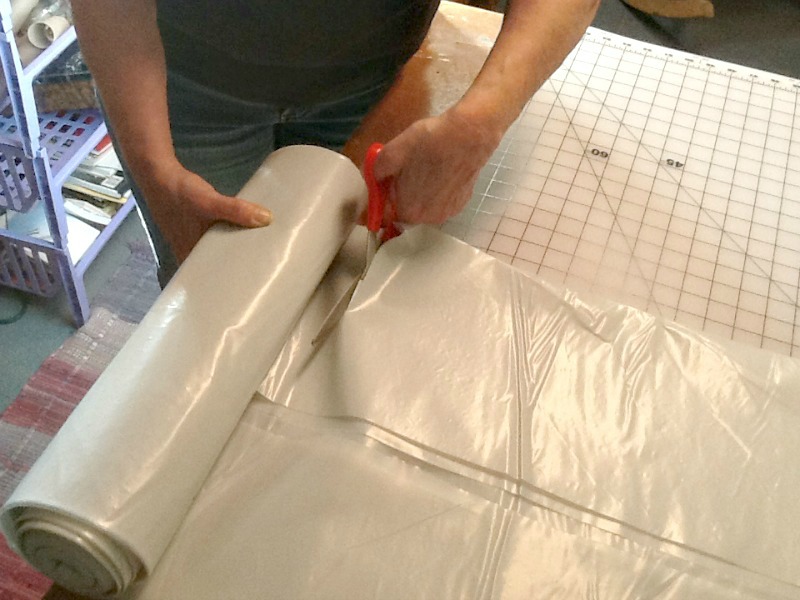
Cut 8 foot of the builder’s plastic for an 8 × 10 section and cut this in half.
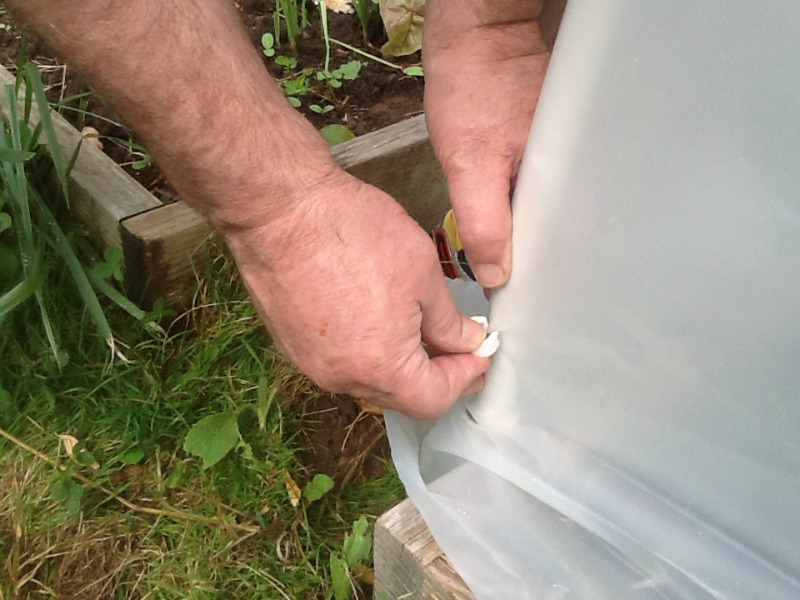
Attach one of the plastic halves to each of the hoops at the end, securing the plastic with the plastic clips you made. Take your time. This takes a little muscle and you don’t want to rip the plastic.
Once the plastic is attached, cut off the excess to about 4 inches from the frame
STEP FIVE: Prepare and attach the center plastic cover.
Cut a piece from the remaining plastic that is 24 inches longer than the bed the plastic will cover. Drape the plastic over the hoops and line it up to fall evenly.
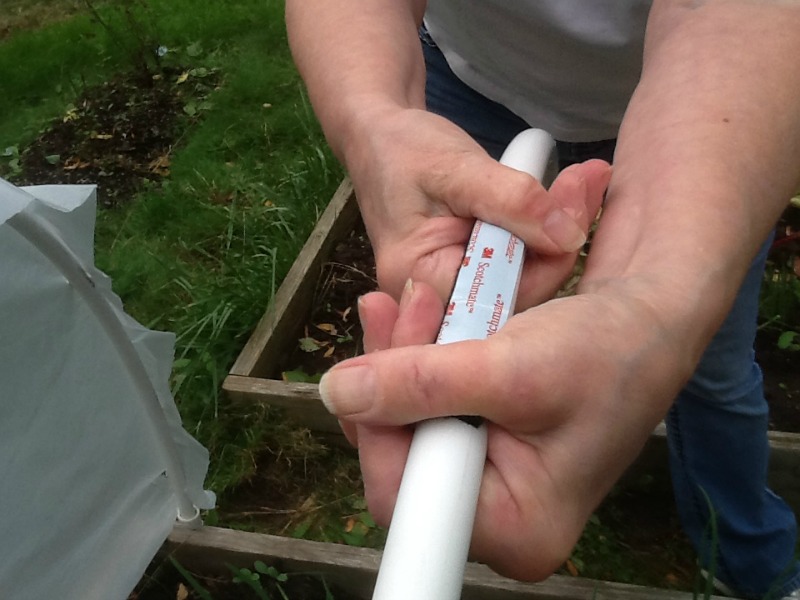
Fold the plastic back from the middle and attach 4 inches pieces of self-fastening velcro to the very top of each hoop.
Peel off the protective paper and unfold the plastic across the hoops and press firmly to adhere.
STEP SIX: Fasten the cover to the frame
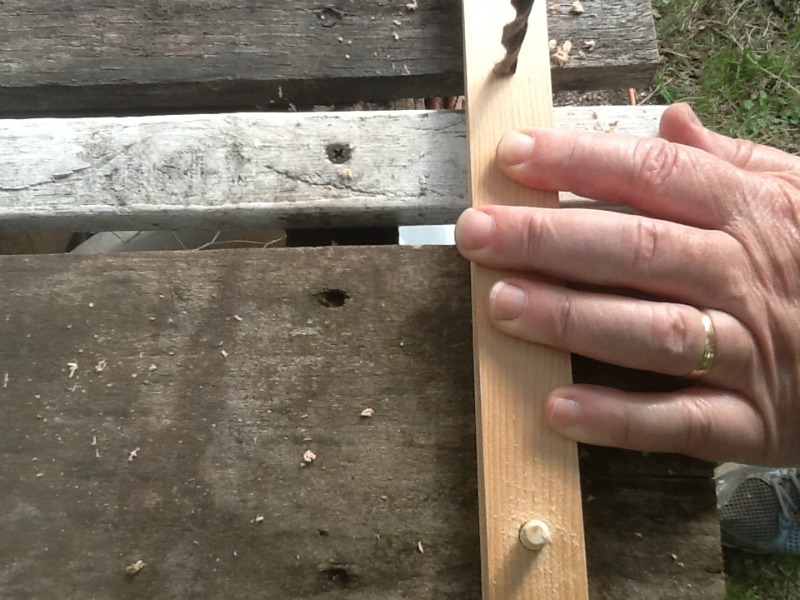
Align two 1 foot sections of the lath wood and drill two holes through both pieces.
Repeat with the remaining lath strips so that there are four pairs with matching holes. Use a peg to hold one set of holes in exact alignment while you drill the second set.
On the bottom of each flap attach the lath strip to the plastic in pairs between the middle and end hoops, two on each side. Roll up the plastic and lath pieces and staple together.
Nail finishing nails through the aligned holes in the lath strips into the wood frame for all four sections.
Once all the lath has been secured, wiggle the lath strips and plastic pieces free of the nail so that the plastic cover can be lifted from either side and then refastened when necessary.
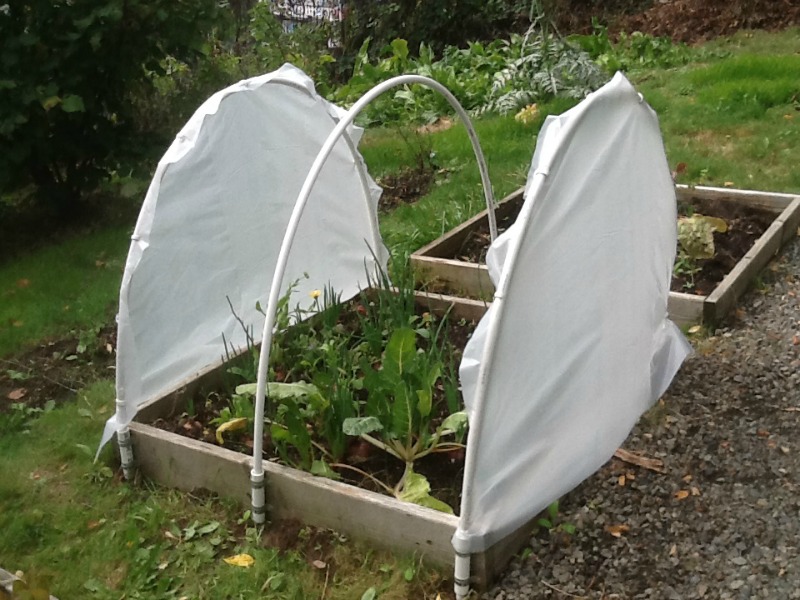
STEP SEVEN: Get growing! Fold back the cloche cover on warm winter days and water appropriately.
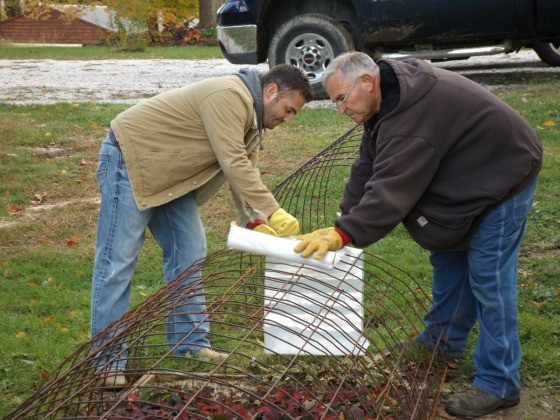
Click HERE to see how Duston and Mike made their hoop house!
My zip is 32060 and do not have internet, could someone please tell me what zone that I am in ?
Loraine,
Zone map for the United States:
http://www.usna.usda.gov/Hardzone/ushzmap.html
Zone map for Canada:
http://nlwis-snite1.agr.gc.ca/plant00/index.phtml
Zone 8b
Loraine,
Live Oak, FL is zone 8b
8b
Instead of pvc pipe I use 3/4 inch black poly pipe…the kind that comes in a roll used for irrigation…and cut it to length. The pipe slips over a rebar type 3 foot fence post at each end. The posts are spaced along the inside edge of my raised bed about 2 feet apart. The posts are long enough to keep the piping not only in place but keep the house from shifting in the wind. I made clips out of the pipe in the same manner. I happened to have some left over wiggle wire and track so used that to secure the plastic to the sides and ends of the outside bed. …great stuff. Poly pipe lasts forever and it won’t snap off in a high wind or degrade in sunlight. The wiggle wire makes it easy to unfasten the plastic for ventilation if required. Depending on the size of the bed/plastic the ends can lap over so one piece of plastic sheeting is all that is required (cut off any excess) as the wiggle wire will fasten several layers easily.
Each year I donate a couple thousand plants to local charity plant sales and community gardens. This includes perennials that I pot up in the fall and tomatoes, etc. that I grow from seed in the spring.
The potted perennials are set next to each other on the ground. I lay a few small empty pots on their sides with packets of rat/mouse bait in them scattered between the big pots of perennials. I put a corral of chicken wire around the perimeter of the group of pots. Then I dump a few inches of leaves or straw on top of all the pots just before it snows. When it thaws out in the spring I remove the leaves/straw.
I start all of the tomatoes, peppers etc. in our basement in a warmed enclosure. When they get too big to live indoors I set up a couple 4′ x 20′ temporary hoop houses in the back yard. I do not use PVC for the hoops because it is not UV resistant. Instead I use 10′ UV resistant plastic conduits. The UV resistant conduit is not very flexible–I bend it into permanent hoop shapes with a heat gun (sort of like a hairdryer on steroids). What Mike says about lifting the plastic side of the house to keep it from cooking inside is vital! After all of the starts are either planted or given away the hoop houses are dismantled until the next spring.
As they say, there are lots of ways to skin a cat.
Great information Jennifer, thanks for sharing your simple but effective method of over wintering plants. I should do more of what you do!
Jennifer: If you use the gray PVC electrical conduit (which is UV resistant) it should be just as flexible as the white PVC water pipe.
Hi Jennifer,
I live approx an hour north of you.
Have you ever tried using cornbread muffin mix with added baking soda as a mouse poison??? I saw a YouTube video about it and am planning to use it here.
We have a dog sanctuary at my home and need to have something really safe.
I found a monster size dead mouse by the garage last week and realized that it may have been in the garage eating the mouse poison.
We are trying to do some gardening here but have space limitations due to the dogs needing a play space. This year we planted potatoes in cardboard boxes and set them on the driveway pad. They seem to be doing well.
The baking soda added to the cornbread muffin mix…..cornbread entices and because mice can not BURP, the baking soda kills them,…..totally nontoxic.
I have found this web site, and also the comments of other readers to be a great source of information, and education. I have learned things here, not covered on some of the university agriculture webs. Thanks to all.
Mike,
As a would be beginner in plants and vegtables I find most of your blogs and even in the comments section from other readers to be most helpful… I enjoy reading through them all… I wish there were more of them and more ideas even… I guess everything can’t be free 100% of the time but its glad to know and is a relief that there is someone like you out here always with some advice… Right or wrong, we all learn through trial and error. Making mistakes is part of life, but when ya share your knowledge others learn to.
Just wanted to say thanks and keep up the good work… I enjoy all your emails
John,
We do our best to provide as much free information as we possible can and I have been doing so for over 16 years now. In that time we’ve compiled a ton of information over three websites. http://freeplants.com, http://mikesbackyardnursery.com/, http://japanesemaplelovers.com/
If you are in an area where people are remodeling you can reuse sliding glass doors and windows of all kinds . A lot better than busting them for the dump. Also you might set 5 gallon buckets or jugs full of water to grab heat and then release it slowly when the sun goes down. could also use a seed starter heating pad in there to help in cold areas. Jerry
Mike,
The PVC pipe has a reaction with the plastic and will eat away at it. Slip a barrier between the plastic and the PVC pipe and the plastic. I lost my hoop house this way. All the west side of the hoop house became brittle. There was a storm and the brittle area slit. The next thing that happened was the hoop house was lifted off the ground and was smashed to smithereens 200 ft away.
I had real greenhouse film with a warranty on it. It was not covered by the warranty because of this (although they also DID not tell me about this issue when I bought the film!)
I am planning on buying a pipe bender so I can make hoops of metal. In the meantime I found an old metal shelter frame and will use that .
Keep planting !
Kristen
Thank you for that advice Kristen! This project was submitted by one of our readers, Merlin.
Great piece of information. I knew the structure would grow more brittle over the years but didn’t’t realize it was a chemical reaction and so easily preventable. Thank you for sharing.
What if you coated the PVC with paint? do you think that would protect the plastic?
Cyndy: I don’t know if painting it would help but if you decide to paint your PVC keep these 2 things in mind. First the surface of the PVC has a kind of glossy finish. Paint will not adhere to it properly. Use Citristrip paint remover to clean the PVC. It is a quick and easy way to remove the gloss and prepare the PVC for paint. (Don’t get oil or fingerprints from your hands on the PVC after you clean it. Either wear gloves or remove your finger prints with rubbing alcohol.) Second use Krylon Fusion paint for plastic to paint it.
A neighbor had a carport that was made of plastic and it split so he had a new cover made. Before putting the cover on the pvc he covered the pipe with pipe insulation. I think that might work for this, too, and it’s not very expensive. Maybe a person could put some cloth over the pvc as an insulator between the pvc and plastic.
Loretta,
Great suggestion about the pipe insulation. That will keep the plastic from wearing through where it meets the hoops.
Here’s another point with hoop houses of all kinds. The plastic has to be really tight. If it can move it all it work a hole in the plastic, the wind gets in and away it goes.
You can bend pipe with hot sand if you wanted to go the cheaper route! There is a video on YouTube I saw where someone did it. 🙂
I use live stock panels.. Wire them together and walk them together to form the hoop.. For Floor fasten wire at bottom and secure to bottom other side to hold your shape.. Run 2×6 down each side to secure wiggle wire track and use regular greenhouse film.. Framed a door in on one end and window in other.. Lasted a long time.. I use the same method to tarp and form rain and shade shelters for livestock.. Not fancy but fully functional.
I live in northern Wisconsin will the hoop house work with the sub zero temps up here?
Joyce,
It depends on what you are over wintering, but if the plants that you are growing are hardy in your zone, then the hoop house is all the protection they need. You have plenty of cold weather, but even here in Ohio it often gets well below zero and in most cases the plants in the hoop houses work great.
A hoop houses isn’t meant to keep your plants from freezing. It’s meant to keep them from freezing and thawing, freezing and thawing. It also keeps them hydrated which is really important when they are frozen.
I couldn’t’t have put it better myself. Thank you Mike.
Joyce Ann: You’d probably need to keep the snow cleared off it is so that it doesn’t collapse under the weight!
Snow load is an issue, lots of hoop houses that are not constructed strong enough come crashing down every year. Amazingly the mini hoop houses that I show people how to make hold up really well. http://mikesbackyardnursery.com/2013/11/over-wintering-protecting-plants-for-the-winter/
did you mean lath strips instead of lattice?
Sharon,
Yes, I think she meant lath strips. Thanks for pointing this out. -Mike McGroarty
Did you mean cut off four feet off the ten foot wide roll for the end pieces of the hoop shelter?
Yes, probably so. Oh boy, is my face red. Thanks for pointing that out.
Don’t feel bad, I’m like the king of typos, but people still appreciate the content. Every once in a while somebody goes to school on me about typos etc. But you know what? I do the best I can which is a lot better than most of my critics.
Don’t be too hard on the spelling critics Mike. I know some of them are jerks but most are just trying to help.
Thanks for this nice article !!
Partha
Thank you all this helps alot. BCB