Mike's Backyard Nursery

The Most Fun You Can Have With Your Bibs On!

  • Home
  • Recommended Tools
  • Products
  • Categories
    • Complete Guides
    • Gardening
    • Growing
    • Landscape Design
    • Plant Care
    • Propagation
  • Contact
  • About Mike
Home » Backyard Nurseries » DIY Raspberry Trellis

DIY Raspberry Trellis

Updated : December 18, 2014

11 Comments

Raspberries will grow happily without any support at all, but having a raspberry trellis /support system makes gardening easier for you!  raspberry trellis 1
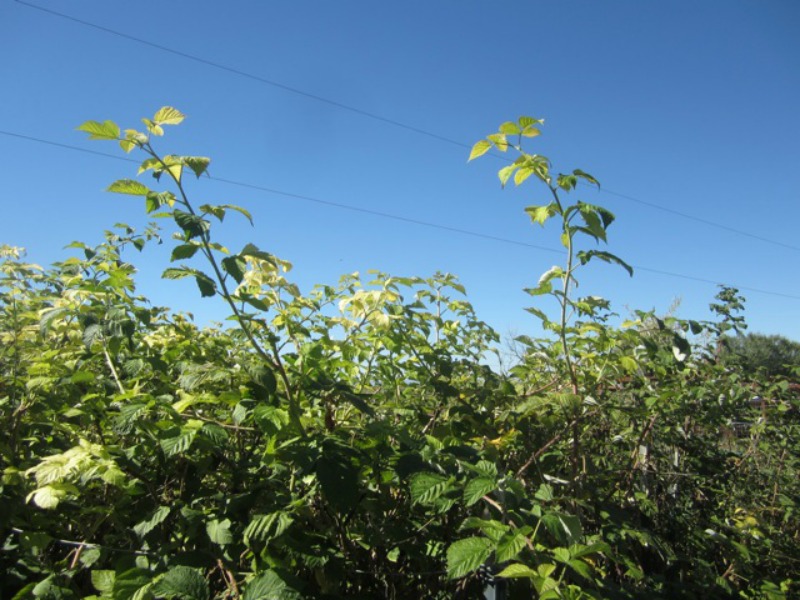
If left to their own devices, raspberries will form an arching plant about 7 to 9 feet tall.

Making a support keeps these plants neat and tidy, enables easy walking between rows, and makes harvesting convenient.

This raspberry trellis is simple and easy, no carpentry needed!

Materials you’ll need for your DIY Raspberry Trellis:

6 foot tall stakes or posts, Wire(10 or 12 gauge galvanized wire works well), Mallet, Old carpet or cardboard

Step 1- Outline your raspberry patch

Start by outlining the confines of your raspberry beds. Mine are 3′ x 12′.

Three feet depth gives you the ability to reach into the center of the patch from either side, not missing any juicy treasures!

If your raspberries are growing along a fence or wall, keep the depth of your bed at 18″ so you can reach in to harvest easily.

Lay down strips of old carpet, wood, or even cardboard boxes around the bed you have outlined, creating a border and barrier so your new raspberry shoots will come up in your patch, not in your path.

trellis carpet trellis carpet 2I use wide pieces of old carpet between the rows in my raspberry patch and it prevents weed growth and directs new raspberry shoots to come up in the bed.

 Step 2- Put in support stakes or poles

trellis carpet
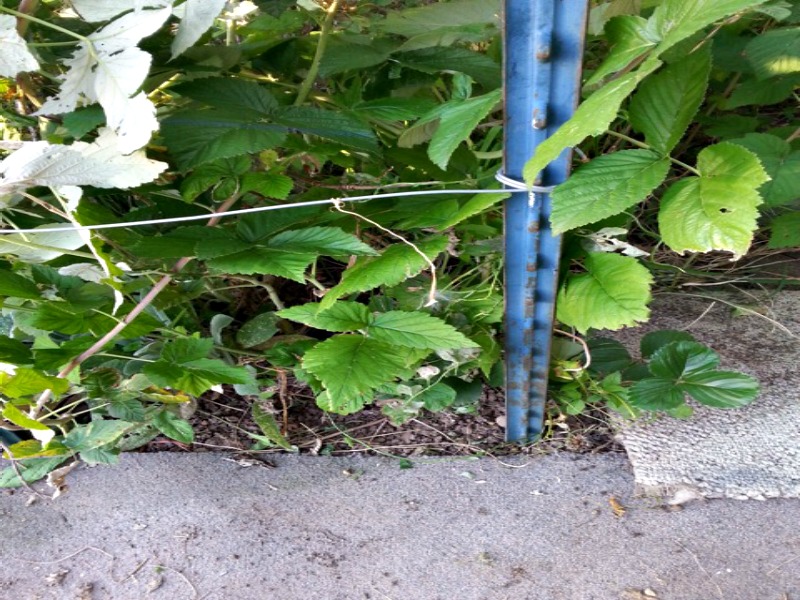
Now that you have outlined your patch with some kind of barrier border, use a mallet to drive a stake into the soil at each of the 4 corners of your bed until it is about a foot into the ground.
Firm the ground around the stakes.  If your bed is longer than 6 feet, you’ll need a support stake half-way between corner stakes on the long side of your beds.
You can use metal fence stakes, rot-resistant fence poles, old closet dowels, or anything you have on hand.
Metal fence stakes worked well for me, and they have little notches to help hold the wire in place.

 Step 3- Wrap wire around the stakes

raspberry trellis 3
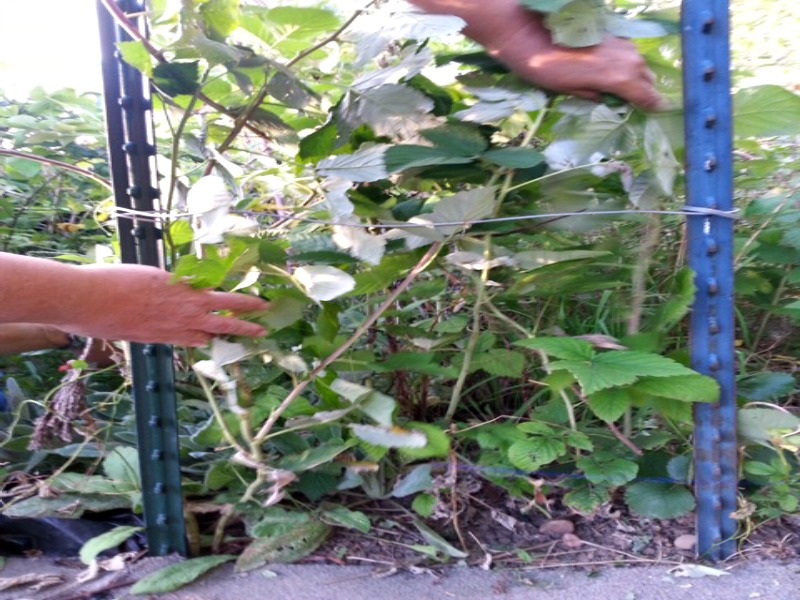
You’ll need 2 wire supports, horizontal to the ground at about 18″ from the ground and also up near the top of the stakes.
Start with the corner stake, with the wire measuring approximately 18″ up from the ground,  and wrap the wire around the stake a few times.
Stretch the wire to the next stake, repeating the process until you have outlined your bed and returned to the original stake.
Repeat with another wire near the top of the stakes.

 Step 4- Tuck those raspberries into bed

trellis tuck
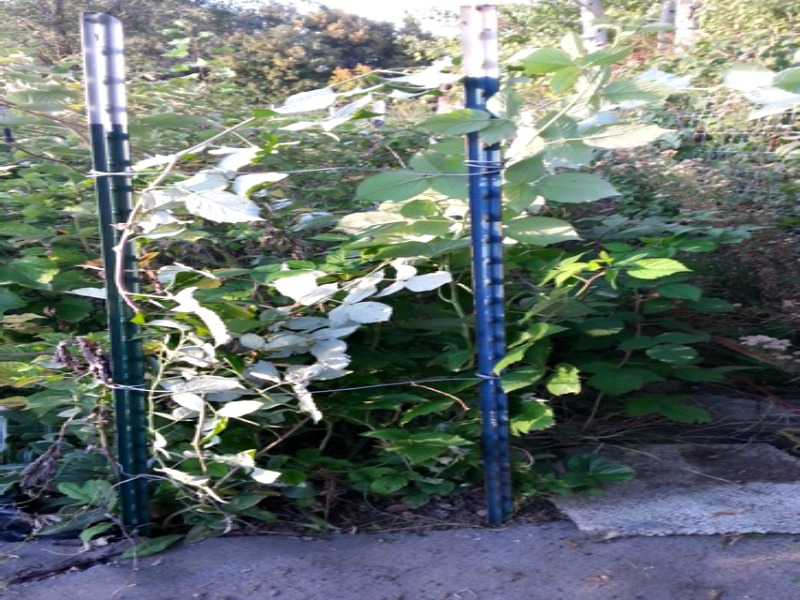
Tuck your raspberry canes all inside your wire outlined bed.

Step 5- Prune back your canes

raspberry trellis 4
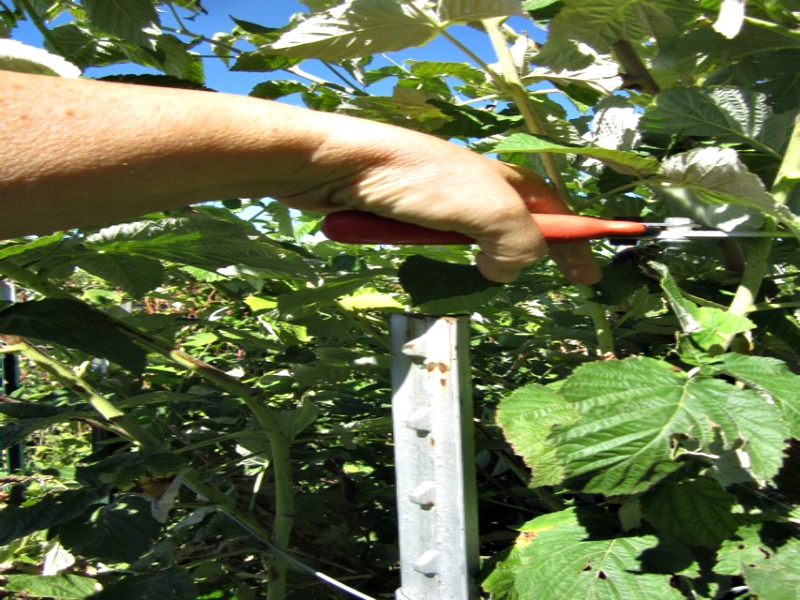
Prune your raspberry canes off at about 6 feet. Using your corner support stakes as an approximate height guide, prune back all the plants.  You’ll need to do this a few times during the growing season to keep them easy to manage.
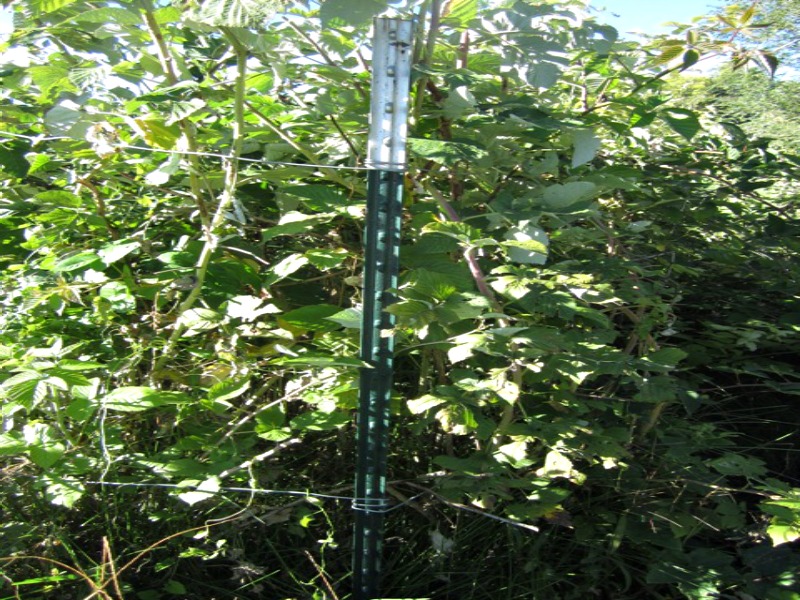
Step 6- Maintenance

trellis tuckTuck all new green growth that has sprung up from the ground in the spring back behind the wire supports as they grow.  The wires serve as a cage to keep the plants confined within the raspberry patch.
They grow very fast, so regularly tucking them behind the wires will keep them tidy.
There is no need to tie up the canes.  Once the canes hit the 6 foot mark, off with their heads.  You’ll have a very manageable, fruitful raspberry patch!

About the Author-Diane H.

I love to garden!  For me, it is miraculous to see plants grow, nourishing and therapeutic to work in the garden, and health-building to eat your own homegrown foods. Fresh raspberries from the garden can’t be beat! I am not a fan of backbreaking work, though, so the easy way in gardening always has appeal to me.  My husband and I are the parents of 7 children whom I home schooled. We live on 7 acres in the Rocky Mountains, with a short growing season.

Take a gander at these posts...

  • Pruning Azalea Bushes
  • Do You Have Shotgun Fungus?
  • Tree Stump Removal Instructions
  • Check Out My Billy Goat Outback Brush Cutter!
  • 37 Ways to Know You’re Addicted to Gardening

Comments

  1. Andrew Saal says

    June 2, 2020 at 2:16 pm

    Have you ever considered a trellis system that actually spreads the plant out to allow better sun penetration and air flow. Check out ibexgrows.com. They have been used on commercial farms for years and are now availabe to home growers.

    Reply
  2. Path Soong says

    November 7, 2019 at 10:40 am

    Your instructions are very helpful. Simple.
    How much space between the rows do you suggest ?
    Thank you

    Reply
  3. Dianne South says

    September 19, 2018 at 7:25 pm

    How many plants need to be in a 12′ by 3′ raspberry bed? Also, how far should they be spaced out? I love to make homemade jam and jelly, so I can never have too much fruit.

    Reply
    • Mike says

      September 20, 2018 at 8:43 am

      Dianne,

      I’d say no more than four, maybe three.

      Reply
    • Ben McLellan says

      April 25, 2021 at 9:53 am

      18 inches apart

      Reply
  4. abbie says

    April 26, 2018 at 4:27 pm

    You should tie each individual primal cane (before it leafs out) to the top trellis wire. It will look like the letter V when you are looking DOWN the length of your hedgerow. This V pattern allows for better airflow and sunlight which reduces disease problems, increases fruit and makes it easier to harvest. Also, don’t be afraid to make a 2- 3′ wide bed with your planting if you want more canes to produce more fruit. The 1′ wide path won’t give you nearly as much fruit but then again you won’t have to weed as much. So, if you want more fruit, be ready to weed more.

    Reply
  5. Suzanne C says

    July 24, 2017 at 11:52 am

    Question if you keep pruning them, when do you stop so they can flower and fruit?

    Reply
    • abbie says

      April 26, 2018 at 4:22 pm

      You only need to cut out the ones that are outside of the perimeter you set. Let the ones inside the trellis system flower and fruit.

      Reply
  6. Pam says

    April 12, 2016 at 9:32 pm

    I presently have my berries by a fence but am not really happy with it although they are happy. I am thinking of putting them in a new spot and using my old clothesline posts as the main support of the trellis. Can you see a problem with that?

    Reply
    • Mike says

      April 13, 2016 at 6:43 pm

      Pam,

      No, I don’t see an issue with that at all.

      Reply
  7. Annette Allyn Aguilar-Gomez says

    June 26, 2015 at 2:25 pm

    Am struggling with red raspberries, because my nana had them. Great information on setting up the bed.

    Reply

Leave a Reply Cancel reply

Your email address will not be published. Required fields are marked *

This site uses Akismet to reduce spam. Learn how your comment data is processed.

$180.00 per Square Foot? Is it really possible?

Posted On March 28, 2023 By Mike

Rooted cuttings of variegated weigela in bunches to harden off.

Over Wintering Rooted Cuttings.

Posted On January 8, 2023 By Mike

Mike's Big Perennial Bed.

Mike’s Big Perennial Garden

Posted On January 8, 2023 By Mike

A Profound Thank You from Mike.

Posted On September 1, 2022 By Mike

Finnegan keeping the sun off his head.

An Old Guy, Two Donkeys, a Puppy and a Hammock. What could possibly go wrong?

Posted On July 17, 2022 By Mike

This upside down donkey is a hoot!

An Upside Down Donkey and Cute Puppy.

Posted On July 14, 2022 By Mike

'Rockin Raspberry' Bee Balm.

‘Rockin Raspberry’ Bee Balm.

Posted On June 26, 2022 By Mike

'Bubblegum Blast' Bee Balm.

‘Bubblegum Blast’ Bee Balm

Posted On June 26, 2022 By Mike

Blue Angel Hosta.

‘Blue Angel’ Hosta.

Posted On June 25, 2022 By Mike

Big Daddy Hosta.

‘Big Daddy’ Hosta

Posted On June 25, 2022 By Mike

Complete Guides

Growing, Rooting and Propagating Dappled Willow in Tree Form from Cuttings.

Growing Seeds, Winter Sowing, in Milk Jugs and Kitty Litter Jugs.

The Correct Way to Pot Rooted Cuttings, Nursery Stock Liners and other Plants.

Training Arborvitae and other Conical Evergreens to Grow with a Single Leader.

How to Propagate, Root Cuttings, of Dwarf Alberta Spruce.

Recent Posts

'Bubblegum Blast' Bee Balm.

‘Bubblegum Blast’ Bee Balm

This beautiful Bee Balm is part of the 'Sugar Buzz' series. I planted these in my perennial bed last summer and this year they are beautiful and blooming like crazy! They grow from 16" to 24" tall, are hardy from zone 4 through zone 8. They love full sun … Read Full Article

Blue Angel Hosta.

‘Blue Angel’ Hosta.

'Blue Angel'hosta is by far one of my favorite blue hostas. A big hosta like this in a perennial bed covers a lot of area and that keeps a ton of weeds at bay! These giant heart shaped leaves are very slug resistant. We have this plant in full sun. With … Read Full Article

Big Daddy Hosta.

‘Big Daddy’ Hosta

'Big Daddy' hosta is one of my favorite big hostas, mostly because it's big, it's blue and it has very interested leaves that are a bit dimpled. Big Daddy hosta gets about 24" tall and 36" wide. It's hardy in zones 3 through 9, the flowers are blends of … Read Full Article

'Humpback Whale' hosta.

‘Humpback Whale’ Hosta.

We sold out of 'Humpback Whale' hosta pretty early this year. Humpback Whale is pretty impressive hosta and this one really hasn't matured yet because they can get three feet high and 7 feet wide. I've also seen photos of them that show them to be a lot … Read Full Article

Ice Plant, delosperma

Ice Plant, delosperma

How pretty is that? And it's a ground hugging perennial that comes back year and year. These plants were new to our nursery last year so Pam and I planted three of them in our landscape at home. Not only did they do really well last year but they wintered … Read Full Article

Copyright © 2023 · Hill Country Digital Media, LLC · Privacy Policy · Earnings Disclaimer · Terms of Service