One of Our Members asked me to show everybody exactly how I go about winterizing my sprinklers and irrigation lines in the nursery. All of my irrigation lines are PVC and PVC is very unforgiving if it freezes with water in the lines. Black plastic well pipe, on the other hand, does give a little and won’t shatter if it freezes.
My irrigation runs several hundred feet from the well to the far back of the nursery and is set up as follows:
The discharge line leaving the pump is 1-1/2″ and that runs almost all the way back.
I currently have four watering zones that feed off of that 1-1/2″ line. Those runs are 1″ PVC.
The sprinkler risers that come off of the 1″ line are either 1/2″ or 3/4″.
For more information about setting up irrigation see this article. My setup will make more sense if you read that article and watch the movie.
Each sprinkler riser has a ball valve installed just below the sprinklers so I can shut off any sprinkler that I don’t need. But more important than that when it comes time to winterize the system I need to close all of the valves in each zone except the last one in the line.
To winterize the system I disconnect the discharge line from the pump so the line is laying on the ground with an open end. Keep in mind, where my pump is located in the lowest point in the nursery. Everything falls toward the pump.
Your setup might be completely opposite so when you drain the system you want to push all the water to an open line at the lowest end. If your property happens to be flat, that’s a good thing, it will be easy to get most of the water out of the system.
In this photo, you can see that I’ve disconnected the discharge line from the pump as well as the pickup line. The pump has a drain plug on the bottom, be sure to remove the plug and drain all the water out of the pump after you’ve disconnected the lines.
As you drain the water out of the pump you need to have at least one of those lines open so air can enter the pump housing as the water leaves. That allows you to get all of the water out of the pump.
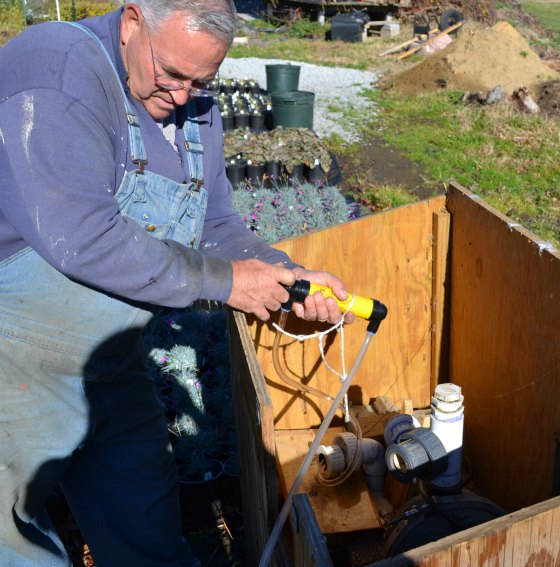
The next thing that I do is what you see me doing in this photo. Using a small pump from the hardware store I pump as much water out of the pickup line that I can, trying to get the water level in the pickup line below the frost line. I added some extra tubing to the little pump so I could pump out about 8′ of the pickup line. This allows me to leave the pickup line in the well all winter and just hook it back up in the spring.
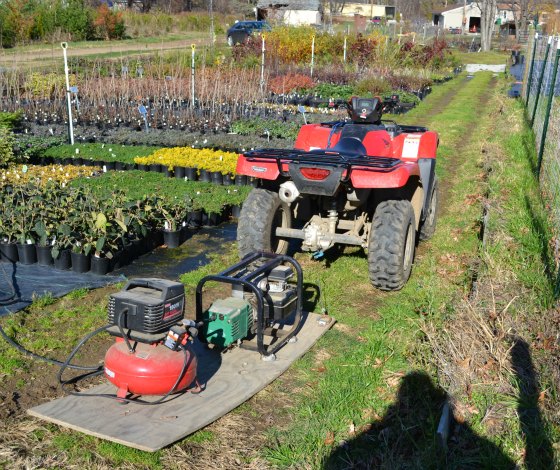
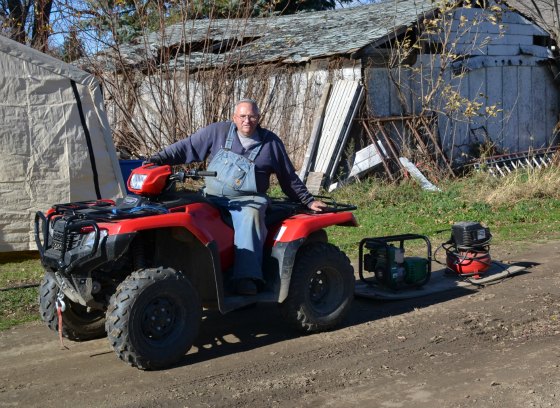
In this photo, you can see that I have an air compressor and a generator on the sled that I pull behind the four-wheeler. You can also see the sprinkler standpipes down through the nursery. And at the very top of the photo, you can see a building. My well pump is located all the way by that building. I am going to push all the water in that direction using compressed air.
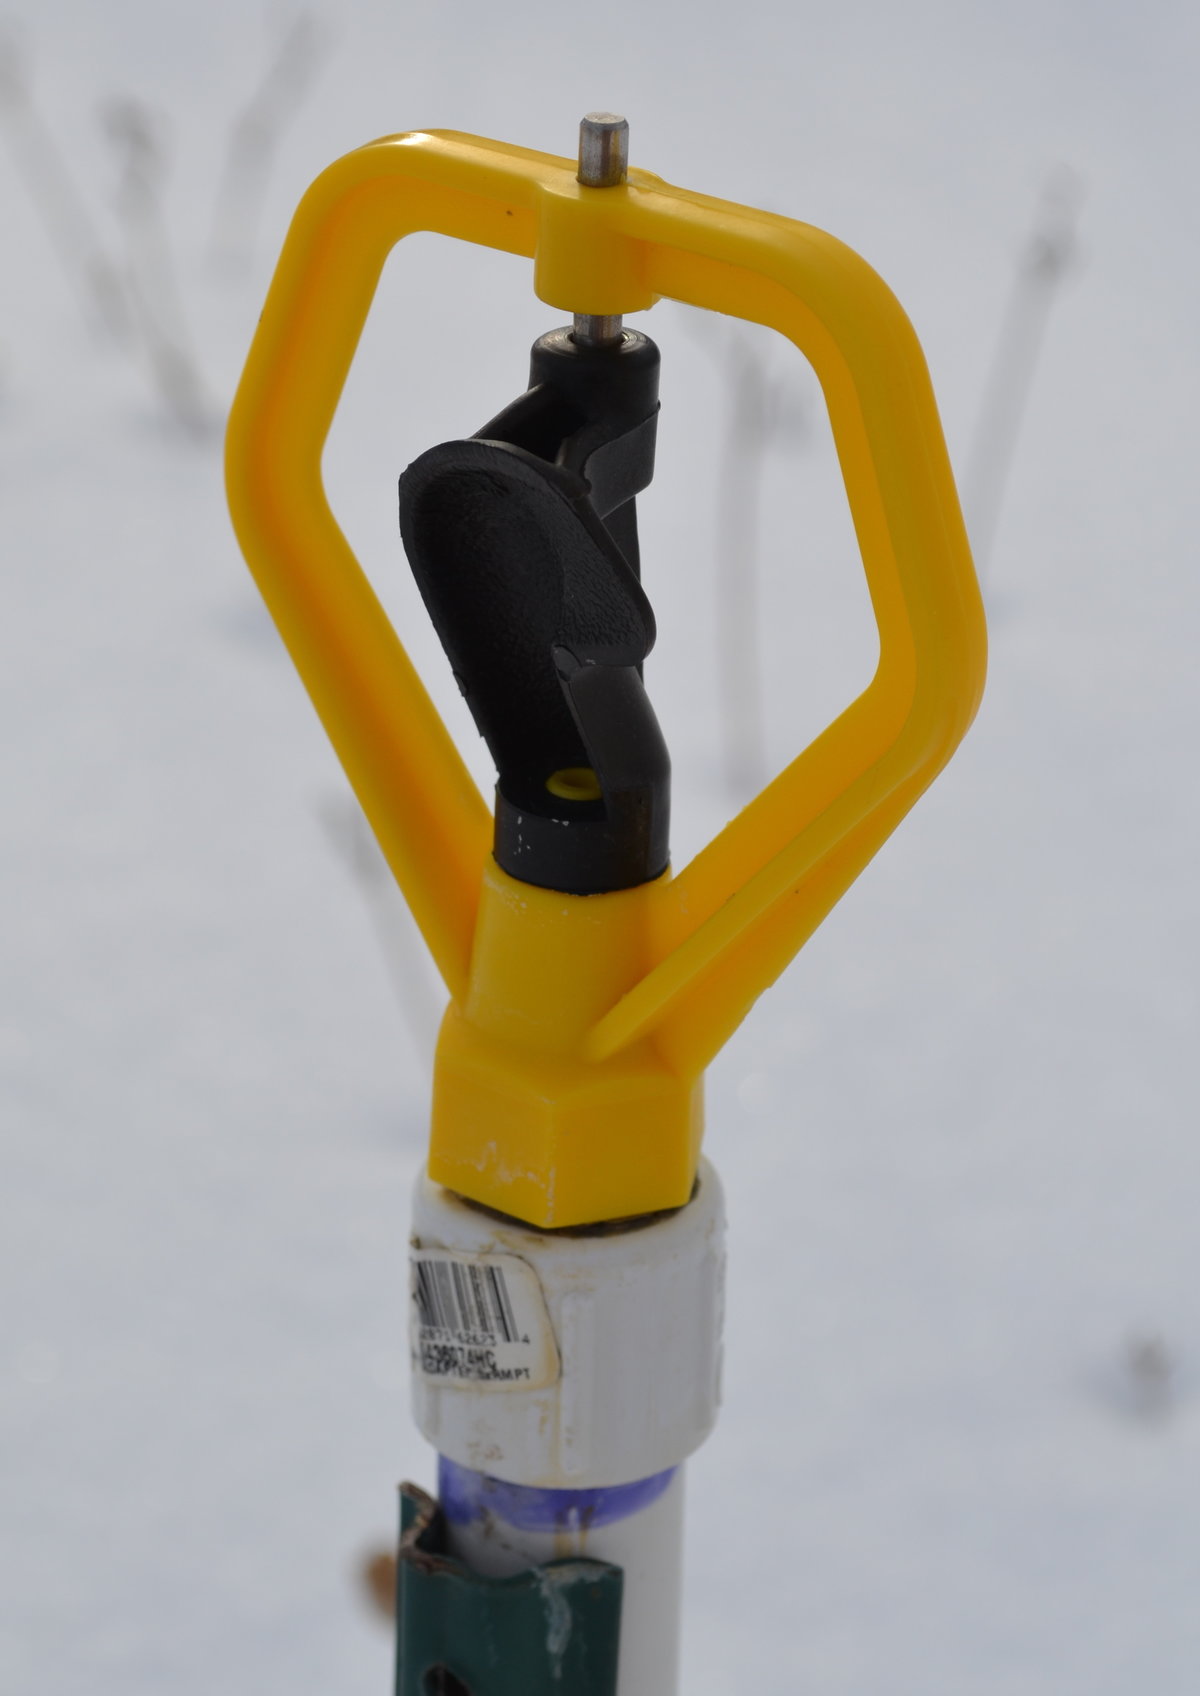
I do one watering zone at a time, closing off all the others. I close all the sprinkler valves on the zone that I am working on except the farthest one. One the farthest one I remove the sprinkler head and install my homemade gadget for blowing out the lines.
It’s pretty simple really. A small valve, a few pipe fittings, and a water pump pressure gauge. I let the pressure build up in the compressor then open the little valve. As I do this I open and close the valve that controls that watering zone.
Once I push some of the water out of that zone I close the valve and let the pressure build up to about 40 or 50 pounds again. The second time I actually get more air pressure to build up because I am also pressurizing the air that I put into the lines.
Then I open the valve again (the valve on the waterline, not my little gadget, that’s already open) and watch the pressure drop. I usually have somebody stationed at the far end letting me that the water has quit draining from the line but that’s probably not necessary.
You can’t get all of the water out of lines, but if there’s only a small amount in the line it won’t do any damage when it freezes.
I currently have one place in the nursery, watering zone one, where I actually cut the PVC line for the winter to make sure it’s completely empty of water because the line has one short, vertical section that concerns me. So I simply cut the PVC just a few feet from that vertical section.
It’s a lot easier to install a coupling in that section in the spring than have 20 or 30 feet of shattered pipe. I’d install a union in that line but it’s in a traffic area and unions are big and clunky, easy to trip over.
This is how I make my own free-standing sprinklers to use around the nursery.
Questions or comments? Post them below and I’ll answer them for you.
Hello
Do you have information about how to keep critters from eating the bark off of the base of all of the trees and shrubs. We have lost many nice trees and shrubs from being ringed under the snow.
thank you,
Sherry D. NH
Sherry,
You can put tree guards (plastic) on the trees. Shrubs you really need to find a way to control mice etc. If you use mouse bait be sure to use a pet safe bait station.
Just want to say, thank you for all the advice you give I really love following along. I learn something new every day.😊
Thank you, I appreciate that.
Just want to say thanks for the cat tips. You are an enjoyable host and I wish you and yours a wonderful Christmas season. My cats like to dig in the most recently planted area or the one with the most delicate seedlings or transplants.