My 4 year old daughter, Gabby, and I decided to tackle this project yesterday afternoon. We worked at a leisurely pace and from start to finish it took about two and half hours. Being plant enthusiasts, we already had some potted plants set aside that we wanted to make a permanent home for. Since I wouldn’t be buying plants, I set myself a $30 budget for this project.
Flower garden designs don’t have to be elaborate or expensive. I was able to do a lot with what I already had on hand.
Designing a flower bed can be quick and easy. Learn how to make a flower bed as I walk you through our project step by step.
Step 1: Choose Your Area
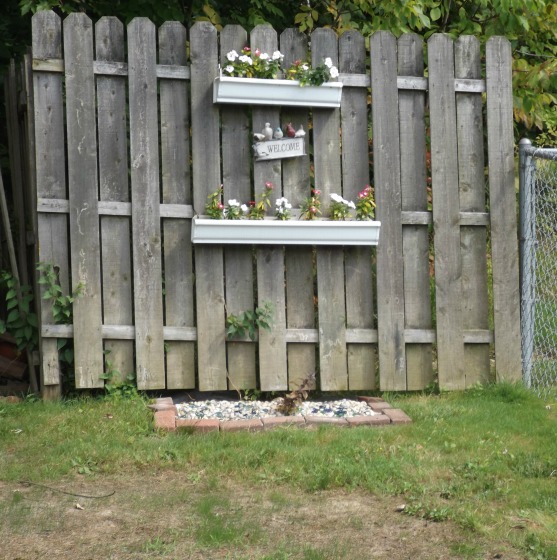
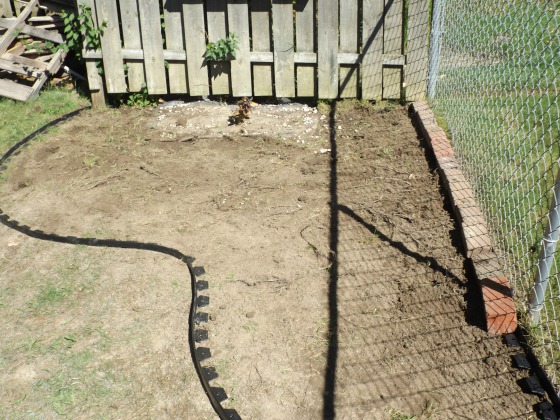
The Before Picture
Chose a location where you’ll have enough sunlight to grow the types of plants you would like to grow. Pick a spot that can be easily reached by the hose for occasional watering.
We chose this corner of my backyard because it needs some serious help. There is a dead ring of grass directly in front of the area, where the pool used to be. Now that the pool has been taken down this corner is visible from my back patio as well as from the road. It could use some sprucing up. It gets full sun throughout most of the day and is the perfect spot for the bushy butterfly garden that I had pictured in my head.
Step 2: Map Out Your Area
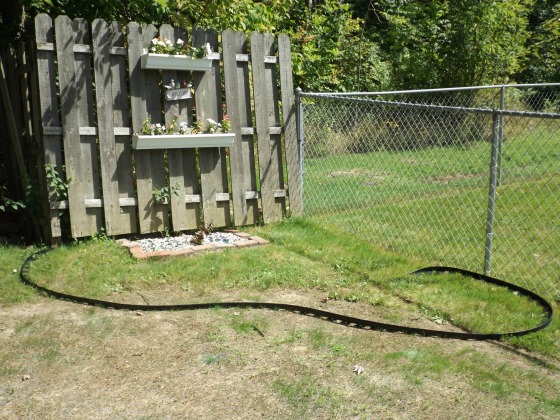
I used garden edging to map out my area.
Map out your area to help visualize what it will look like. I’m a firm believer that big curves look nicer than straight lines in any landscape.
We used garden edging like the kind pictured below. You should be able to find it in a hardware store or garden center. This cost us $9 for a 20 foot section.
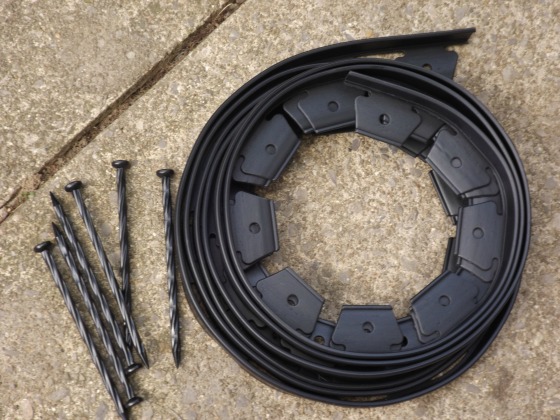
Garden Edging with Nails
The edging was easy to bend and shape. It came with a few spikes to help hold it in place.
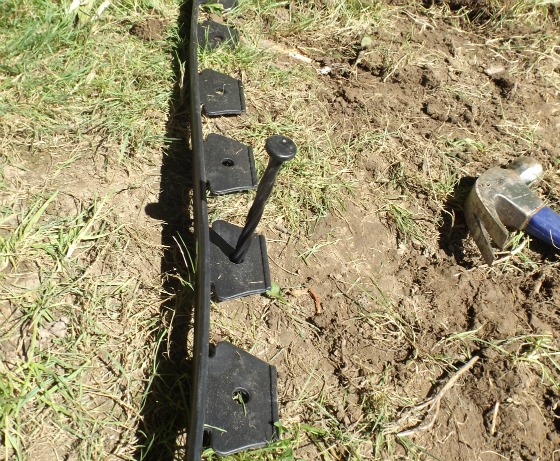
Secure Edging
I like to use edging for two reasons. Number one: It keeps your soil and mulch contained. Number two: It creates a bit of barrier from grass that might try to grow into your flower bed. You can create an edging with bricks, rocks or anything else you choose. If you do not want to use edging, use a shovel to dig a shallow trench to mark your area.
Step 3: Clear Your Area
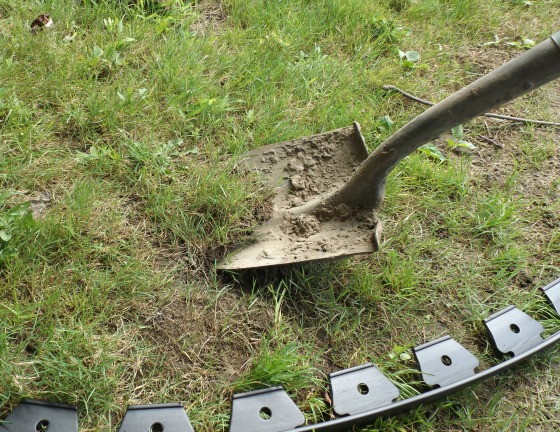
Remove grass and other weeds from your area.
Use a shovel to remove any grass or weeds that is inside your area. Remove any large rocks, bricks or anything else in the area.
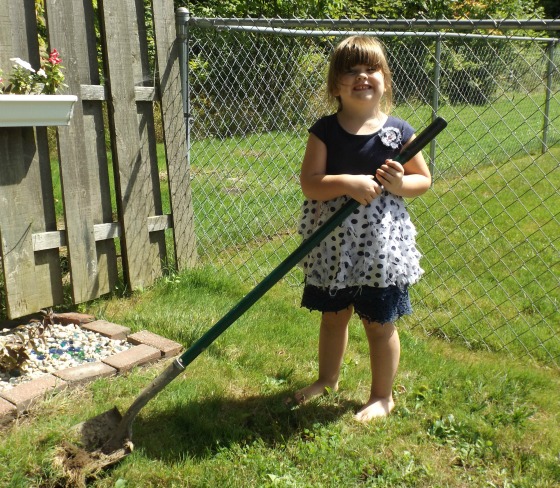
That’s my daughter, Gabby.
Gabby got the raw end of this deal. She’s behind the shovel while I’m behind the camera. She would much rather be be using the hose.
We had to remove a few small bricks and a 10 gallon bucket’s worth of landscape stones to remove. (Who’s idea was it to use stones, anyway?) There’s a tiny java red weigela bush that we decided we’d work around.
If you run your shovel along the ground at a slight angle, you can remove grass is strips.
Tip: Place the strips of grass in bare areas of your lawn. Step on them, give them a little water and hope they take root. (Insert “you might be a redneck if this is your idea of re-sodding your yard” joke here.) It really does work!
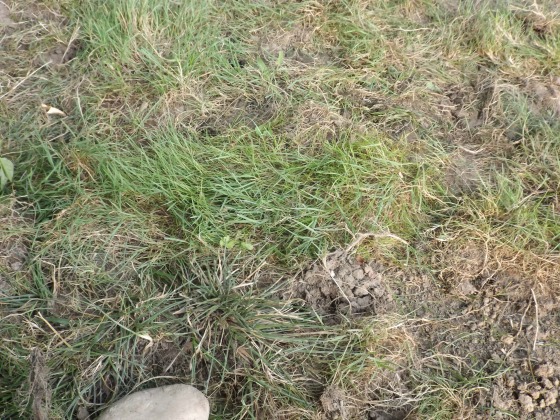
Use freshly dug grass strips to fill in bare patches in your lawn.
Step 4: Stop and Get a Cool Drink. (Clearing the Area is Harder than it Looks!)
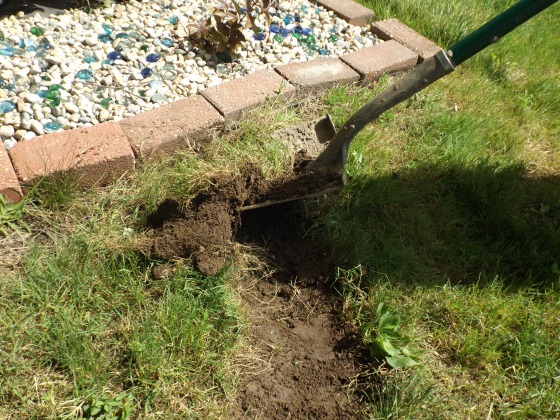
This is my cleared area.
You can see in the picture above that there are still some tiny bits of grass holding on (and a lot of tiny tree roots to contend with!) but the majority has been cleared. We threw some cardboard on top of the areas that we were concerned might have grass growing back.
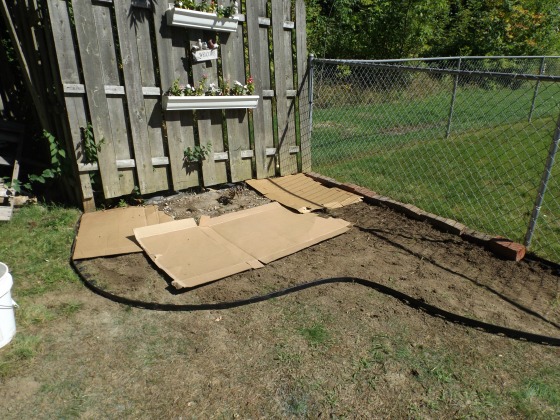
Cardboard Barrier
You can save yourself a lot of backache by laying a cardboard barrier over the entire area to choke out the grass and weeds. Just cover the area in a layer of cardboard then spray it down with a hose to soften it and hold it in place.
If you use cardboard, keep in mind that you will need to add a thicker layer of soil on top to plant in. Trying to cut and plant through the cardboard can be a chore. Since we were on a tight budget and already had $22 invested in soil we opted to remove most of the grass by hand.
Step 5: Add Soil
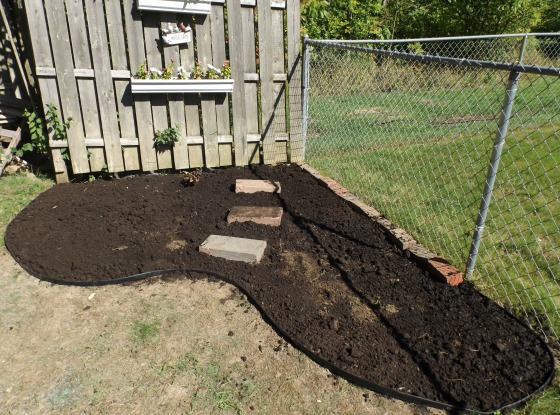
Its starting to look like a garden!
Fill in your area with soil. We mixed 3 bags of mushroom compost with 5 bags of topsoil. Wondering which kind of soil to get? Check out this page.
We decided to place the small bricks along the fence to keep my soil from spilling into my neighbors yard. We added 3 large bricks that we had laying around to act as stepping stones. This will help us reach the back of the bed for weeding.
Step 6: Plant Your Flowers
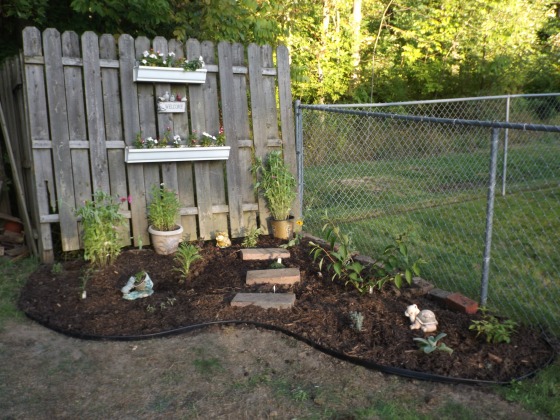
Our brand new $31 flower garden!
Once your soil is down its time for the fun part- Planting your flowers!
We planted Zinnia, Rudbeckia, Russian Sage, Weigela and a PeeGee Hydrangea along the back. Towards the middle we have Orange Peony (that I grew from seed), Dwarf English Lavender and a small Lilac bush. Along the edges we planted Moon Flower, Lamb’s Ear, Carnations, Hen and Chicks, and some Creeping Thyme. I think we will have a lovely garden once everything fills in.
$22 for soil and $9 for edging put me $1 over budget, but that is a small price to pay for the time we spent together and the enjoyment we will get out of our garden in future years.
If you are looking for a place to buy small plants cheap, cheap, cheap….its worth your time to check this out: http://freeplants.com/business-center.html
It is beautiful
Mike, nice garden. Isn’t it better to build a higher garden edging for more soil? I don’t know what the base for yours is, but have some more fresh soil would be much better for the plants and flowers.
Anyway, really liked the idea with the big curved outline.
Ivo,
Higher is not always better. Higher beds are subject to less water and more freeze damage. I don’t like edging beds with anything, it makes mowing more work. I have really high beds at http://mikesbackyardnursery.com/2011/07/mikes-new-nursery-from-the-beginning/ but that’s because the soil was there and I had to work with it. Still no retaining objects.
Thanks so much for the inspiration! Can’t wait to do this with my little.
I love this article! I didn’t know about using the cardboard and would have never considered it before. Yours and Gabby’s garden looks great!
Looks great, Mike and Gabby! Say, Mike, any of those orange peony seeds for sale? We have fushia, pink and white peonies, but no orange! How does one harvest and start those seeds, please?
Love all that you do. I have had a lot of Cocks Combs this year. The are a beautiful deep red,
In laying out the shape of youur bed garden hose works well too. Just be careful when using the shovel. It also helps to warm the hose up if it’s chilly.
The bed looks good. I can only imagine how Gabby would have put the hose to use. Heh,Heh,Heh.
Rod.
‘Tis the season to plant those plants on special at your nearby nursery. The soil is till warm and the roots will get a head start on Spring time. The tops may look ragged, but they will be ok come Spring, like Gabby’s Garden. I have been planting Hummer favorites and bushes the birds will enjoy for years to come. It will be a special treat for the little guys and gals when they return in the Spring. I looked for the sign “GABBY’S GARDEN, but did not see it! .
I planted several flower beds, two on either side of my driveway as I pulled in, but far enough off the county road so salt wouldn’t invade them. Then, two more as I approached the garage so that they would be located where I got out of my car or truck so that I could enjoy looking at them before going into the house. I had a gas edger (waste of money) at the time so I didn’t use edging. I enjoyed seeing the pictures.
Mike,
I wondered if anyone has asked about cutting on tree roots that are coming up above the grass. Should they be cut off on two ends or just scalped at the ground surface to make them level with the ground.
Which will stop tree rooting the best? Does a chemical application to the root cuts seem necessary, this is a large Norway Spruce?
Cheers, Don